---
title: "Kadence HTML Editor Hooked Elements"
source: "https://docs.nexcess.com/software/kadence/theme/html-editor-hooked-elements/"
description: "HTML Elements in Kadence Hooked Elements give you full control when it comes to inserting custom HTML anywhere on your site. Whether you want to add scripts, th…"
vertical: "Software"
area: "Kadence Theme"
date: "2025-07-02"
last_modified: "2026-07-02"
---
# Kadence HTML Editor Hooked Elements
**HTML Elements** in Kadence Hooked Elements give you full control when it comes to inserting custom HTML anywhere on your site. Whether you want to add scripts, third-party embed codes, or completely custom markup, this element type is perfect for developers or advanced users who want to go beyond block-based layouts.
Use HTML Elements to inject content into specific parts of your website, such as before or after your header, inside your post content, or even on custom post types and archive pages. You can conditionally load your HTML using powerful display settings, targeting by page, post type, user role, and more.
Getting Started
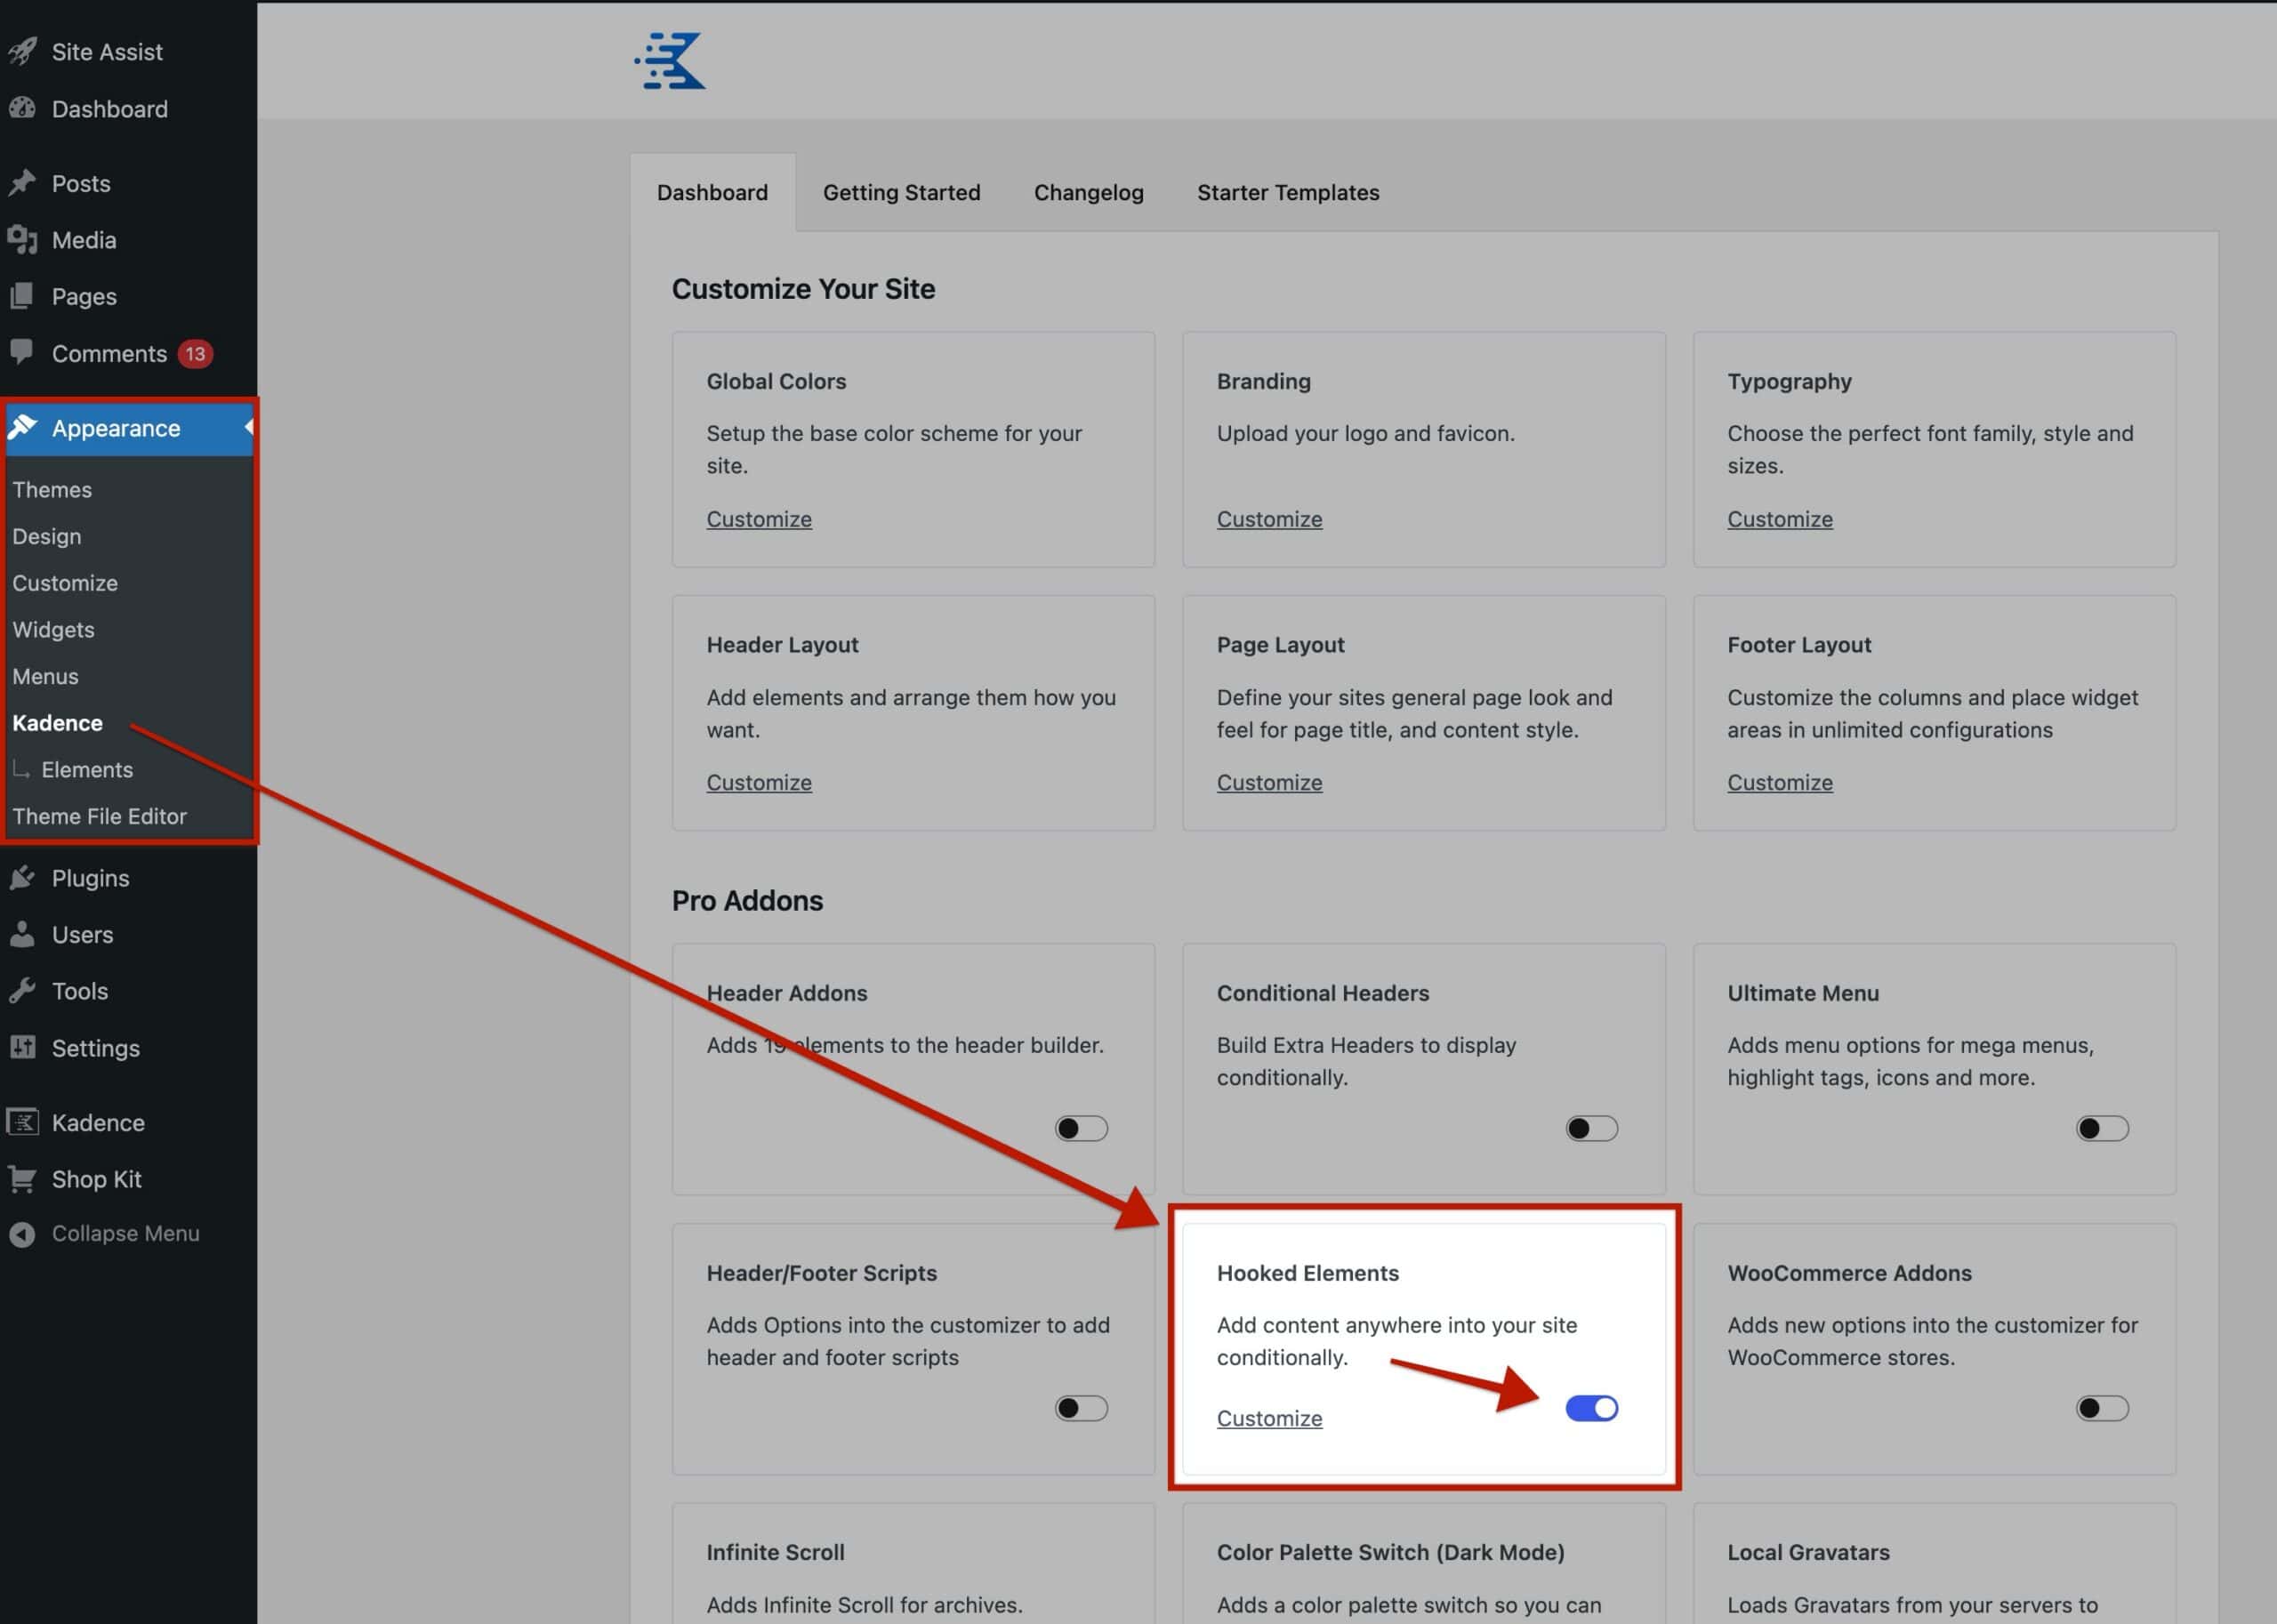
You must have the **Kadence Theme Kit Pro** plugin installed, activated, and licensed on your website. *(Click [here](https://docs.nexcess.com/software/kadence/theme/theme-kit-pro-plugin/) to learn more.)* Once *Theme Kit Pro* is active on the website, enable **Hooked** **Elements** from the **Dashboard -> Appearance -> Kadence** page.
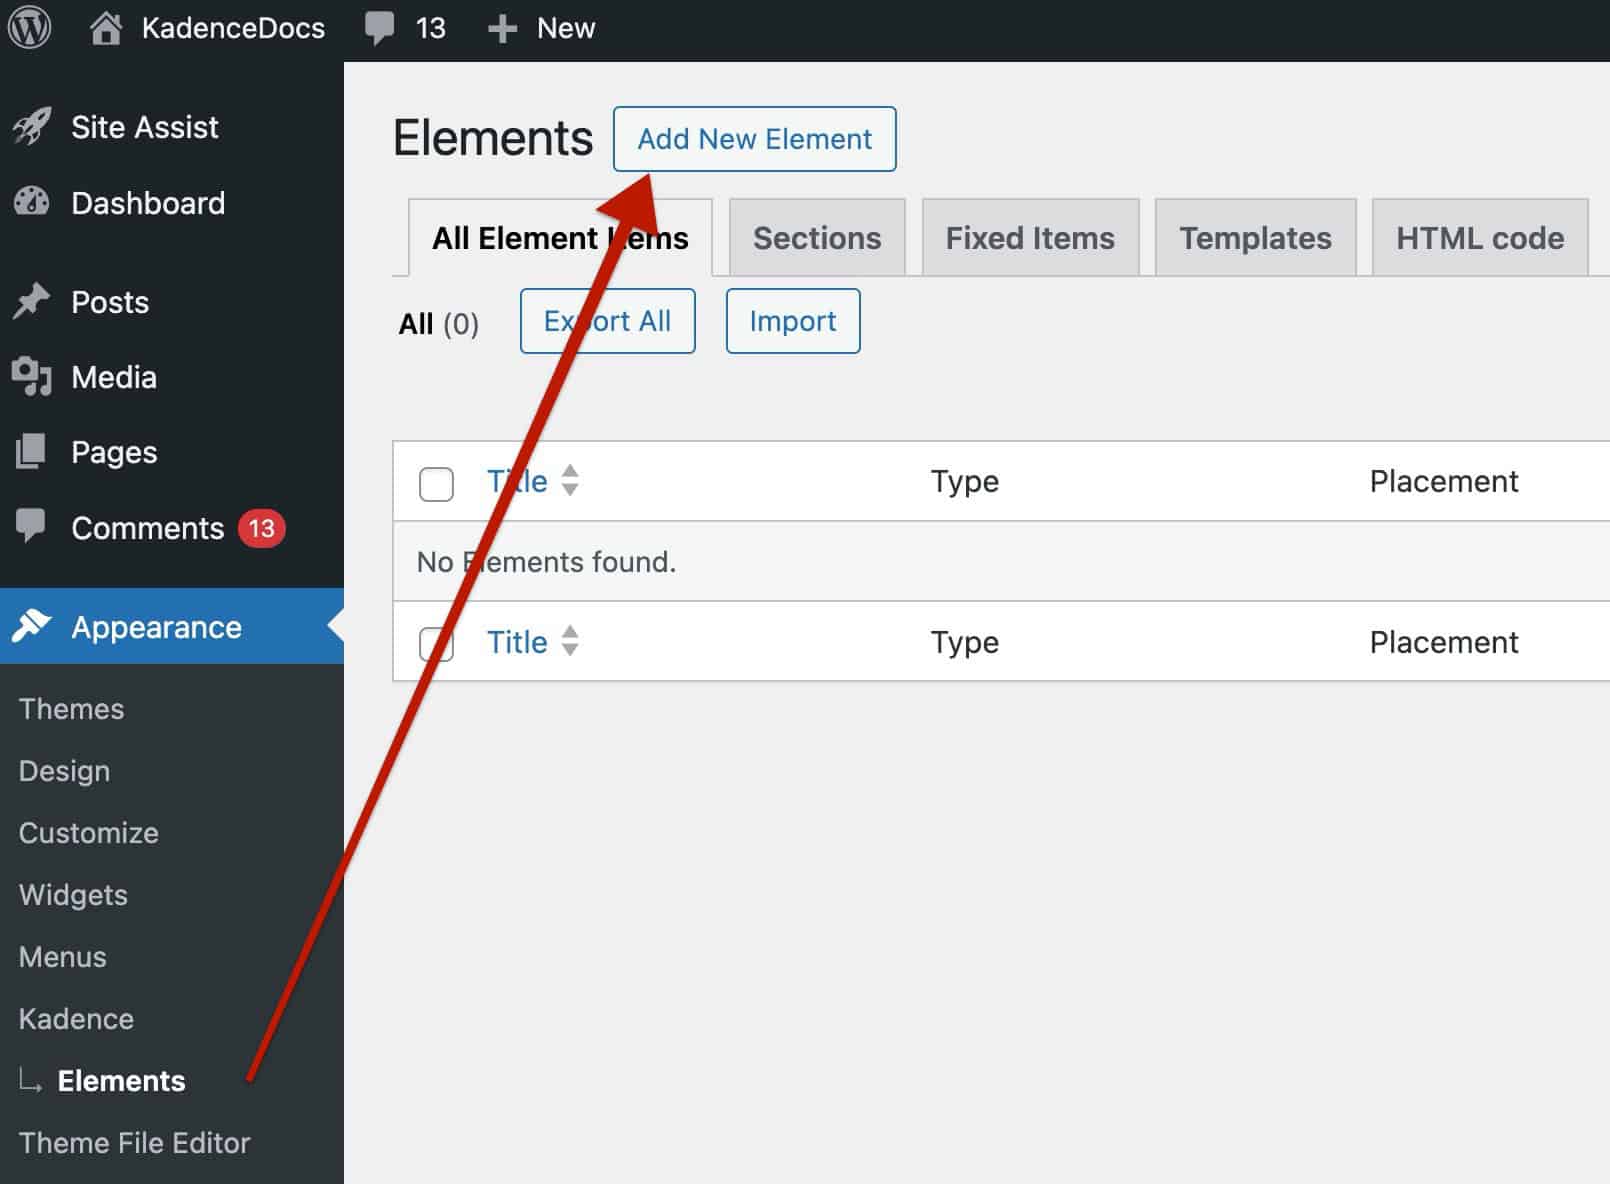
Once **Hooked** **Elements** are enabled, navigate to the **Dashboard -> Appearance -> Kadence -> Elements** page and create a new element by clicking the **Add New Element** button.
Then, select the **Template Element** type to begin creating a new *HTML Element*.
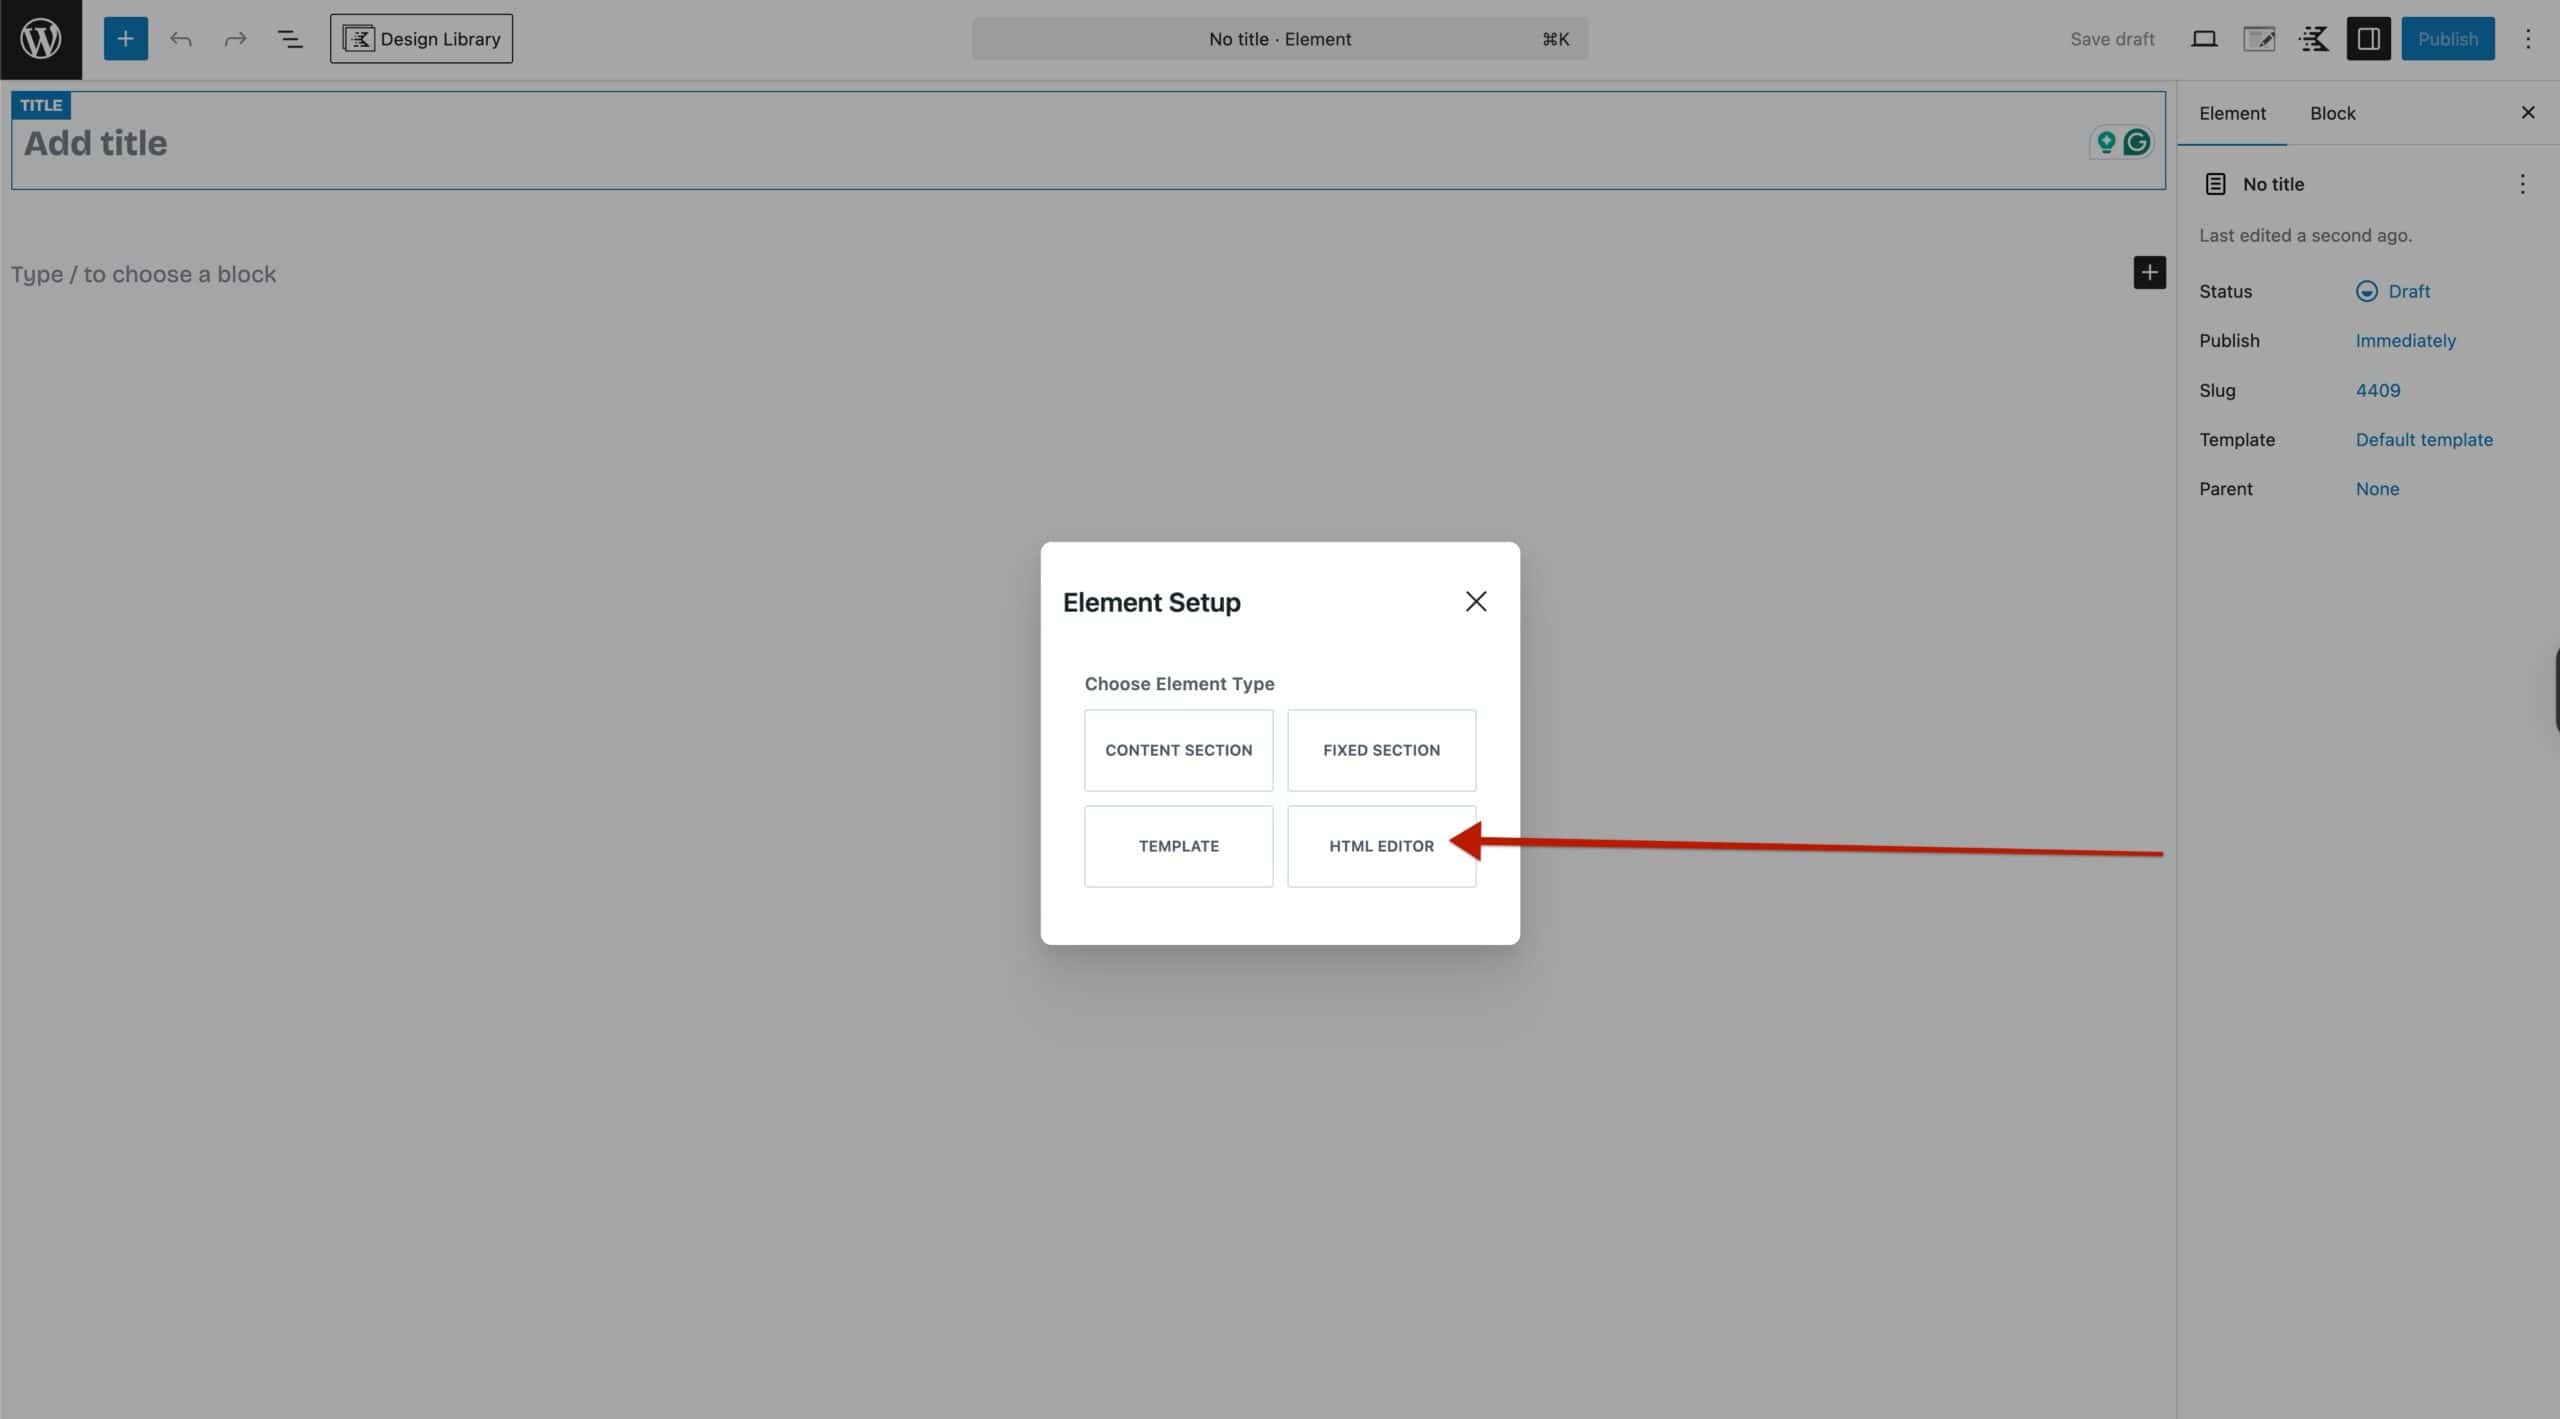
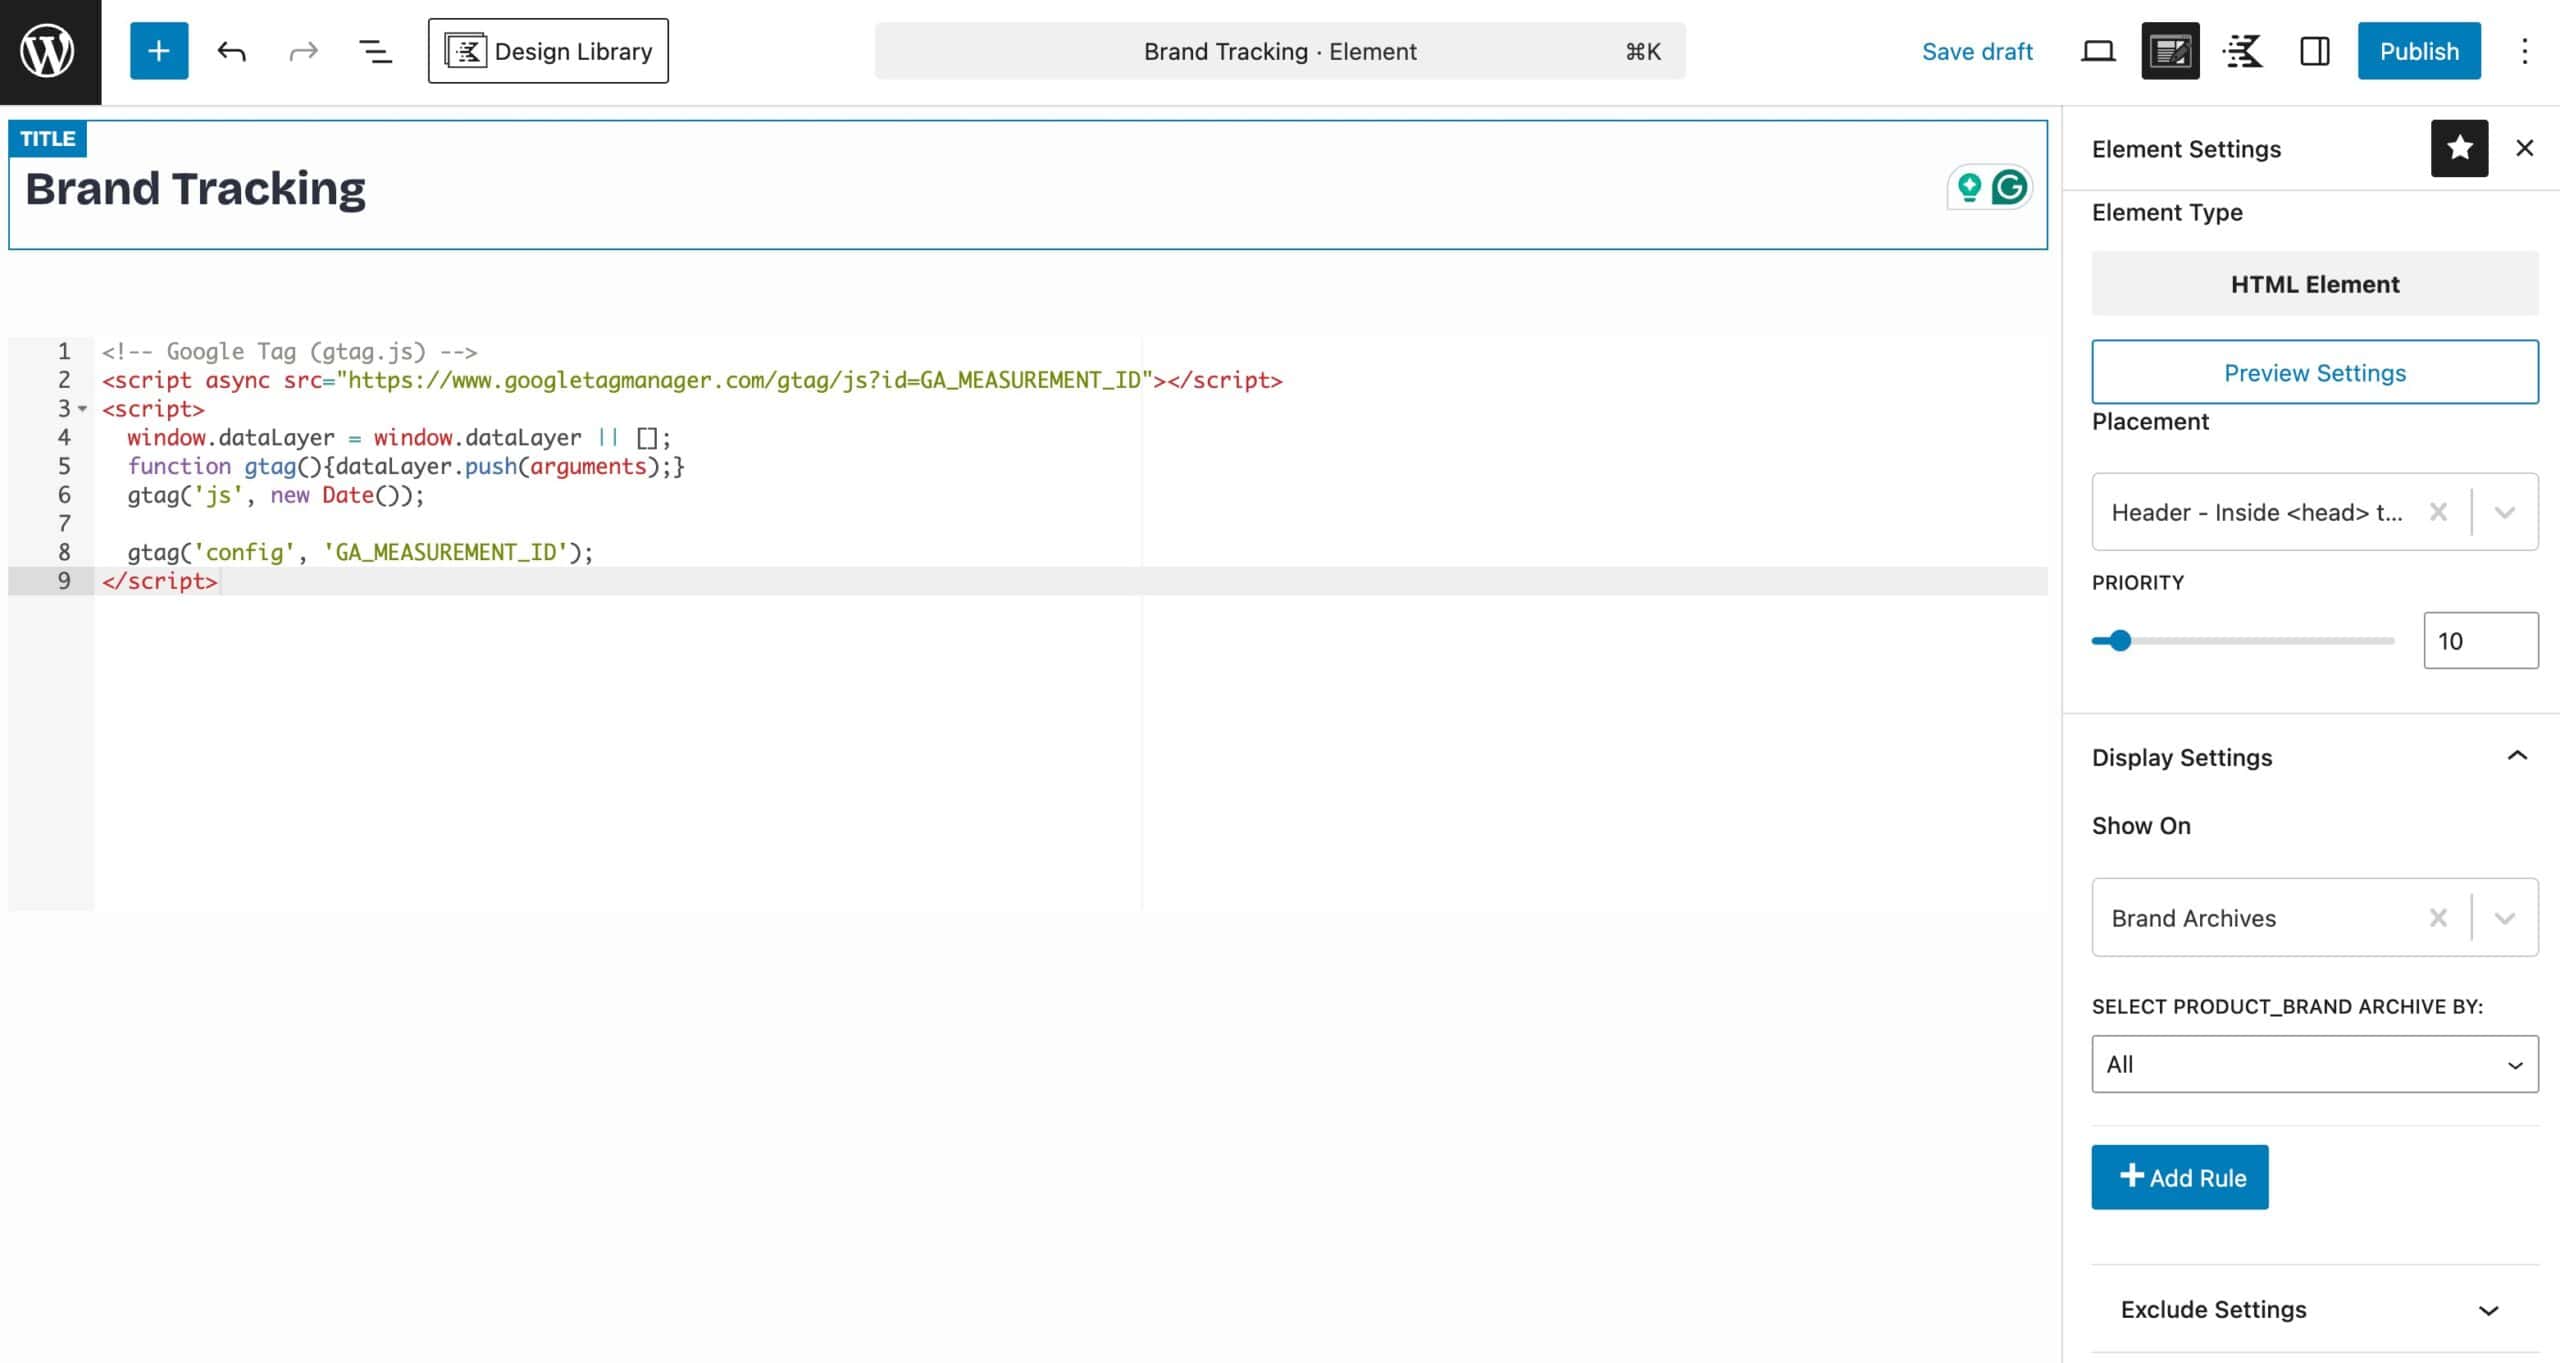
What you add to your element depends on what you’re trying to accomplish. With **HTML Elements**, you’re likely working with custom code or embeds, but no matter the content, the key is using the **[Element Settings](http://element-settings)** to control *where* and *when* your element shows up.
The **[Placement Settings](http://placement-settings)** let you choose exactly where your HTML will be inserted; whether that’s before your content, inside a post, after the footer, or even replacing key parts of your layout like the header or archive titles.
And with Display Settings, you can control who sees your element and on which pages, giving you the flexibility to target by post type, user role, device type, and more.
Element Settings
Use the **Element** **Settings** to control the placement, along with various display settings to determine where and to whom the element applies.
The *Element Settings* can be found at the top right corner of the element editor. Look for an icon with a paper and pencil.
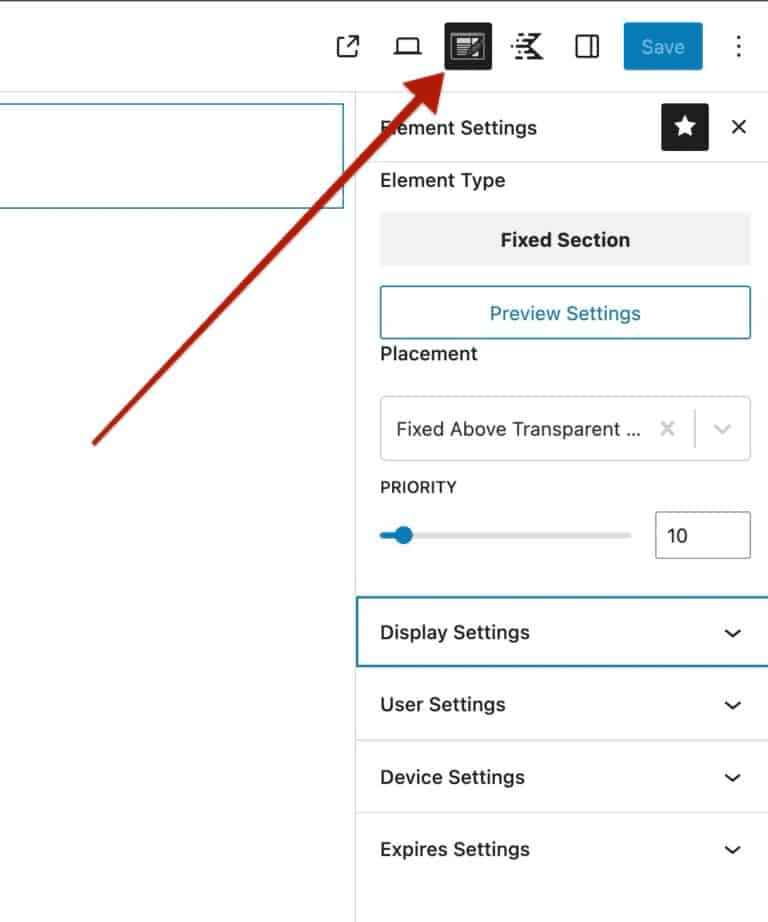
Placement Settings
**Placement Settings** let you choose exactly *where* your HTML Element will appear on your site. Want to replace the header on a specific page? Or maybe insert custom code at the top of all blog posts? Placement options give you that level of control. Each one serves a different purpose, so understanding how they work will help you use HTML Elements more effectively. You’ll find a breakdown of each placement type below, along with tips to get started.
Once you’ve chosen a placement, use the **Display Settings** to decide *when* and *where* your element shows up. You can target specific pages, post types, categories, and more, like showing your element only on single posts, a particular archive, or even just a specific landing page.
- **Scripts:**
- Header – inside tag
- After body tag opens
- Footer – before tag close
- **Header:**
- Before Header
- After Header
- Replace Header
- **Above Content Hero Title**:
- Single: Above Title Content (Use Priority for Before/After Placement)
- Archive: Above Title Content (Use Priority for Before/After Placement)
- Replace Above Content Hero
- **Single Inner Content:**
- Before Inner Content
- Before Inner Title Area
- Before Inner Title
- After Inner Title
- After Inner Title Area
- Before Entry Content
- After Entry Content
- After Inner Content
- **Comments:**
- Before Comments
- Before Comments List
- After Comment List
- After Comments
- **404 Page:**
- Before 404 Page Content
- After 404 Page Content
- Replace 404 Page Content
- **Mobile Menu Off Canvas:**
- Before Mobile Menu Off Canvas
- After Mobile Menu Off Canvas
- **Body:**
- Before Site Wrapper
- After Site Wrapper
- **Content Wrap:**
- Before All Content
- After All Content
- **Content and Sidebar:**
- Before Content
- After Content
- Before Sidebar
- Replace Sidebar
- After Sidebar
- **Inside The Content**:
- Before First Heading Tag
- After First Heading Tag
- After First Paragraph
- After Second Paragraph
- After Third Paragraph
- After Fourth Paragraph
Need to insert past the fourth paragraph? [Click here](https://docs.nexcess.com/software/kadence/theme/add-elements-after-specified-paragraphs/) to learn how!
- **Archive Inner Content:**
- Before Archive Inner Title
- After Archive Inner Title
- **Footer:**
- Before Footer
- After Footer
- Replace Footer
- **Header Account Login Menu:**
- Left of Login Form
- Before Login Form
- After Login Form
- Right of Login Form
- Replace Login Modal
- **Custom Hook:** Use a custom hook instead of a pre-selected option.
Display Settings
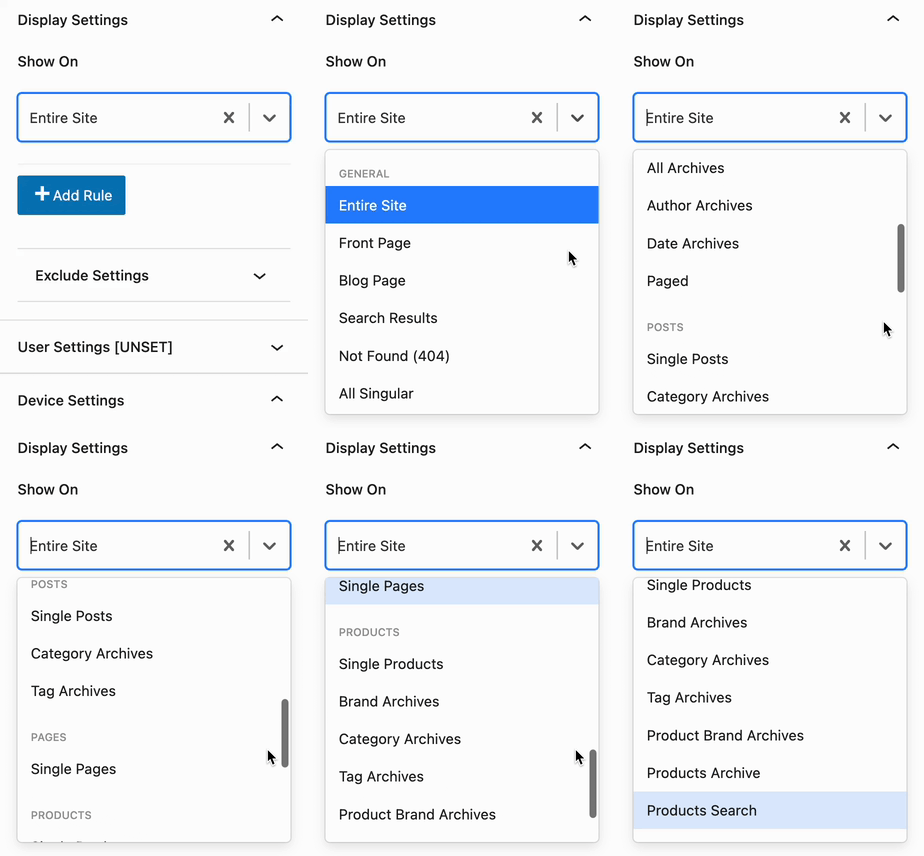
Use the **Display** **Settings** to determine where the element will take effect. Use the Add Rule button to include additional options.
- **Available Options:** Entire Site, Front Page, Blog Page, Search Results, Not Found (404), All Singular, All Archives, Author Archives, Date Archives, Paged, Single Post, Category Archives, Tag Archives, Single Pages, Single Products, Brand Archive, Product Category Archives, Product Tag Archives, Product Brand Archives (Shop Kit), Events Archive, Single Events, Events Category Archives, Products Archives, and Products Search.
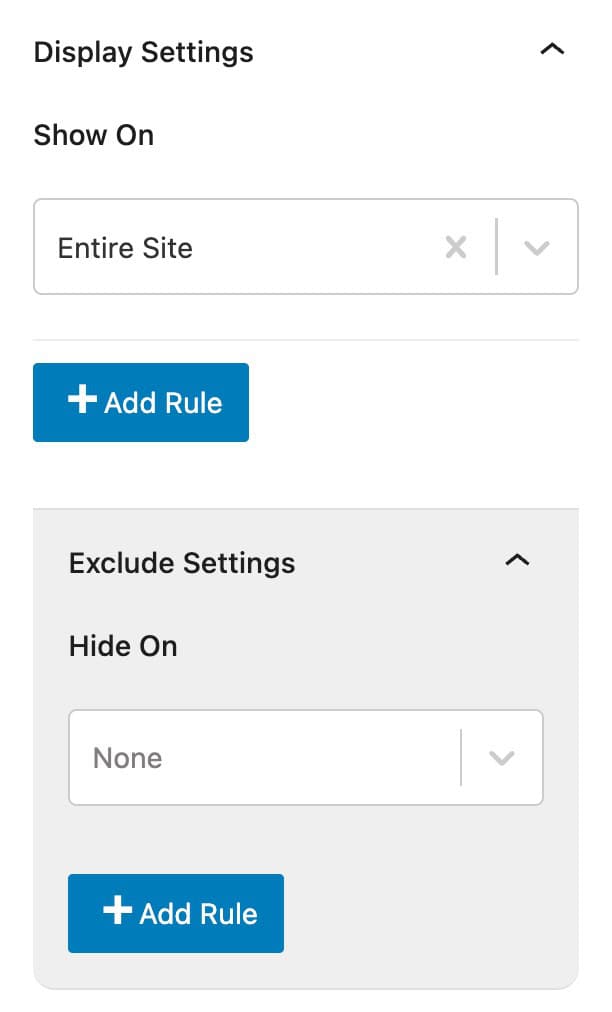
Use the Exclude settings to add exclusions. For example, if you wanted to show an element on all pages of a website, except one, you can use the exclude feature to prevent the element from showing on that specific page.
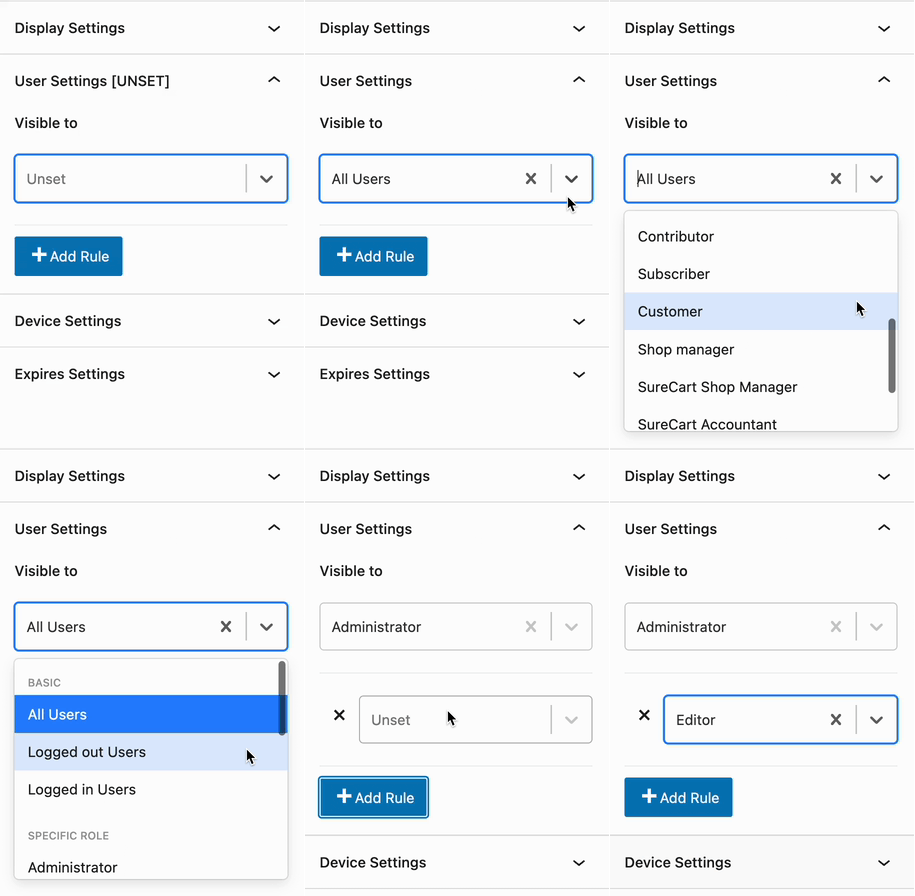
User Settings
Determine which user role(s) will be able to see the element in effect.
- **Options include:** All Users (Default), Logged Out Users, Logged In Users, or based on the available current website roles.
- Use the *Add Rule button* to add more visibility options.
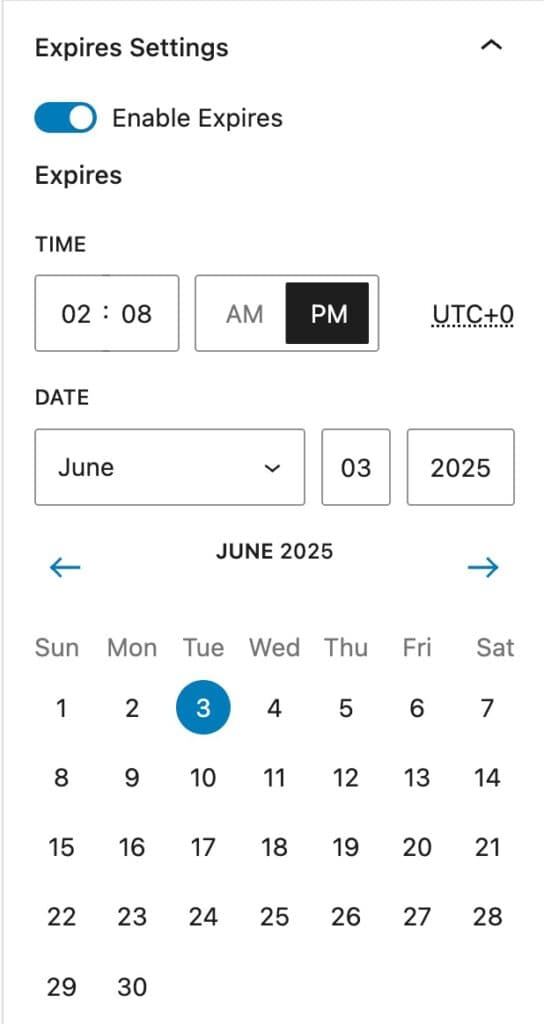
Expires Settings
Enable this option to add an expiration to the element. Once the expiration is met, the element will no longer take effect.