---
title: "Customizing the Single Event Page"
source: "https://docs.nexcess.com/software/the-events-calendar/customize-single-event/"
description: "The single event page is where visitors land when they click into an event from your calendar — it shows the full details, dates, venue, and anything else tied…"
vertical: "Software"
area: "The Events Calendar"
date: "2019-10-18"
last_modified: "2026-07-02"
---
# Customizing the Single Event Page
The single event page is where visitors land when they click into an event from your calendar — it shows the full details, dates, venue, and anything else tied to that event. You may want to adjust how that page looks or what it contains to better fit your site. This article collects customizations for the single event page.
**See also:**
- [Customizing Virtual Events](https://docs.nexcess.com/software/the-events-calendar/customize-virtual-events/)
- [Customizing the Event Cost Display](https://docs.nexcess.com/software/the-events-calendar/customize-event-cost/)
- [Customizing Related Events](https://docs.nexcess.com/software/the-events-calendar/customize-related-events/)
## Changing the “All Events” Back Link
The “All Events” link at the top of single event pages points by default to the main events archive. If you’ve built a custom events page using a page builder or the `[tribe_events]` shortcode, you can redirect this link to any URL you choose.
#### Option 1: Using a Filter (Recommended)
The URL is generated by the [`tribe_get_events_link()`](https://docs.theeventscalendar.com/reference/functions/tribe_get_events_link/) function, which exposes a filter of the same name. Using the filter is the recommended approach because `tribe_get_events_link()` is also used by other plugin features — a template override only changes the back link, while the filter changes all uses of the function.
```
add_filter( 'tribe_get_events_link', function() {
return '/your-custom-url-here';
} );
```
#### Option 2: Template Override
If you prefer a template override, the file to copy depends on which editor you are using.
**Block Editor:** Copy:
```
/wp-content/plugins/the-events-calendar/src/views/single-event/back-link.php
```
to your theme at:
```
[your-theme]/tribe/events/single-event/back-link.php
```
Locate this block:
```
«
```
Replace `tribe_get_events_link()` with your custom URL:
```
«
```
**Classic Editor:** Copy:
```
/wp-content/plugins/the-events-calendar/src/views/single-event.php
```
to:
```
[your-theme]/tribe-events/single-event.php
```
Locate:
```
```
And replace it with:
```
```
#### SEO Note
When redirecting the “All Events” link to a custom page, the default `/events/` archive will still exist and can be indexed by Google. To avoid duplicate content, set up a redirect from the default events URL to your custom page URL. Plugins like [Redirection](https://wordpress.org/plugins/redirection/), Rank Math SEO (free), and Yoast SEO (paid) all provide redirect management.
## Making Phone Numbers Callable
By default, venue and organizer phone numbers display as plain text on single event pages. Wrapping them in a `tel:` link lets visitors tap to call on mobile devices.
This requires a template override of the phone number templates. The files to copy depend on which editor you are using.
**Classic Editor** — copy both files:
```
plugins/the-events-calendar/src/views/modules/meta/organizer.php
plugins/the-events-calendar/src/views/modules/meta/venue.php
```
to your theme at:
```
[your-theme]/tribe-events/modules/meta/organizer.php
[your-theme]/tribe-events/modules/meta/venue.php
```
**Block Editor** — copy both files:
```
/the-events-calendar/src/views/blocks/parts/venue.php
/the-events-calendar/src/views/blocks/parts/organizer.php
```
to your theme at:
```
[your-theme]/tribe/events/blocks/parts/venue.php
[your-theme]/tribe/events/blocks/parts/organizer.php
```
In both copied templates, find the line that outputs the phone number:
```
```
Replace it with a `tel:` link:
```
```
Keep the link wrapped in its existing `dd.tel` tags so the final result looks like this:
```
```
## Open Links in New Tabs
#### **Event Website link**
```
add_filter( 'tribe_get_event_website_link_target', function () {
return '_blank';
}, 10, 1 );
```
#### Event Venue Link
```
add_filter( 'tribe_get_venue_website_link_target', function () {
return '_blank';
}, 10, 1 );
```
#### Event Organizer Link
```
add_filter( 'tribe_get_event_organizer_link_target', function () {
return '_blank';
}, 10, 1 );
```
## Remove the Venue Link
By default, the venue within the single event page is linked to the corresponding venue page. To remove the venue link from the venue block on the single event page, you can add the following snippet to your site:
```
add_action( 'tribe_events_single_meta_before', function () {
remove_filter( 'tribe_get_venue', array( Tribe__Events__Pro__Main::instance()->single_event_meta, 'link_venue' ) );
}, 100 );
```
This code removes the filter that adds the link to the venue name, ensuring that the venue is displayed as plain text without a hyperlink.
## Making the Organizer Email a Mailto Link
By default, the organizer email address displays as plain text. Adding a `mailto:` link lets visitors open a new email to the organizer directly from their email client.
This is a Classic Editor template override only. Copy:
```
plugins/the-events-calendar/src/views/modules/meta/organizer.php
```
to:
```
[your-theme]/tribe-events/modules/meta/organizer.php
```
Open the copied file and scroll to around line 55. Find:
```
```
Replace it with:
```
```
## Customizing the Event Website Link
By default, the event website field displays the raw URL on the single event page when using Classic Editor:
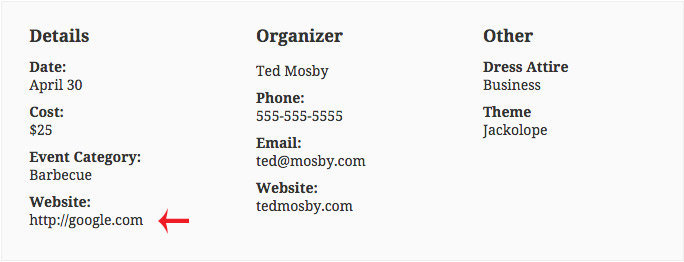💡 If you are using the **Block Editor**, custom link labels are already supported natively — you can set the link text directly in the event editor without any code.
The following customizations apply to **Classic Editor** mode.
### Change the URL to a Linked Word
This snippet replaces the raw URL with a “Visit Website »” label while keeping the link intact:
```
function tribe_get_event_website_link_label_default( $label, $post_id ) {
$url = tribe_get_event_website_url( $post_id );
if ( $label === $url ) {
$label = 'Visit Website »';
}
return $label;
}
add_filter( 'tribe_get_event_website_link_label', 'tribe_get_event_website_link_label_default', 10, 2 );
```
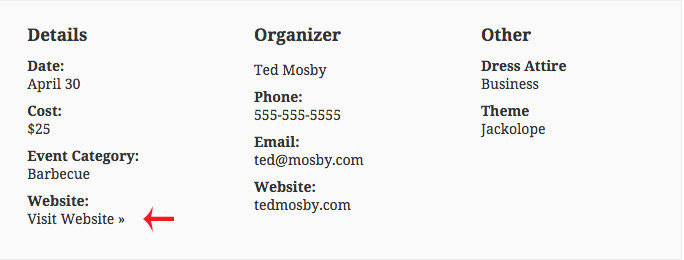To open the link in a new window, also add:
```
add_filter( 'tribe_get_event_website_link_target', static function() {
return '_blank';
} );
```
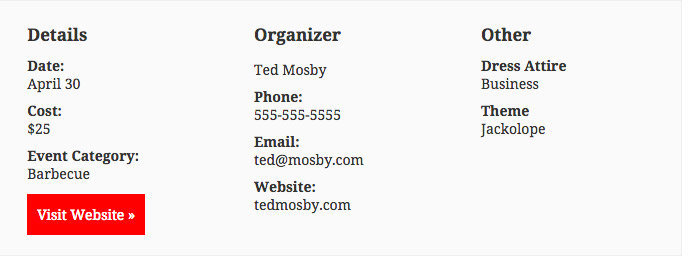
### Change the URL to a Button
This snippet wraps the link in CSS classes so it can be styled as a button:
```
function tribe_change_event_website_link_to_button( $html ) {
$label = 'Visit Website »';
$classes = 'button tribe-events-button tribe-common-c-btn tribe-common-c-btn--small';
if ( false === strpos( $html, 'class="' ) ) {
$new_html = str_replace( 'href="', 'class="' . $classes . '" href="', $html );
} else {
$new_html = str_replace( 'class="', 'class="' . $classes . ' ', $html );
}
if ( ! empty( $label ) ) {
$new_html = preg_replace( '/">.{2,}?()/', '">' . $label . '', $new_html );
}
return $new_html;
}
add_filter( 'tribe_get_event_website_link', 'tribe_change_event_website_link_to_button' );
```
Customize the CSS classes to match your theme’s existing button styles, or define a new class. For example:
```
.my-button-class {
background-color: red;
padding: 10px;
color: #fff;
float: left;
}
```
### Removing the “Website” Heading
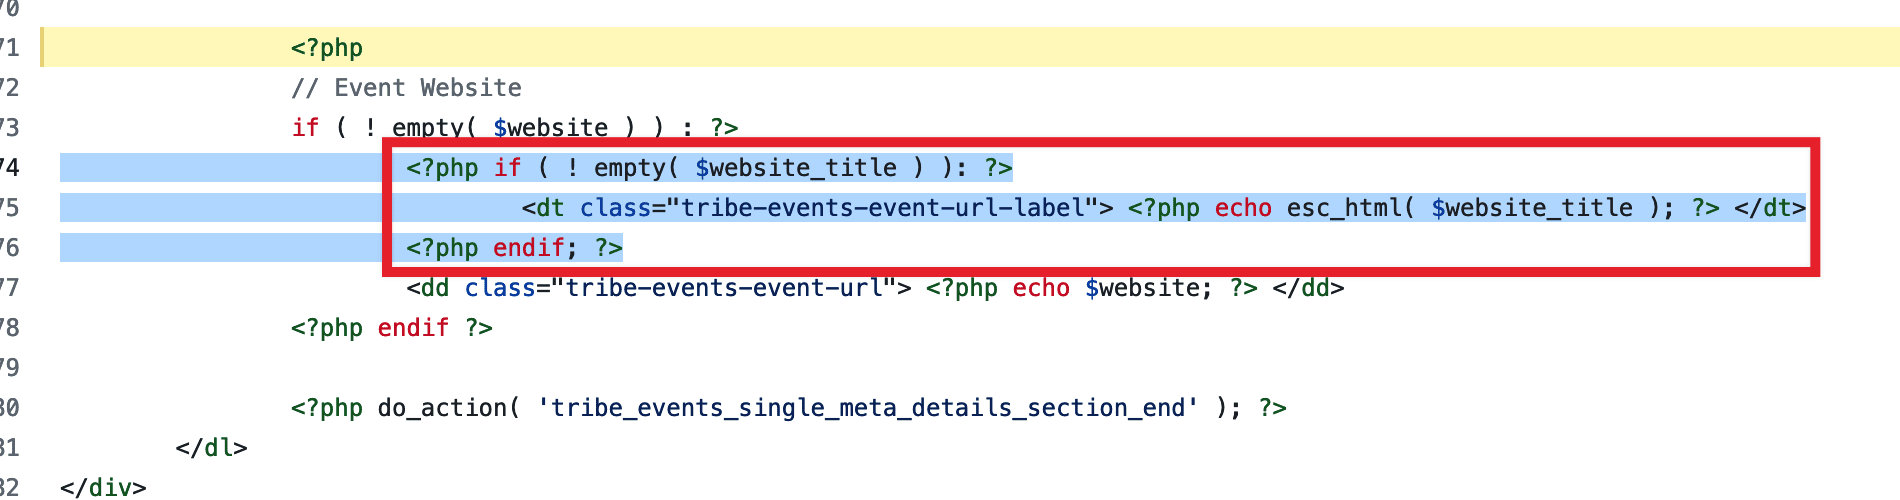
If you’ve changed the URL to a linked word or button, you may want to remove the “Website:” label that appears above it. This requires a template override of `details.php`.
Copy:
```
/plugins/the-events-calendar/src/views/modules/meta/details.php
```
to:
```
[your-theme]/tribe-events/modules/meta/details.php
```
Then remove the following `` block from the copied file:
The result is a clean button or link with no heading above it:
## Customize Single Event Pages with Event Categories
By default, event categories do not contain a specific body class, so making customizations with CSS can be difficult. The good news is that we’ve got a snippet that you can add to your theme’s functions.php file, which will add a body class to a specific event category. From there, you’re free to customize the appearance of the category to your liking.
This can be useful if you’d like to customize only a specific category of events. For example, you may want to hide the date and time only from one event category.
Use this snippet:
```
add_filter( 'body_class', 'tec_add_taxonomy_class' );
// Add taxonomy terms name to body class
function tec_add_taxonomy_class( $classes ){
if( is_singular('tribe_events') ) {
global $post;
$taxonomy_terms = get_the_terms($post->ID, 'tribe_events_cat');
if ( $taxonomy_terms ) {
foreach ( $taxonomy_terms as $taxonomy_term ) {
$classes[] = 'tribe_events_cat-' . $taxonomy_term->slug;
}
}
}
return $classes;
```
Once you add the snippet to your site, check your single event page, and on the body classes, you will see the newly added `tribe_events_cat-CATEGORY-SLUG` classes (one for each event category on that post). You can now use the body classes to manipulate your CSS to your desire. If you need help inspecting the elements, you can use our [Google Chrome Developer Tools](https://docs.nexcess.com/software/the-events-calendar/using-google-chrome-developer-tools/) tutorial.
## Customizing Meta Field Labels
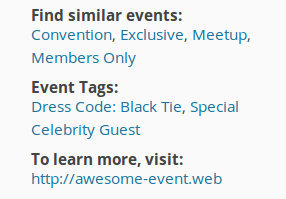
The single event meta area — the section below the event description listing details like website, categories, tags, venue, and organizer — uses a set of default labels that can be changed via a template override of `details.php`.
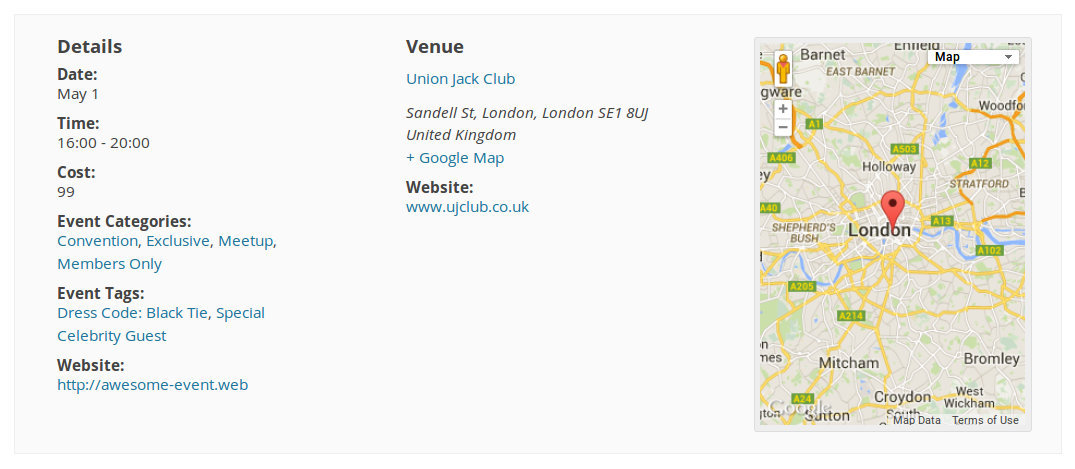If you haven’t already created a `details.php` override from the Website Heading section above, copy the file now:
```
/the-events-calendar/src/views/modules/meta/details.php
```
to:
```
[your-theme]/tribe-events/modules/meta/details.php
```
All three label changes below are made in this same file.
#### Changing the Website Label
Find this line:
```
$website_title = tribe_events_get_event_website_title();
```
Replace it with your preferred label:
```
$website_title = "To learn more, visit:";
```
#### Changing the Event Categories Label
Find the `tribe_get_event_categories()` call and locate this line within it:
```
'label' => null, // An appropriate plural/singular label will be provided
```
Replace `null` with your own label string:
```
'label' => 'Find similar events:',
```
Keep the trailing comma in place.
#### Changing the Event Tags Label
Find the `tribe_meta_event_archive_tags()` call, which contains:
```
/* Translators: %s: Event (singular) */
sprintf(
esc_html__( '%s Tags:', 'the-events-calendar' ),
tribe_get_event_label_singular()
),
```
Replace that entire argument with your own label string:
```
'Find events with specific details:',
```
Keep the trailing comma. The full function call should now read:
```
```
## Display the Event Author
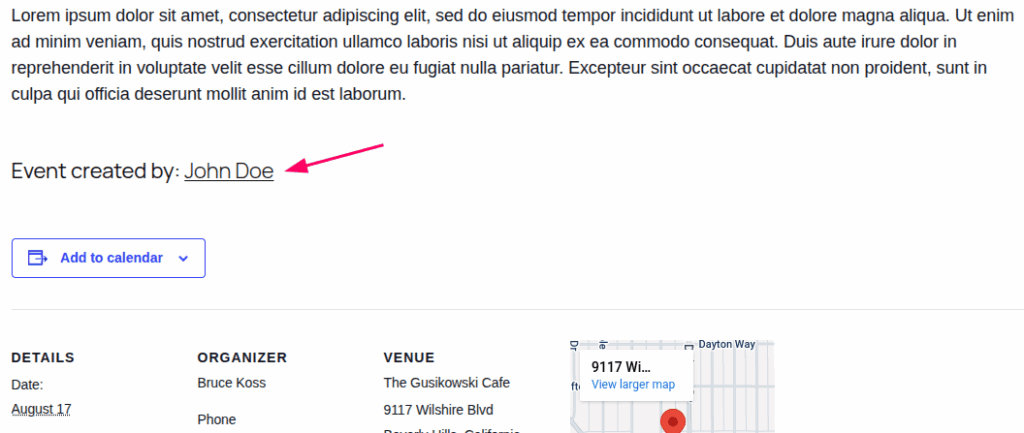
You can show the event author at the bottom of the event description by adding a code snippet to your theme.
```
add_action( 'tribe_events_single_event_after_the_content', 'show_event_author_name' );
function show_event_author_name() {
$author_id = get_the_author_meta( 'ID' );
$author_name = get_the_author();
$author_url = get_author_posts_url( $author_id );
echo 'Event created by: ' . esc_html( $author_name ) . '
';
}
```
This will display a line like this below:
## Hiding Additional Content on Single Event Pages
The Events Calendar allows you to inject content above and below the calendar. This is handy if you want to display an image above it, or perhaps some additional information below. You’ll find these options under **Events > Settings > Display > Additional Content**. By default, **Additional Content** will appear on all event-related pages, including the main events page, event archives, and single event pages.
However, in some cases, you may want this content to appear **only on archive or listing pages**, and **not on individual (single) event pages**.
To exclude the content from single event pages, you can use the following conditional snippet:
```
//HTML before event content
add_filter(
'tribe_events_before_html',
function( $before ) {
if ( is_singular( Tribe__Events__Main::POSTTYPE ) ) {
return '';
}
return $before;
}
);
//HTML after event content
add_filter(
'tribe_events_after_html',
function( $after ) {
if ( is_singular( Tribe__Events__Main::POSTTYPE ) ) {
return '';
}
return $after;
}
);
```
## Adding a Sidebar to Event Pages
By default, the sidebar from your theme may not appear on event pages. Adding one requires a template override of the Default Events Template.
#### Step 1: Switch to the Default Events Template
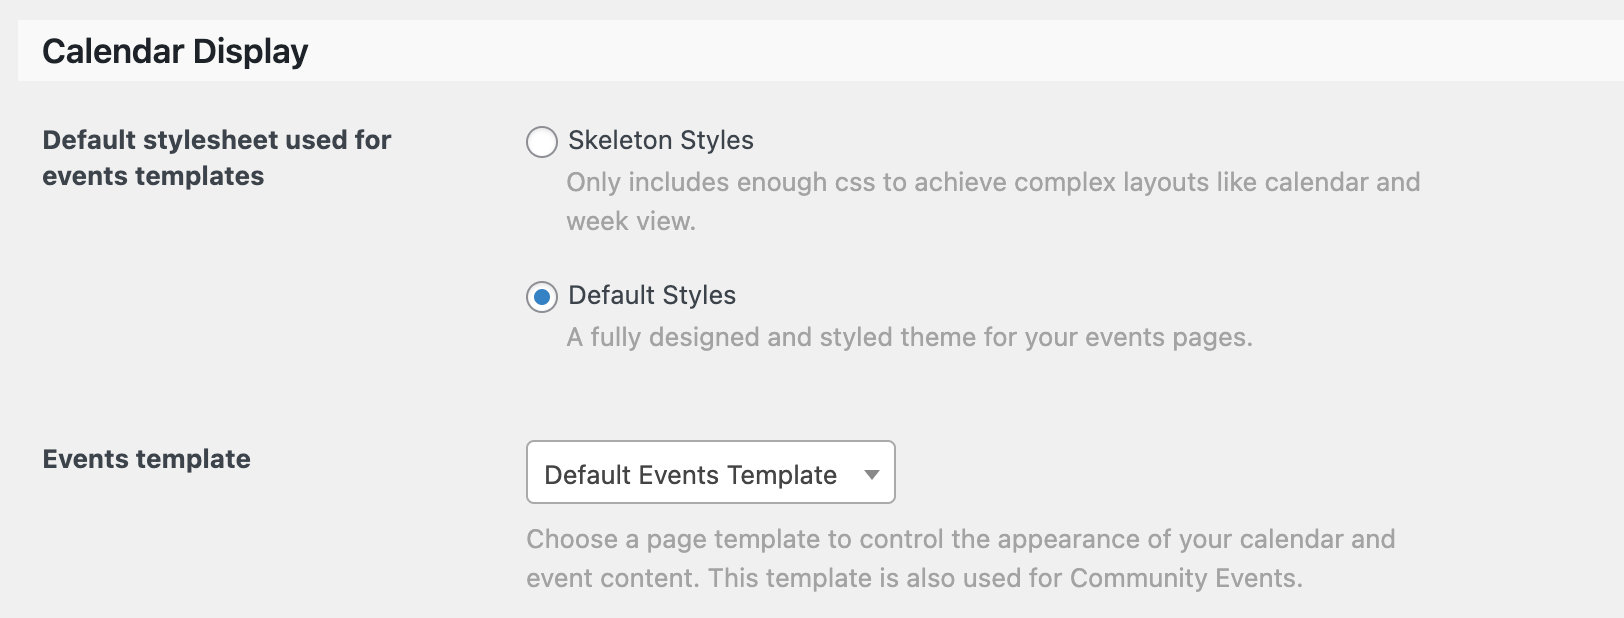
Go to **Events → Settings → Display** and set the **Events template** dropdown to **Default Events Template**.
#### Step 2: Create the Template Override
Copy the default template file:
```
/wp-content/plugins/the-events-calendar/src/views/v2/default-template.php
```
to your child theme. For a full walkthrough of the override process, see [Template Files for The Events Calendar v2](https://docs.nexcess.com/software/the-events-calendar/calendar-templates/).
#### Step 3: Add the Sidebar to the Template
With the copied template open, add your sidebar in the appropriate location within the layout. You have two options:
- **Use an existing sidebar** registered by your theme, using WordPress’s [`get_sidebar()`](https://developer.wordpress.org/reference/functions/get_sidebar/) function.
- **Register a new sidebar** specifically for event pages using [`register_sidebar()`](https://developer.wordpress.org/reference/functions/register_sidebar/) in your child theme’s `functions.php`, then call it with `get_sidebar()` in the template.
Once the sidebar is in place, it will appear in **Appearance → Widgets** where you can add and arrange widgets as usual.