

Event Tickets Plus
Introducing Custom Attendee Registration
Custom Attendee Registration fields in Event Tickets Plus let you collect the details you need from everyone attending your event, not just the person purchasing the ticket. They turn checkout into a simple, customizable registration form.
Why use Custom Attendee Registration fields?
Purchaser details collected by default at checkout identify who made the payment, but not who will attend, what they need, or how to contact them. Custom Attendee Registration fields capture this additional attendee information.
- Find out exactly who’s coming to your event. When someone buys several tickets, you usually only get the buyer’s details. With Individual Attendee Collection (IAC) enabled, Event Tickets Plus asks for each attendee’s Name and Email, so every ticket is connected to a real person.
- Save time and effort by collecting details like dietary needs, shirt sizes, or session choices during checkout. This way, you don’t have to email attendees later or keep track of answers in a spreadsheet.
- Get the information you need in the right format. Choose from different field types to make answers clear and consistent. For example, use a dropdown for set options, a date field for real dates, or a checkbox for yes or no questions.
- Open up new options for your events. You can manage waiver acknowledgments, age-based events, workshops with breakout sessions, or conferences where you need to know exactly who is attending, all from one ticket purchase.
Available field types
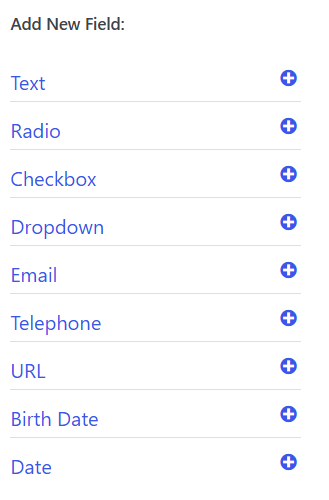
In addition to the default Name and Email fields, you can add custom fields to collect more details. Here are the field types you can use:
| Field Type | Best For |
|---|---|
| Text | Short free-form answers, such as a company name or a special request |
| Radio | Choosing one option from a short list, such as a session track |
| Checkbox | Yes/no confirmations or selecting multiple options, such as a waiver or newsletter opt-in |
| Dropdown | Choosing one option from a longer list, such as a t-shirt size |
| A valid email address, such as a secondary contact | |
| Telephone | A contact number for on-the-day communication |
| URL | A website or social profile link |
| Birth Date | Age verification or age-restricted events |
| Date | Any other date, such as an arrival date |
Common Use Cases
Use Case 1: Workshops and classes with dietary needs
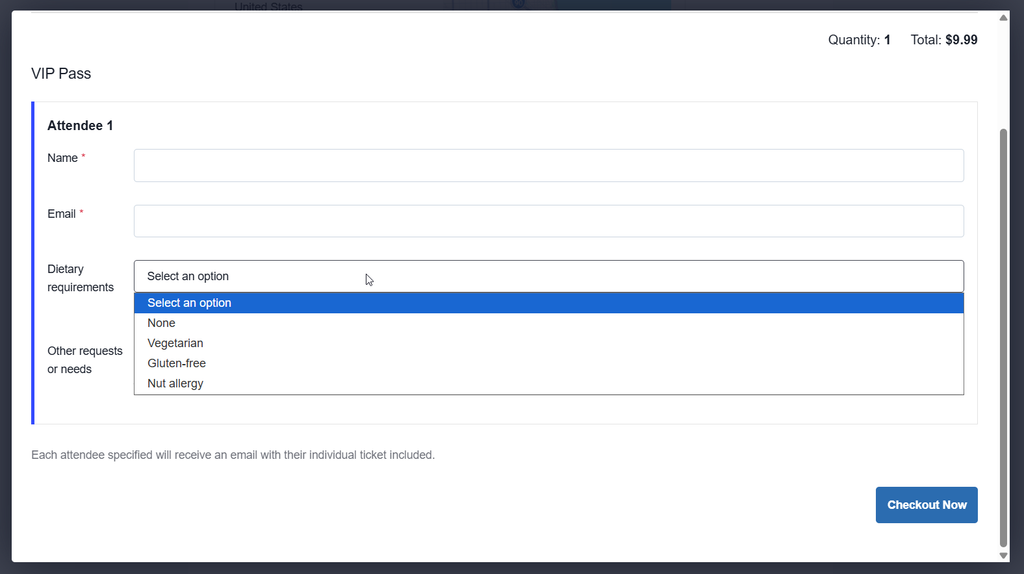
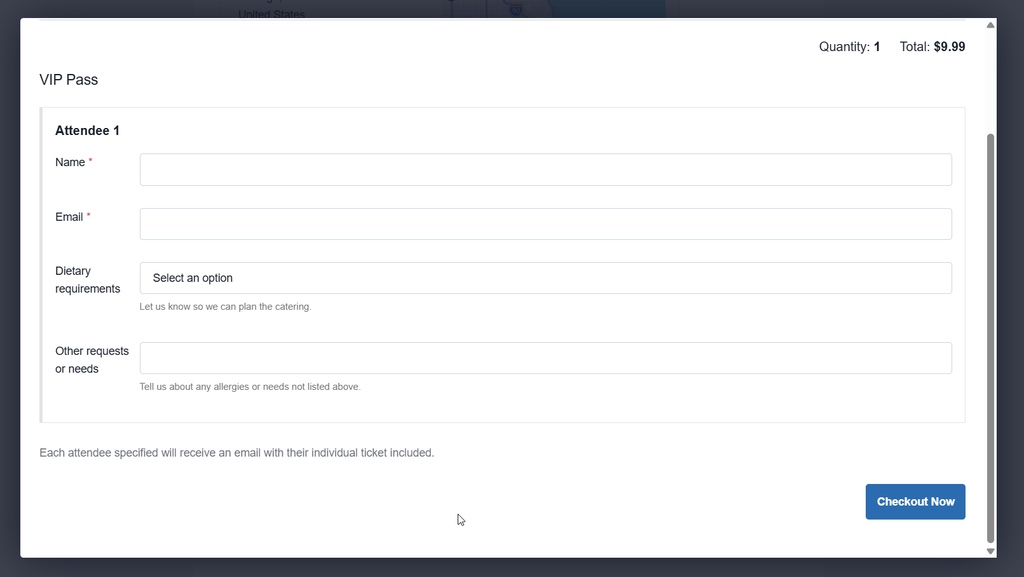
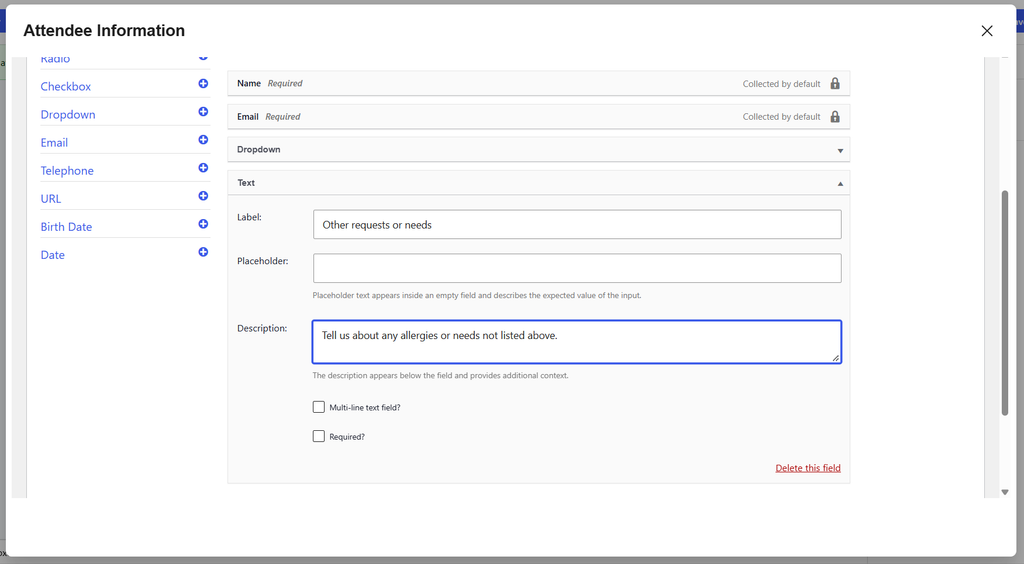
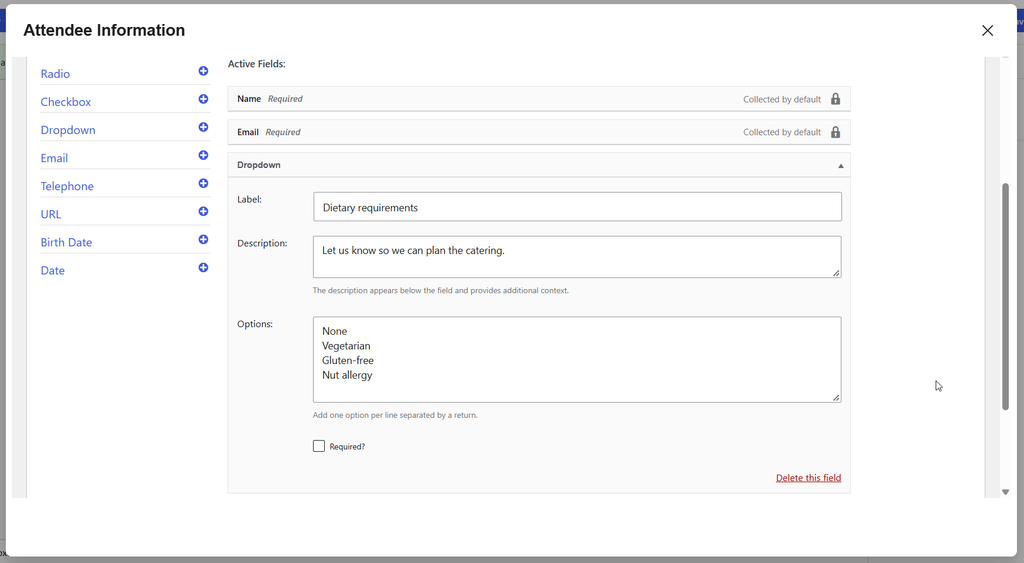
Scenario: You’re hosting a full-day workshop with lunch included, and you need to know about dietary requirements before you order catering.
Solution: Add a Dropdown field for dietary needs and a Text field for any other information attendees want to share.
Use Case 2: Conferences and networking events
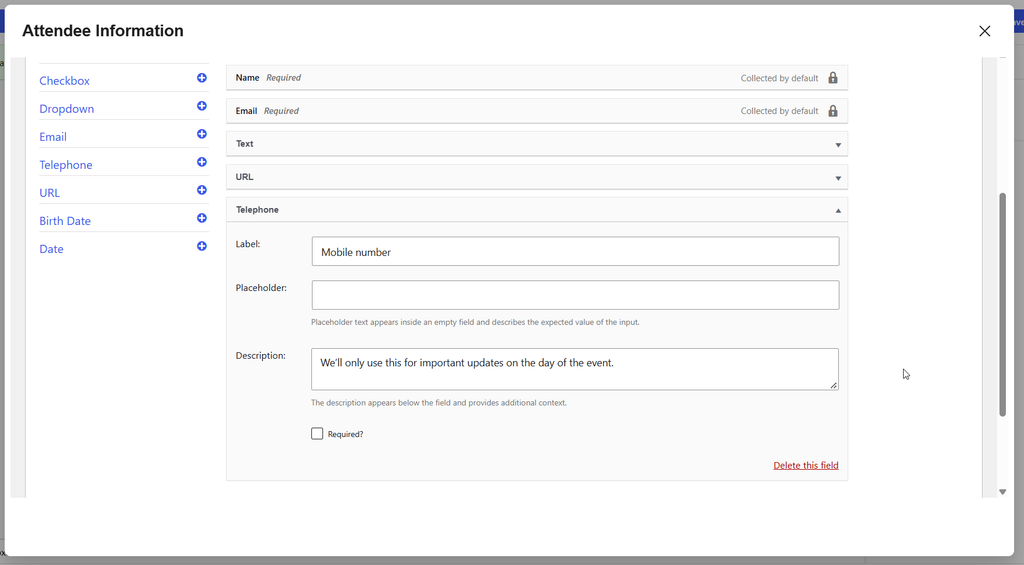
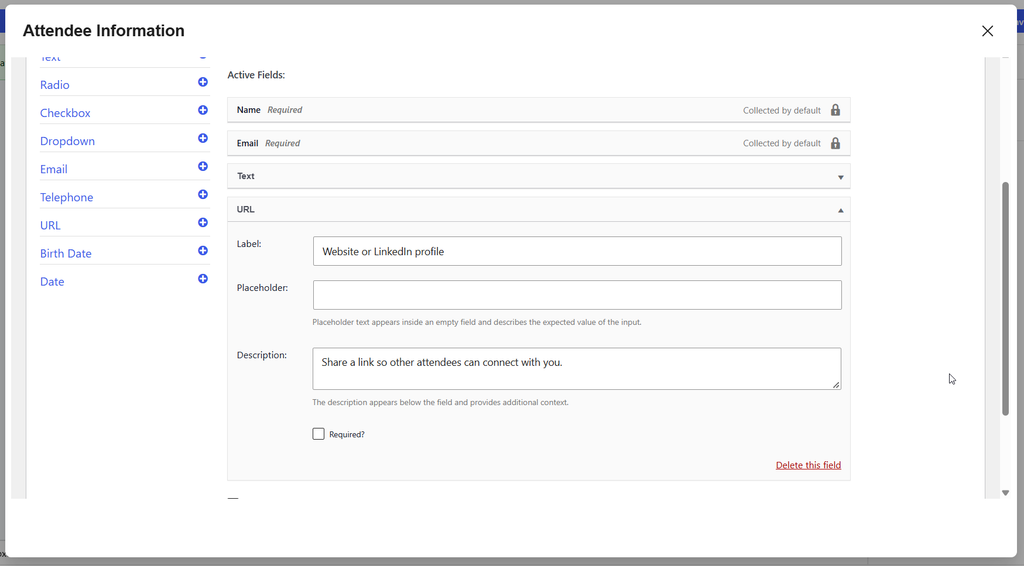
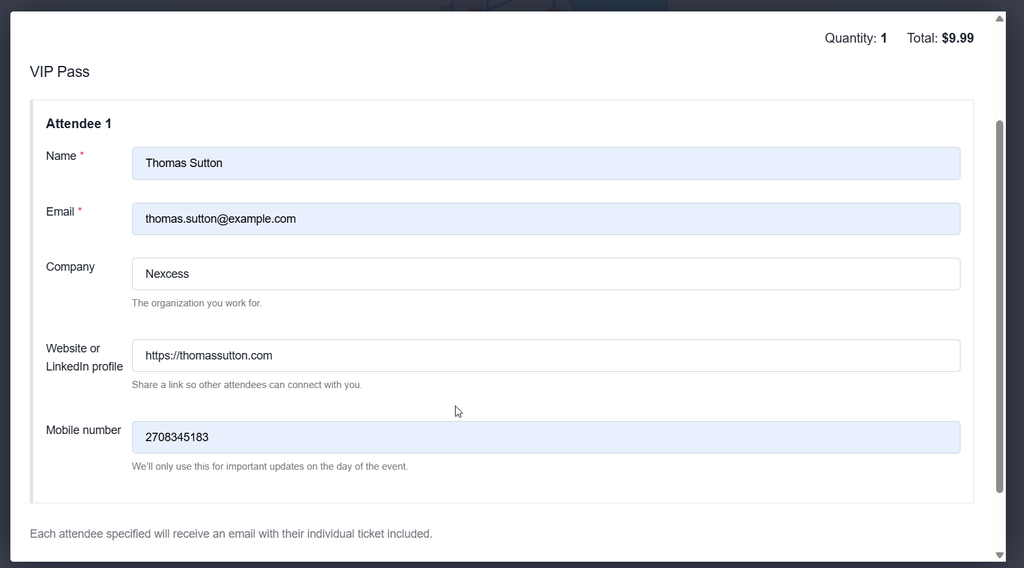
Scenario: You’re hosting a conference and want attendees to connect with each other, and you also need a way to contact them during the event.
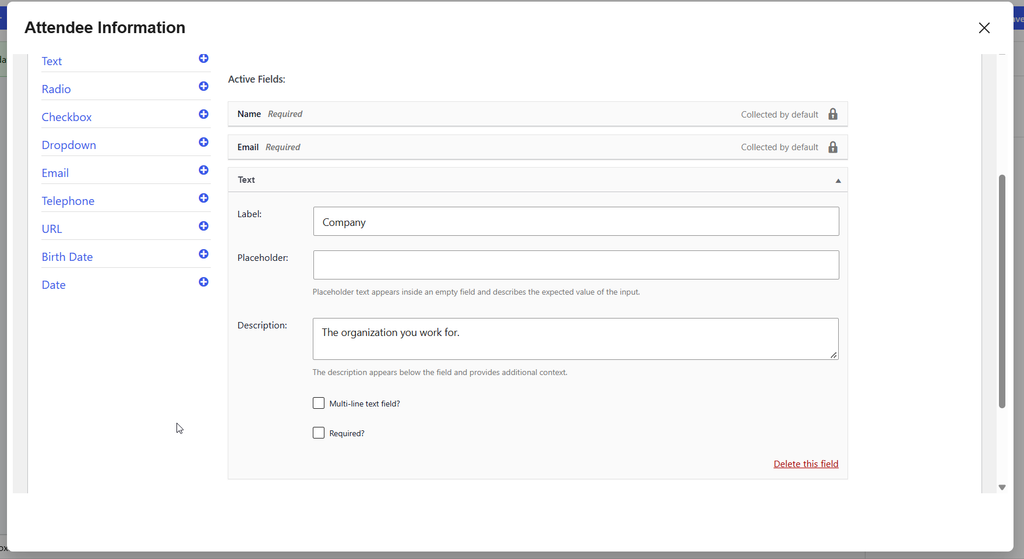
Solution: Add a Text field for company name, a URL field for a website or professional profile, and a Telephone field for a mobile number. This gives you a helpful profile for each attendee.
Use Case 3: Age-restricted or youth events
Scenario: Your event is only for attendees above a certain age, or you need to group children by their ages.
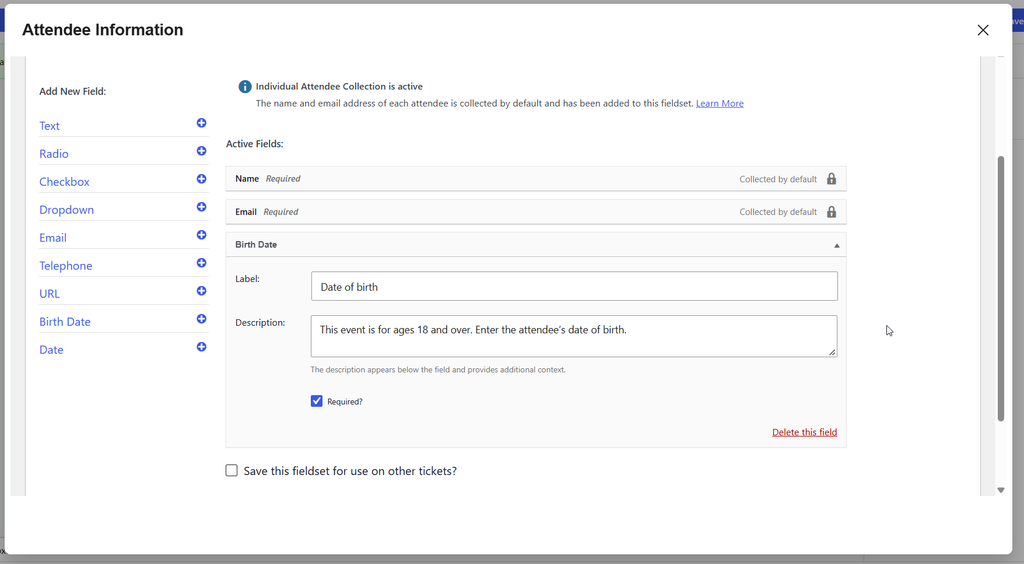
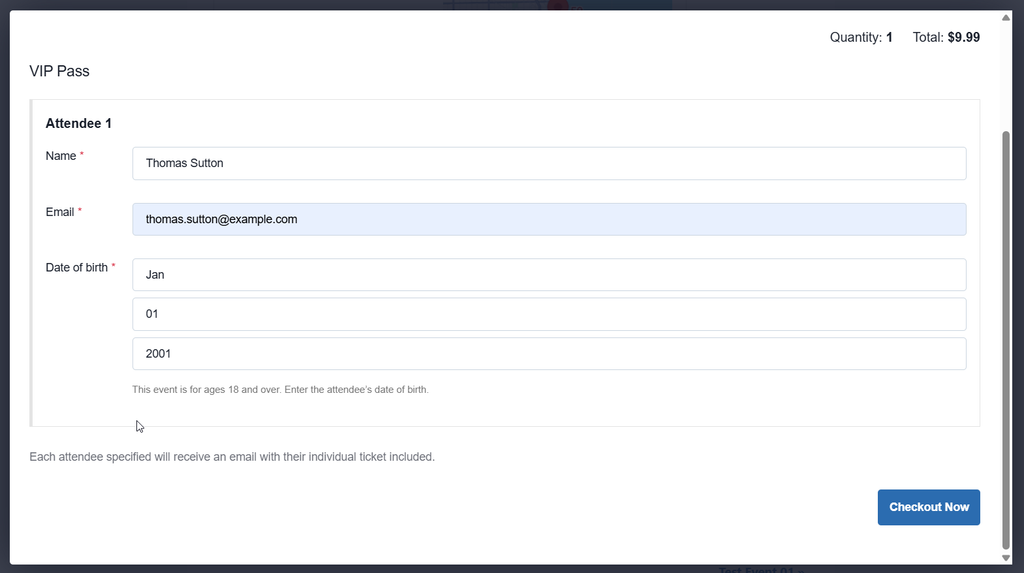
Solution: Add a Birth Date field so each attendee provides their date of birth when they register.
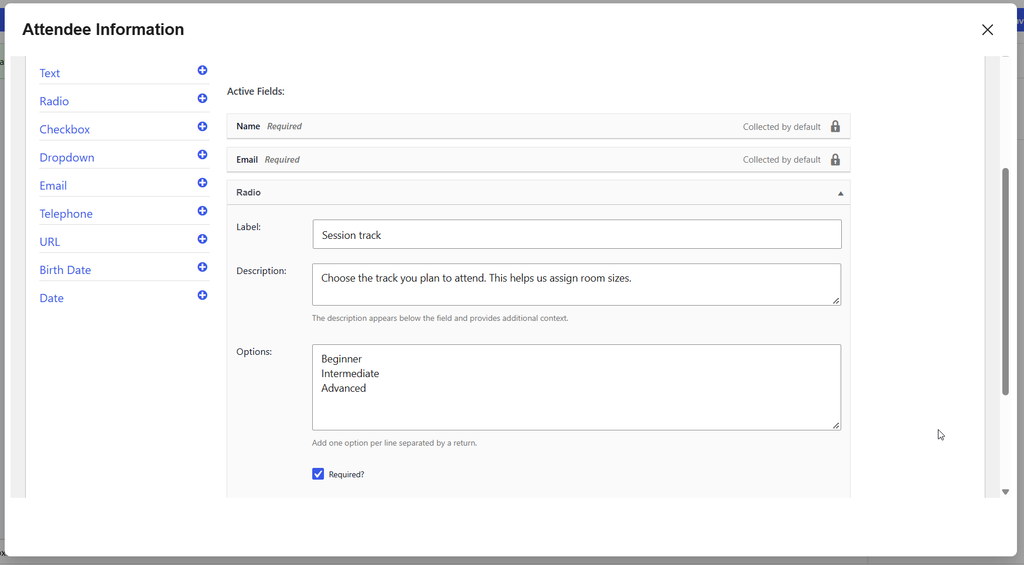
Use Case 4: Multi-track events
Scenario: Your event has sessions happening at the same time, and you need to plan room sizes ahead of time.
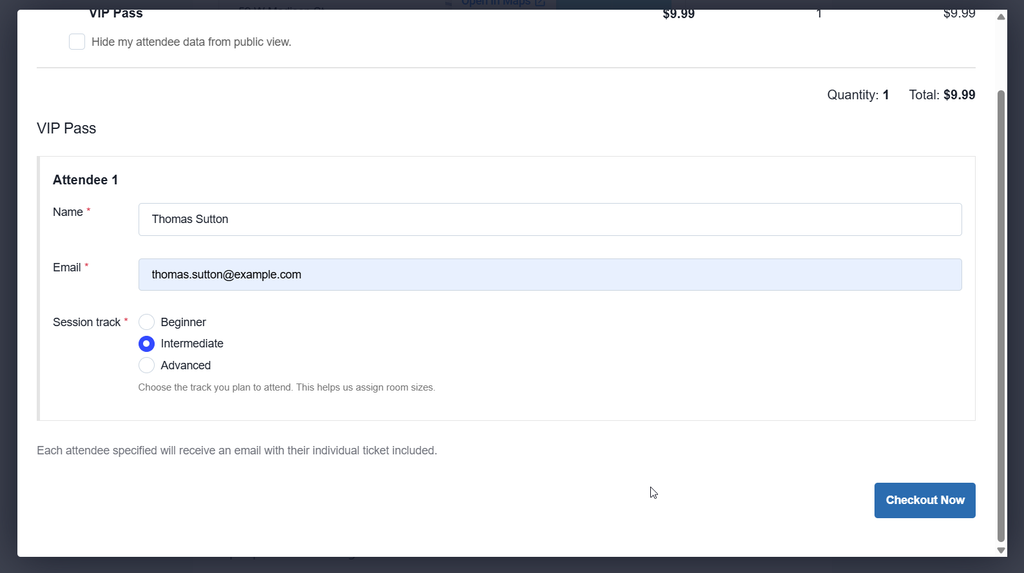
Solution: Add a Radio field with the session tracks listed, so each attendee chooses one. This lets you see how many people are interested in each session before the event.
Use Case 5: Waivers and consent
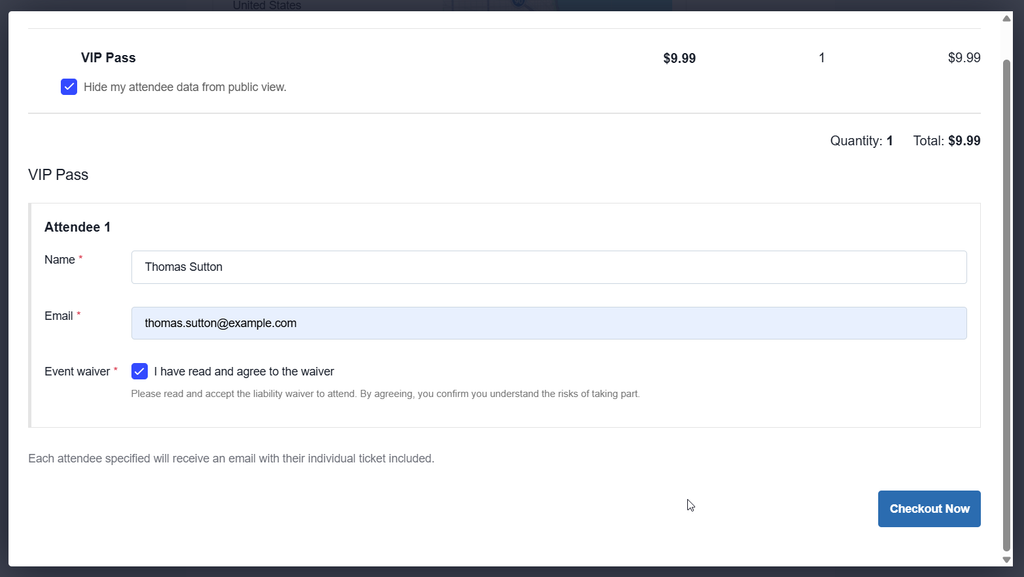
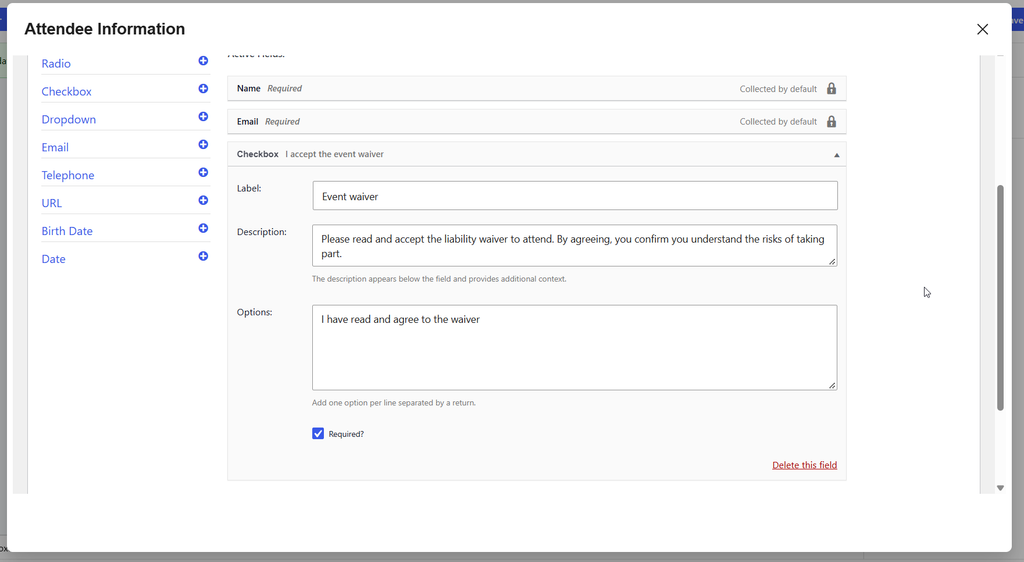
Scenario: You need every attendee to acknowledge your terms, such as a liability waiver, before they attend.
Solution: Add a Checkbox field with the acknowledgment text as the label, so each attendee confirms it individually.
Pro tip: Collect first and last names as separate fields
Individual Attendee Collection has one Name field by default. If you want first and last names as separate details, for things like name badges or mail merges, you can add a Last Name text field and change the label on the default field. With the other custom fields, you’ll have a complete, badge-ready record for each attendee. For code snippets, see: Divide Name into Separate First and Last Name Fields.
Ready to Get Started?
- Set up your fields: Follow our guide on Using Attendee Registration Forms with Event Tickets to enable Individual Attendee Collection (IAC) and add custom fields to your tickets.
- Customize the layout and look: Check out Customizing Attendee Registration to configure the registration modal, switch page templates, or apply custom CSS.