

Resize a Cloud Server
Resize your Cloud VPS, Cloud Dedicated, or Cloud Metal Server to rapidly adjust your server’s resources. Quickly increase or decrease your CPU (compute), RAM (memory), and storage with the click of a few buttons.
Select Your Server
- Login to your Liquid Web account.
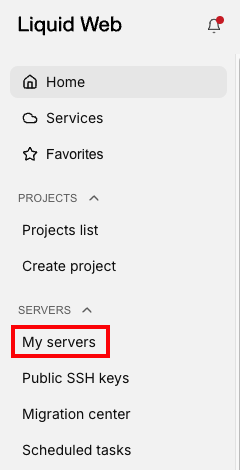
- Click on the My Servers link at the left of the screen.
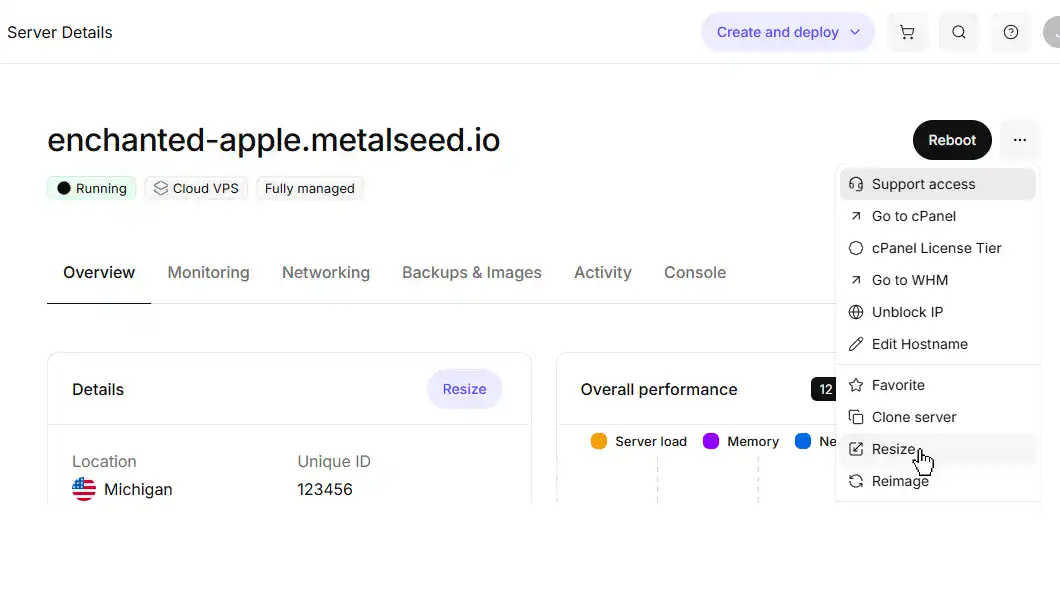
- From the list of servers, click on the name of the server you would like to resize to open the server dashboard page.
- On the server details page, click the three dot menu to the right of the servers name to display the drop down menu. Click on the “Resize” button
Select a Server Configuration
- Select a new server configuration based on your requirements.
- Click Continue to proceed.

Finalize and watch the Resize
Note
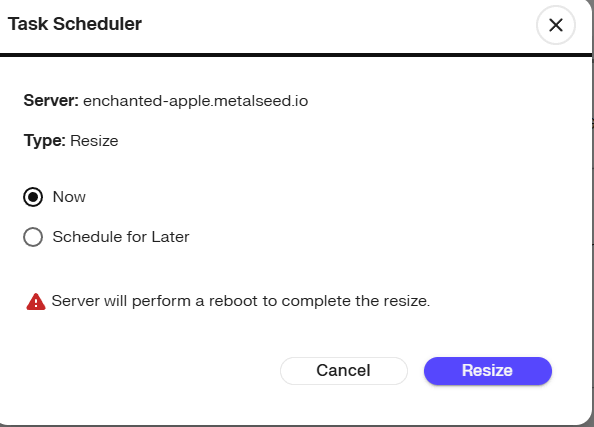
Finishing a server resize requires a reboot.
- To proceed with the resize immediately, click Resize.
- Check for progress in the server’s “Activity” tab.
- Click the Event Log associated with the resize to bring up the Event Details side panel.
Scheduling the Resize
Schedule the resize for a more convenient time, or time of lower expected activity on the server.
- Click Schedule for Later in the Task Scheduler dialog box.
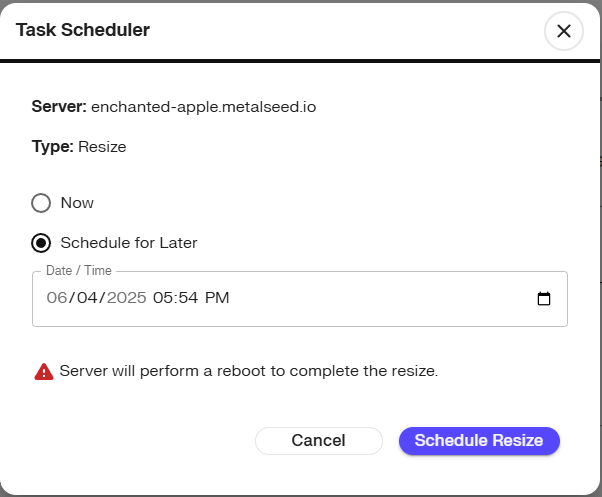
- Enter in your preferred date and time.
- Click Schedule Resize.
Review or Cancel a Scheduled Resize
Previously scheduled Resize tasks will populate your “Scheduled Tasks” list.
- Click “Scheduled Tasks” located under the “Servers” menu or
- Navigate to https://portal.nexcess.com/servers/scheduled-tasks/
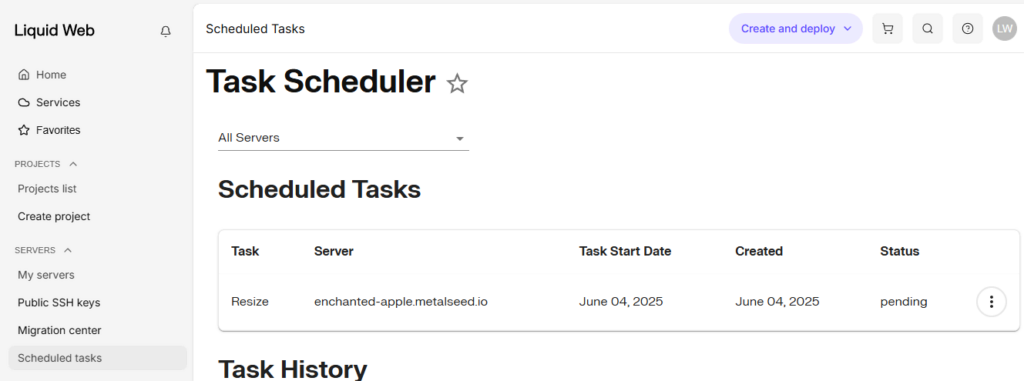
To cancel a resize:
- Click the three dot menu to the right of the Resize task.
- Select Cancel.
- Click Confirm to cancel the Resize task.