Edit Nexcess Account Details
Introduction
The Nexcess Client Portal holds an abundant information to help you manage your account. Here, we’ll simplify accessing and modifying your basic account information. There are several ways to access your account details within the Nexcess Client Portal. These broken up by area of the user interface:
- My Profile area
- Account Settings area
- Addresses area
- Billing area
1. My Profile area
From the main dashboard, go to the top right corner dropdown menu and click on My Profile:

This page allows you to set some basic information for your account, such as first name, last name, and address:

2. Account Settings area
To access even more of your account’s details, go to the top right corner again. Then, in the dropdown menu, click Account Settings:

On this page, you can change the title of your account. You can also change your call-in PIN, which you’ll be asked for each time you call the Nexcess Support Team:

3. Addresses area
To change the addresses associated with your account, use the dropdown menu in the top right corner of the dashboard. Then, click on Addresses:

You can modify your physical address — which will be listed on all the invoices issued after services have been provided:

4. Billing area
From the main Nexcess Client Portal page, you’ll be able to access the Billing section:

Within the Billing section, click on the Invoice tab. You can view all the invoices issued for services performed with your account:

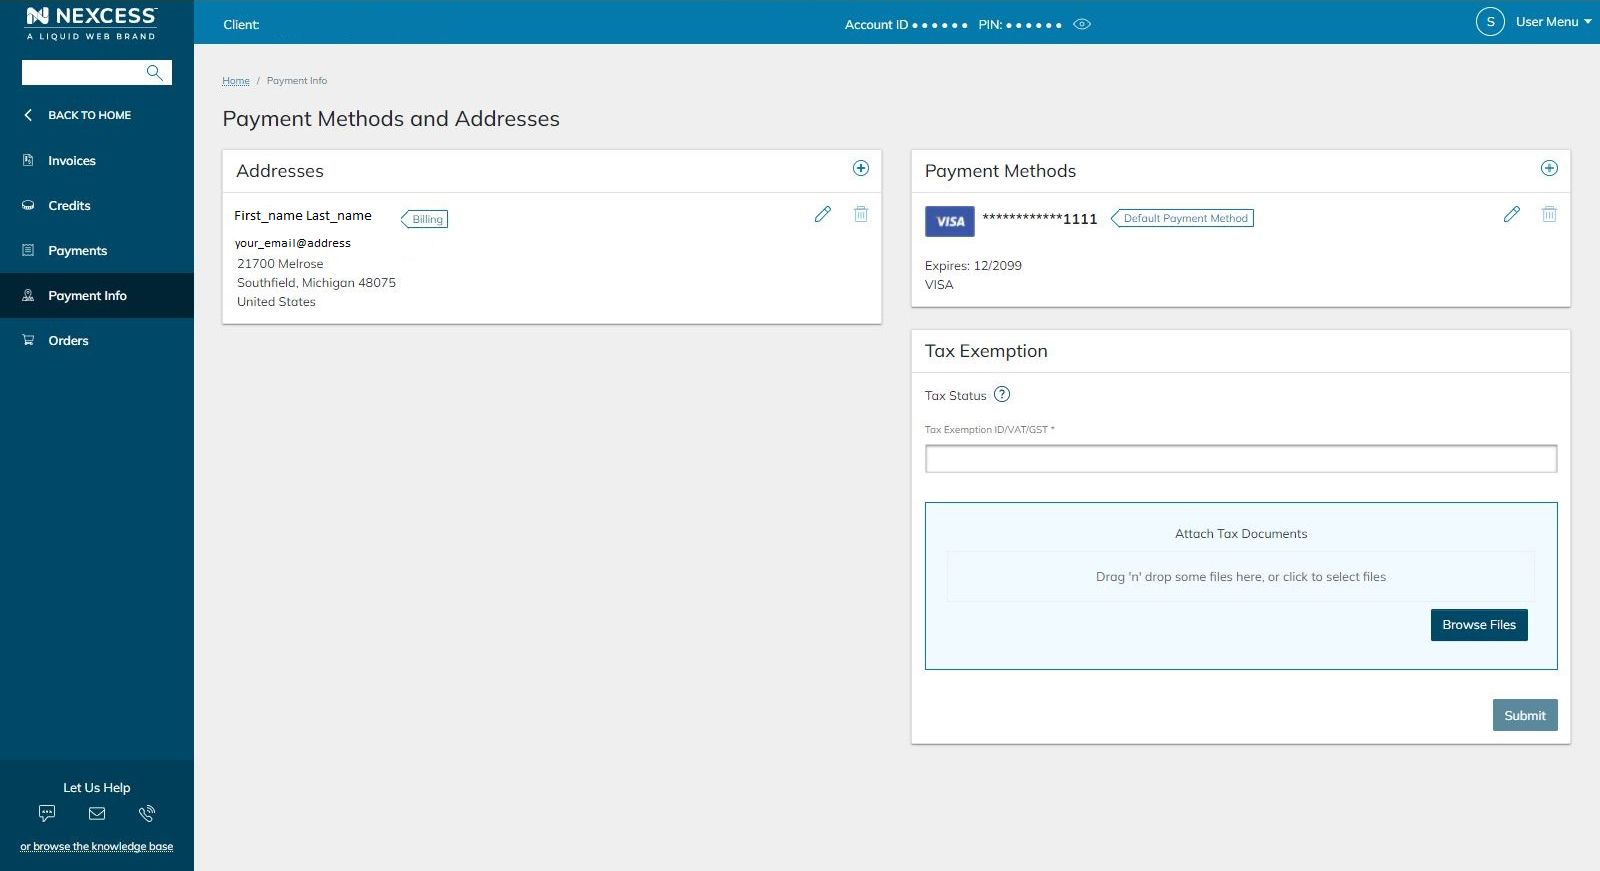
You’ll see a Payment Info section in the sidebar on the left. Click the corresponding option, and you can modify the payment methods and tax exemptions for your Nexcess hosting account: