

Events Calendar Pro
Setting Up Event Series
Event Series in Events Calendar Pro lets you group related single and recurring events. This guide explains how to create a Series, add existing events to it, and manage individual events within a Series.
Before You Begin
Make sure Events Calendar Pro is installed and activated on your WordPress site. If you plan to add existing events to a Series, create those events first. See Creating Events for details.
You can create an Event Series in three ways:
- From the WordPress dashboard
- From the event editor
- Automatically when creating a recurring event
Creating a Series from the Dashboard
In your WordPress dashboard, navigate to Events > Series.

On the Series page, click Add New to create a Series.

Enter a title and description for your Series. You can then add events that already exist on your site.
Note: You cannot create individual events directly on the Series page. To include new events, create them first, then return to the Series editor.
Adding Existing Events to a Series
The Series editor includes an Add events to Series section below the Series details, where you can associate existing events with the Series.
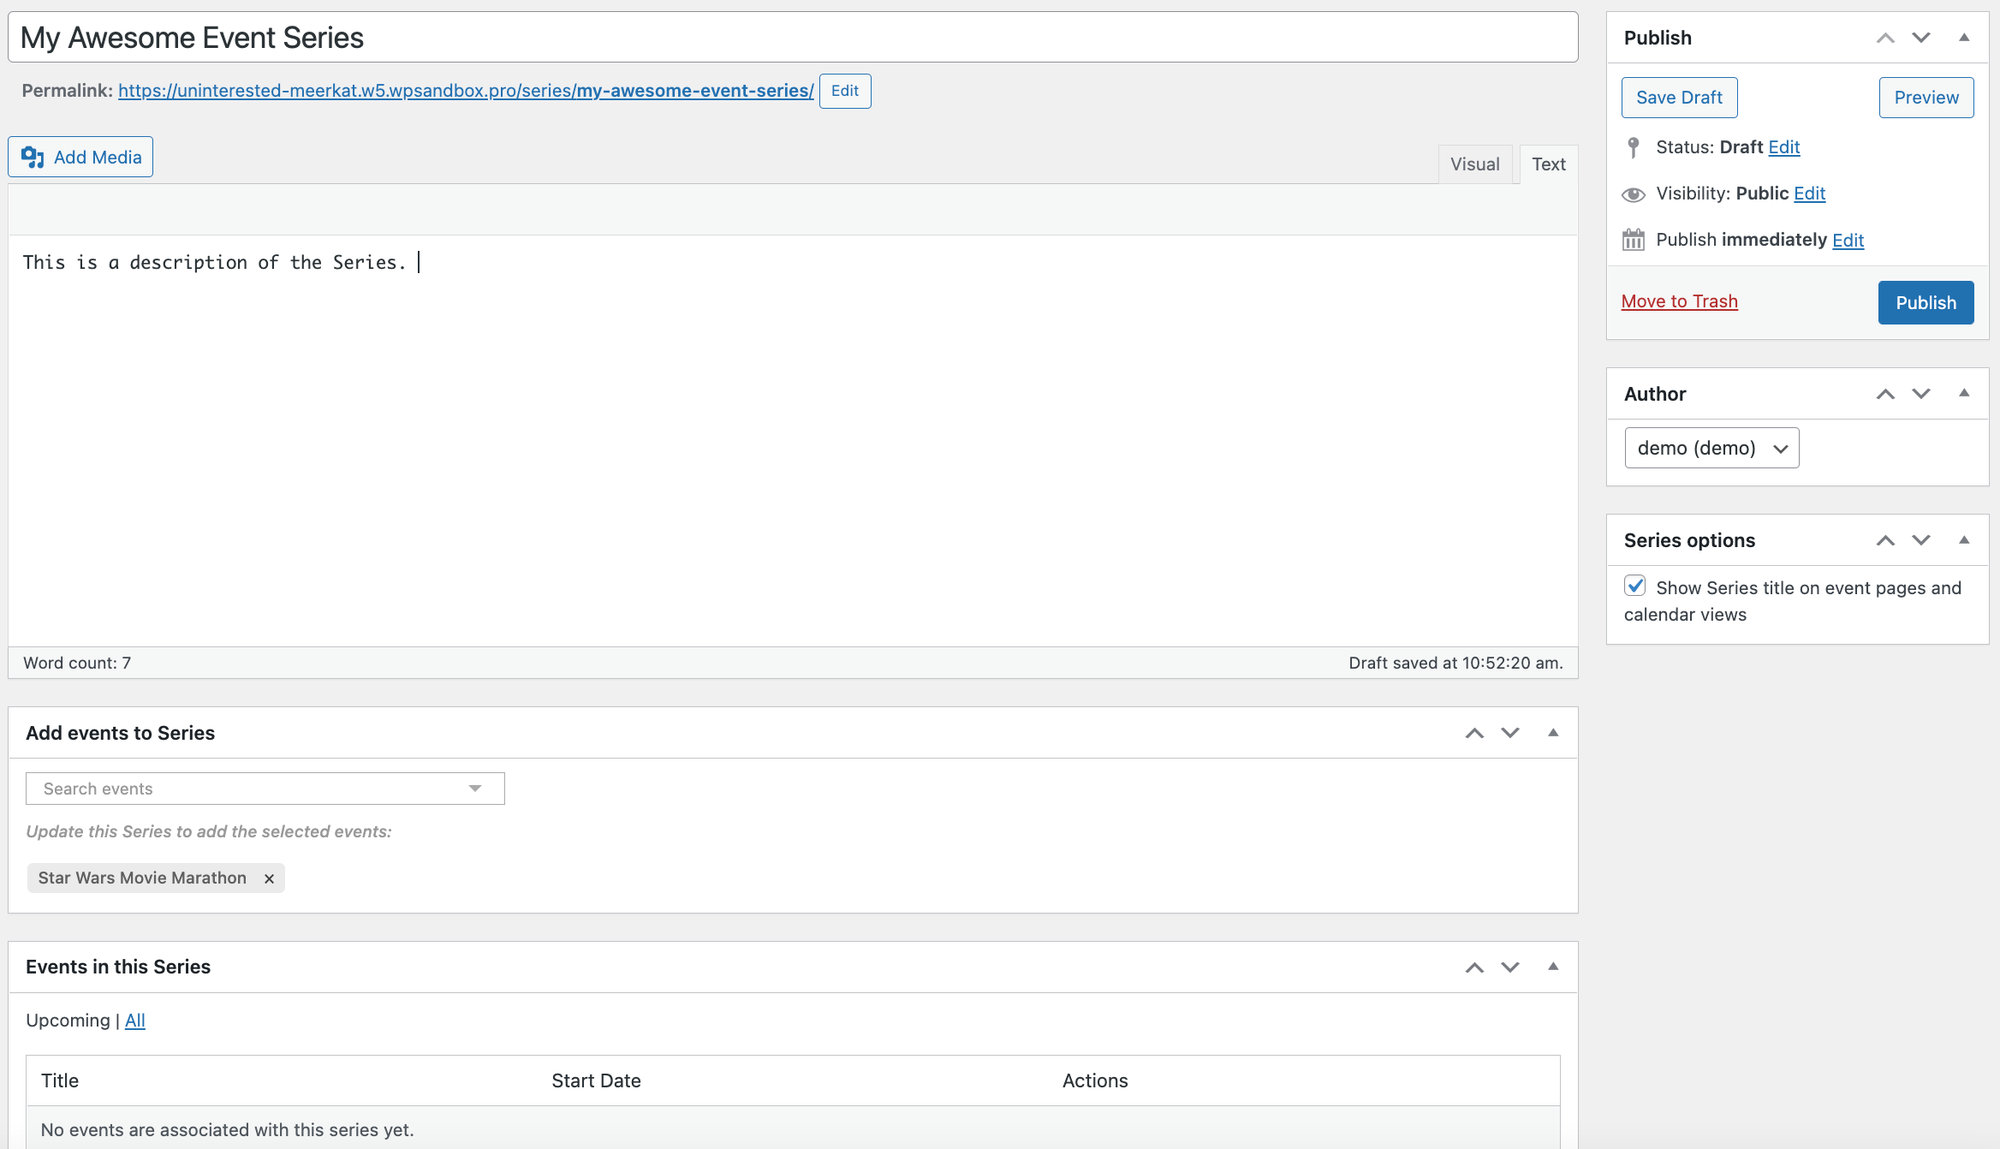
- Scroll to Add events to Series in the Series editor.
- Find and select the event or events you want to include. These events must already have been created.
- Review your selections, then click Publish for a new Series or Update for an existing one.
After the Series is published, its associated events are listed in Events in this Series. You can return to the Series editor to manage the group or add other events later.
Creating a Series from the Event Editor
You can use the event editor to create a new Series or connect an event to an existing one. In the block or classic editor, find the Series field in the event editor sidebar.

- To assign an existing Series: Select the Series name from the dropdown, then save or update the event.
- To create a new Series: Type a new Series name into the field and confirm. Save or update the event to create the Series and associate the event with it.
When you create a Series from the event editor, you can initially enter only its title. After saving the event, you can open the Series editor to add a description or make other changes.
To change the time, venue, or description for only one occurrence of a recurring event, use Editing One Instance of a Recurring Event below.
Automatically Generated Series
Recurring events are associated with a Series. If you create a recurring event without assigning it to an existing Series, a Series with the same name will be generated automatically when you first publish the event.
To edit the generated Series, navigate to Events > Series or use the Series link in the event editor.

Editing One Instance of a Recurring Event
To update the time, venue, or description for just one date of a recurring event, edit that occurrence directly:
- Open the recurring event and follow its Series link, or navigate to Events > Series and open the appropriate Series.
- In Events in this Series, locate the specific occurrence by its date and click Edit.
- Make the changes you want to apply to that occurrence, then save or update the event.
- In the recurring-event confirmation dialog, choose This event to apply the changes to that occurrence only.
The selected occurrence becomes a separate single event within the same Series. The other occurrences are not changed. For a detailed explanation of recurring-event editing options, see Creating Recurring Events.
Converting One Date to a Single Event
Alternatively, you can convert an individual occurrence directly from the Series editor. Under Events in this Series, each recurring occurrence has a Convert to Single action alongside Edit and View.

Click Convert to Single for the occurrence you want to separate from the recurrence pattern and confirm the prompt. This converts the selected occurrence into an individual event without changing the other recurring dates. Afterward, check the event’s Series field if you need to change its association with the Series.
Note: You do not need to use Convert to Single just to change one occurrence. If you only need to edit its details, use the editing method above instead.
Removing Events from a Series
There is no direct Remove action in the Events in this Series list. To remove an individual single event from a Series:
- Open the event from Events > All Events or select Edit in the Series event list.
- Find the Series field in the event editor sidebar.
- Clear the event’s current Series assignment.
- Save or update the event.

If your goal is to change the details of one recurring occurrence without affecting the others, follow Editing One Instance of a Recurring Event above. You do not need to convert it to a single event before making those changes.
Next Steps
Now that you know how to create and manage Event Series, explore these related guides:
- Creating Events – Create individual events to include in a Series.
- Creating Recurring Events – Learn how to manage recurrence rules and individual occurrences.