

Events Calendar Pro
Creating Recurring Events
Recurring events in Events Calendar Pro let you schedule an event once and have it repeat on your calendar. This guide covers creating a recurring event in the Classic Editor and the Block Editor, setting a pattern, an end, extra dates, and exceptions, editing one date, and the recurring event settings. To learn what recurring events can do for your calendar, see Introducing Recurring Events.
Before You Begin
- Events Calendar Pro must be installed and active. Recurring events are an Events Calendar Pro feature. See How to Install and Update Your WordPress Plugins and Themes.
- If you haven’t created a single event yet, start with Creating Events. A recurring event uses the same fields, plus the recurrence options described below.
- An event can repeat on one pattern, such as every Wednesday, plus any number of extra single dates. For a second pattern, see Repeating on More Than One Pattern.
- Standard tickets and RSVPs can’t be added to a recurring event. See Recurring Events and Tickets.
Creating a Recurring Event
Start with the event’s date and time. If you’re turning an existing single event into a recurring event, they’re already set. The first date becomes the first occurrence, and it decides which pattern options you can choose. For example, an event that starts on Saturday, December 5 can repeat monthly on the “first Saturday” or on “day 5”.
Classic Editor
In the Time & Date section, click Schedule multiple events below the start and end times.
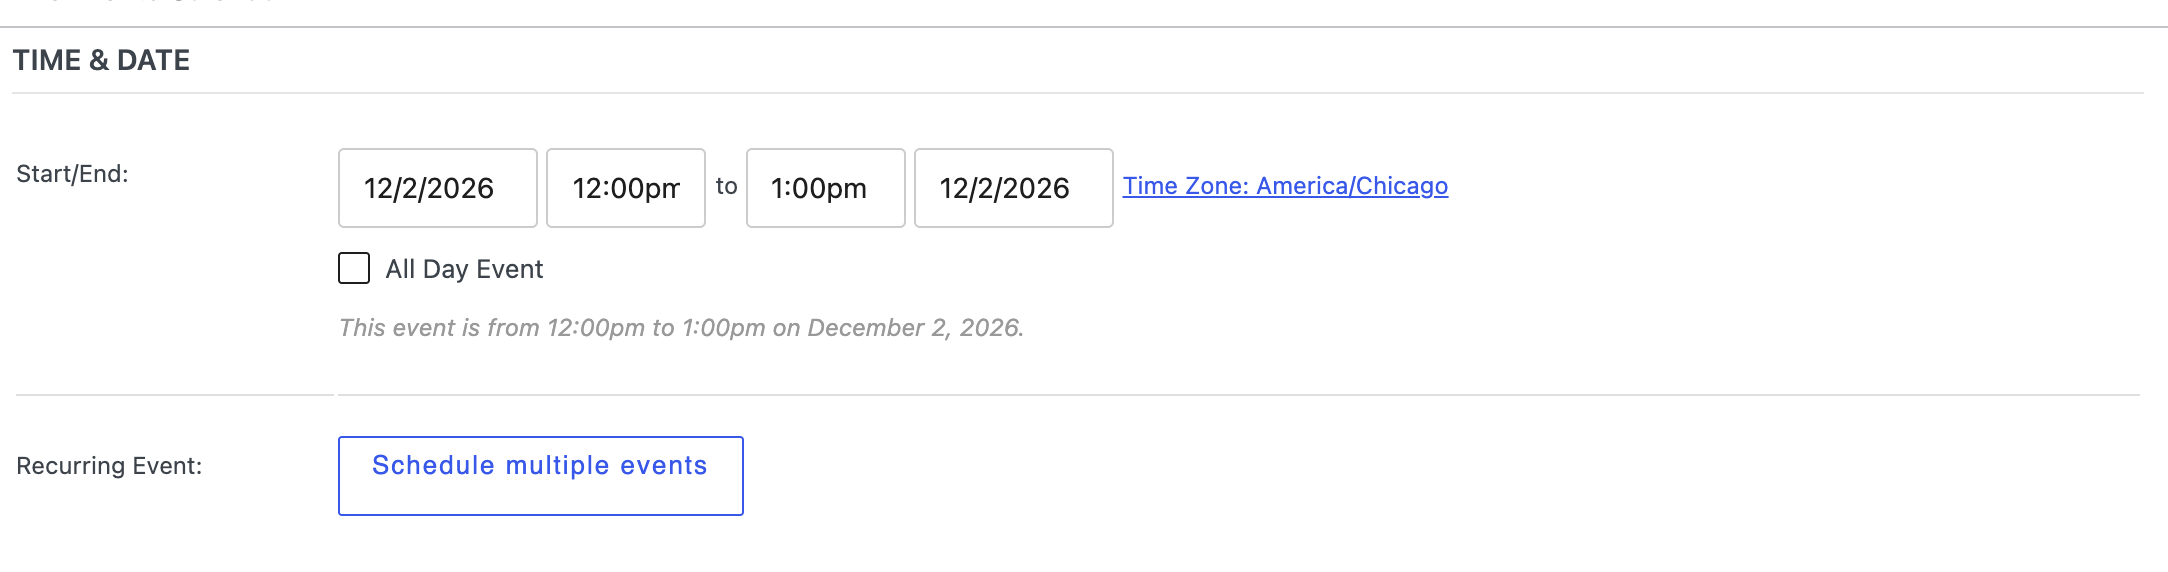
A Recurring Event rule appears. Choose how the event repeats from the Happens dropdown.
Block Editor
Click the event’s date and time below the title to open the date picker, then click Repeat This Event.
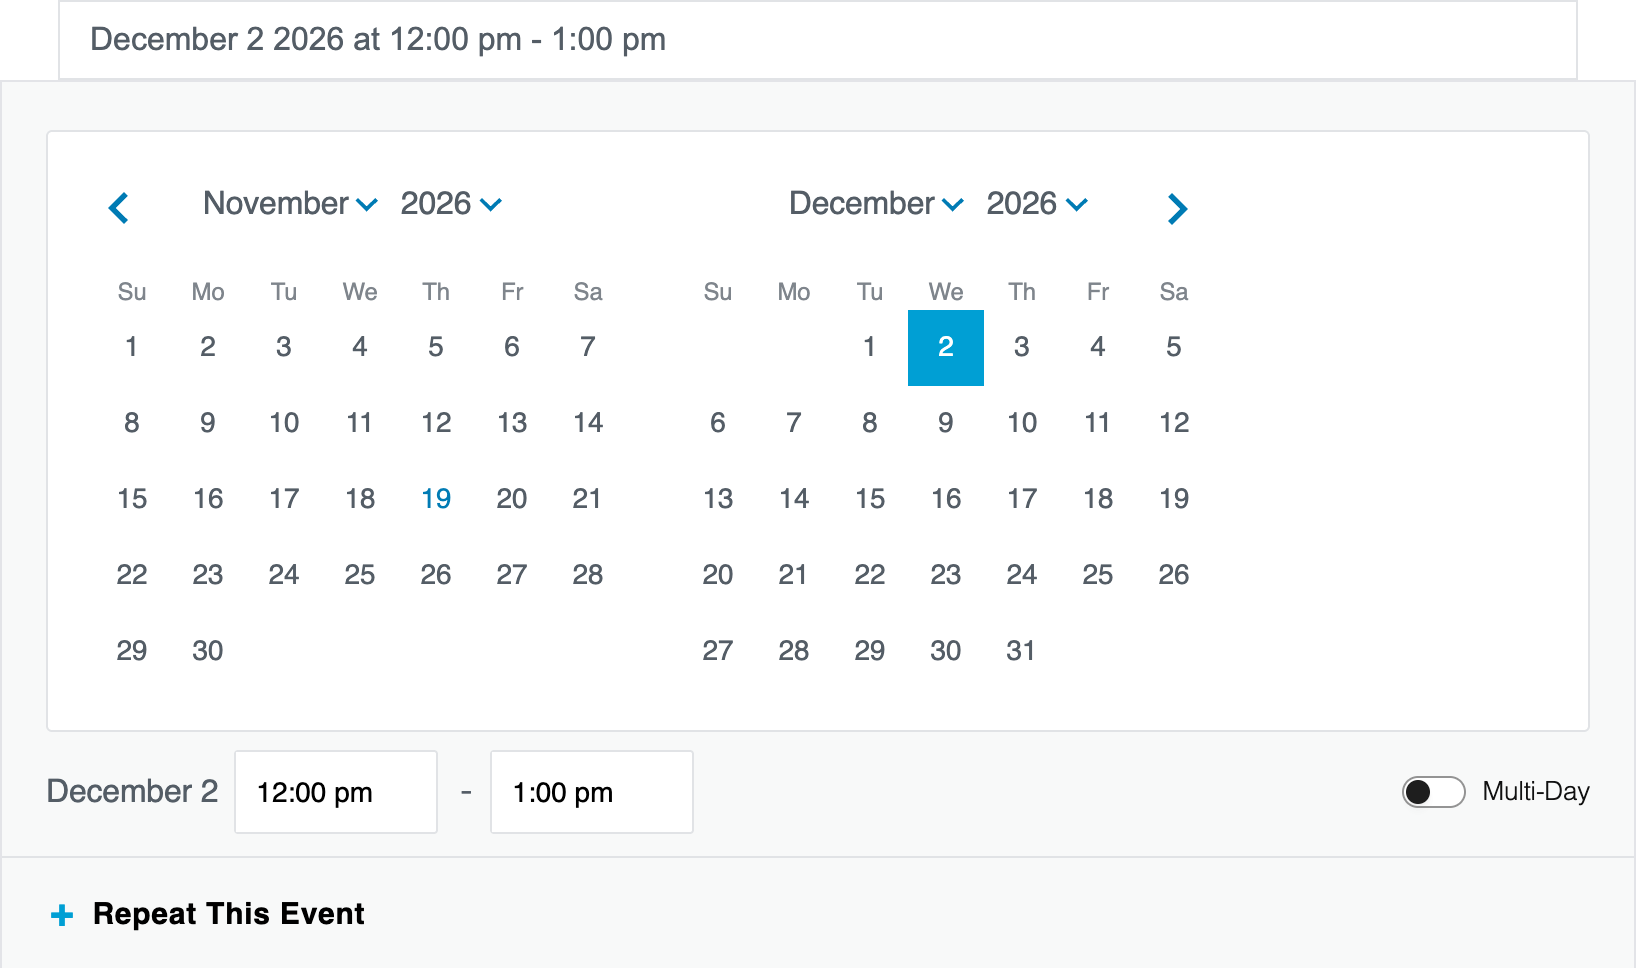
A rule appears, set to once. Choose how the event repeats from the Happens dropdown.
For an event that follows a regular pattern, choose daily, weekly, monthly, or yearly. For dates that don’t follow a pattern, choose once. Both are covered below.
Set a Repeating Pattern
After you choose a pattern from Happens, more fields appear so you can set the exact schedule:
- Every: How often the event repeats, for example every 1 week or every 2 months.
- On (weekly): The days of the week. The day of the first date is always selected, and you can add more, such as Tuesdays and Thursdays.
- On the (monthly and yearly): A weekday in the month, such as the first Saturday, or a date, such as day 5. A yearly event also has an In field for the month or months.
- Ends: When the pattern stops. See the next section.
In the Classic Editor, a sentence below the rule describes the pattern, so you can check it before you save.
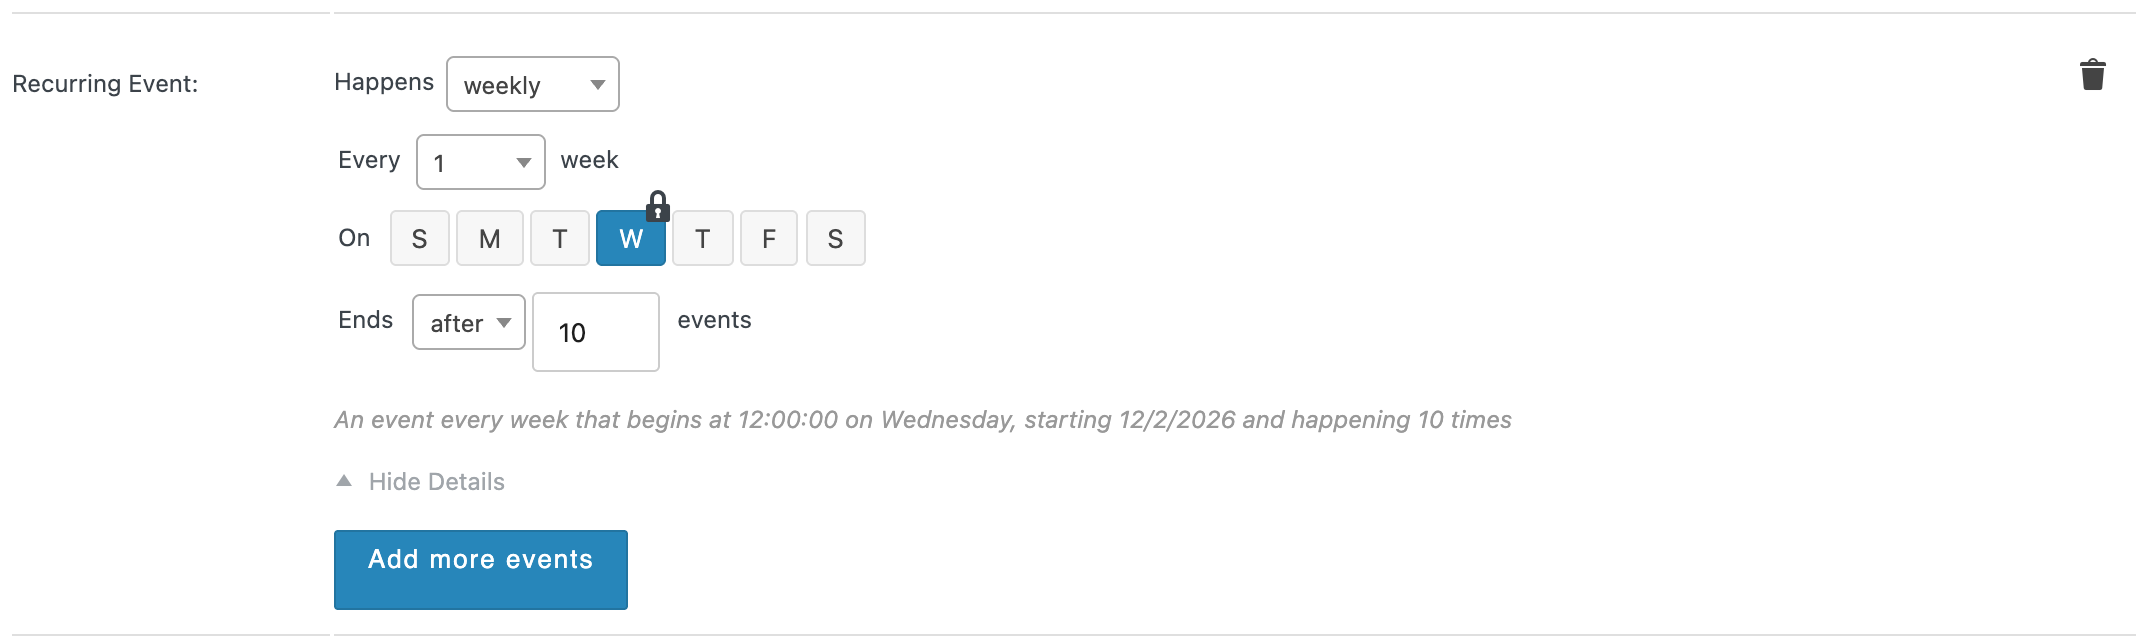
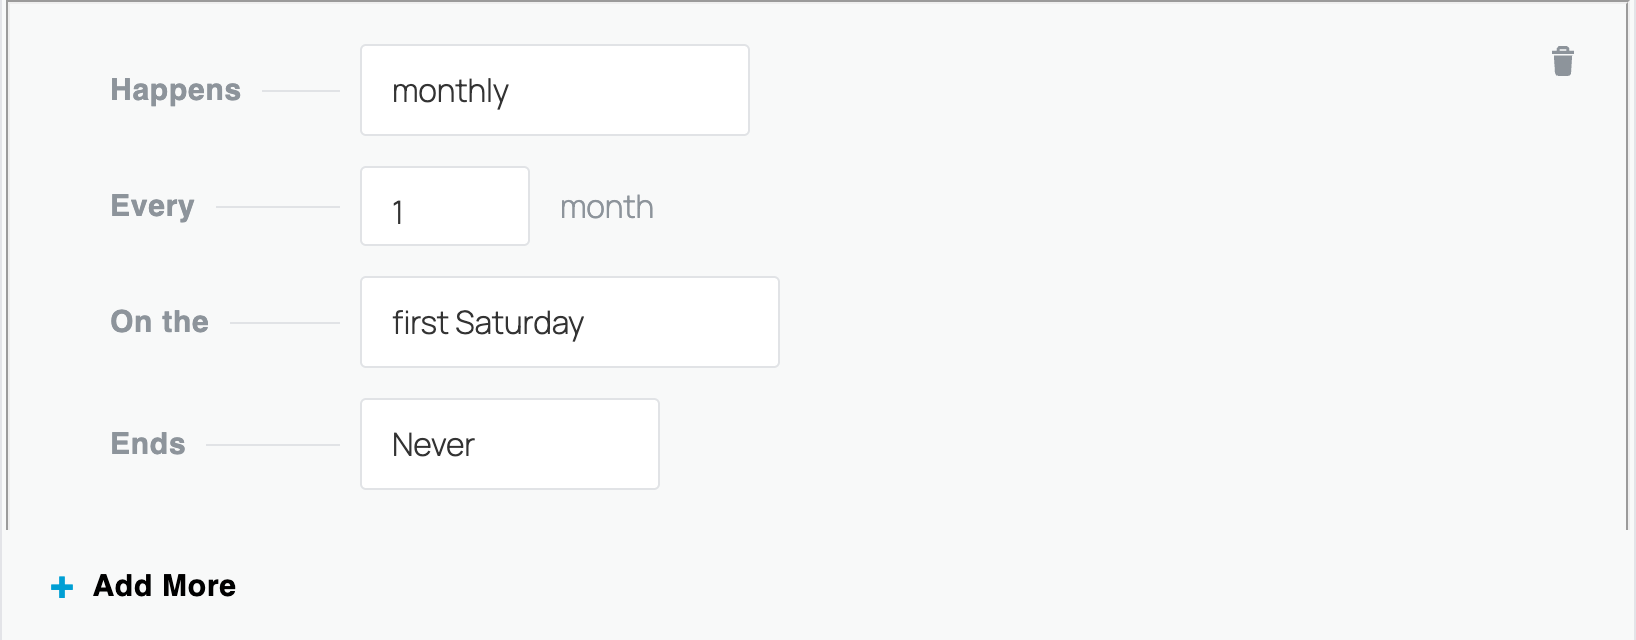
Note: Each event can repeat on only one pattern, plus any number of single dates. If you add a second pattern with Add more events or Add More, it’s saved but doesn’t create any dates. Use once for extra dates, or a Series for a second pattern.
Choose When the Pattern Ends
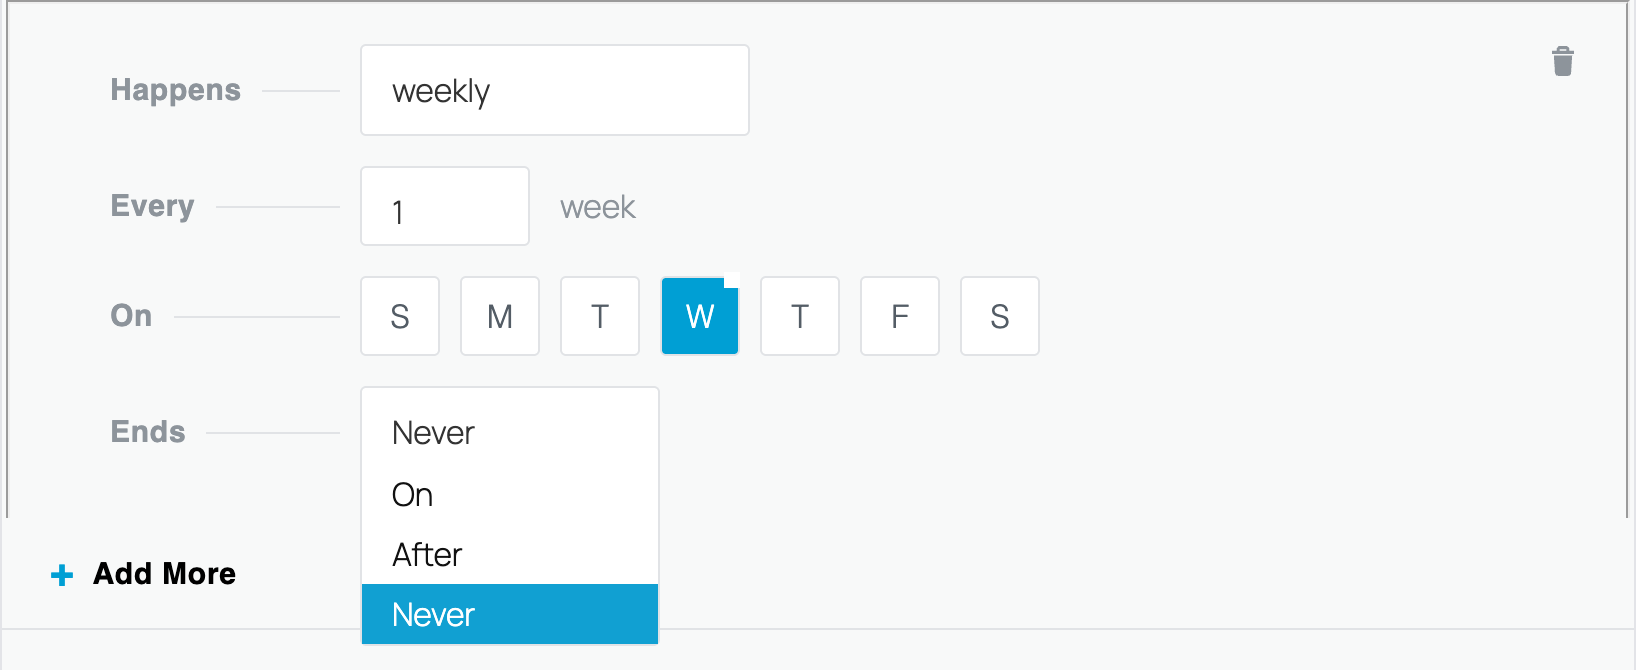
The Ends option controls when the pattern stops repeating:
- Never: The event keeps repeating. Dates are created up to 60 months (five years) ahead of the day you save the event. To change this, see Change the Recurrence Limit.
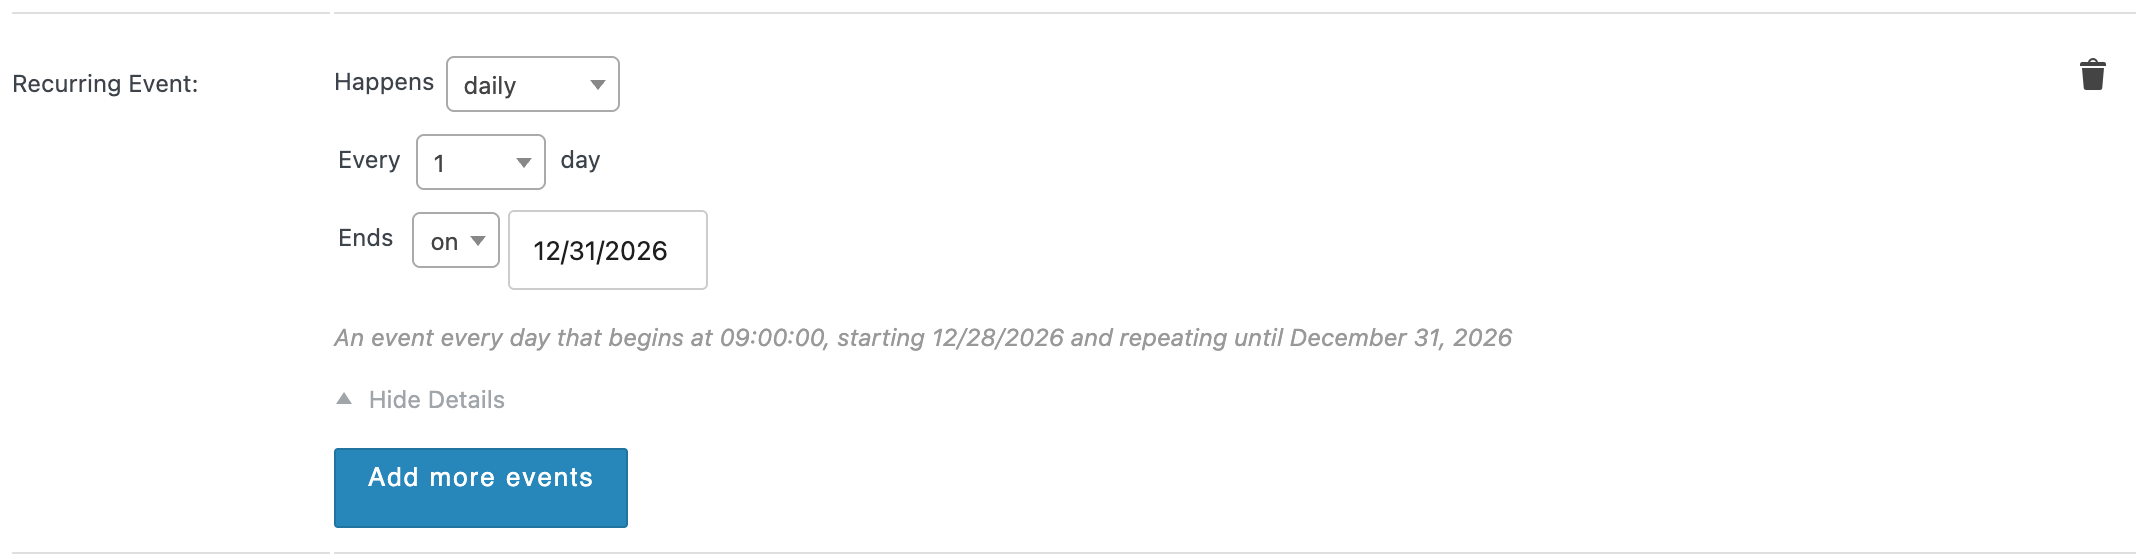
- On: The event stops on a date you choose, and that date is included. For example, a daily camp that starts on December 28 and ends on December 31 runs for four days. If the end date doesn’t match the pattern, the last date is the one before it: a weekly Wednesday event that ends on a Tuesday stops on the Wednesday before.
- After: The event stops after a number of dates. For example, a weekly class that ends after 10 events runs ten times.
Performance note: Recurring events that repeat far into the future add many dates to your database. Avoid having many recurring events that never end or end far in the future.
Add Dates That Don’t Follow a Pattern
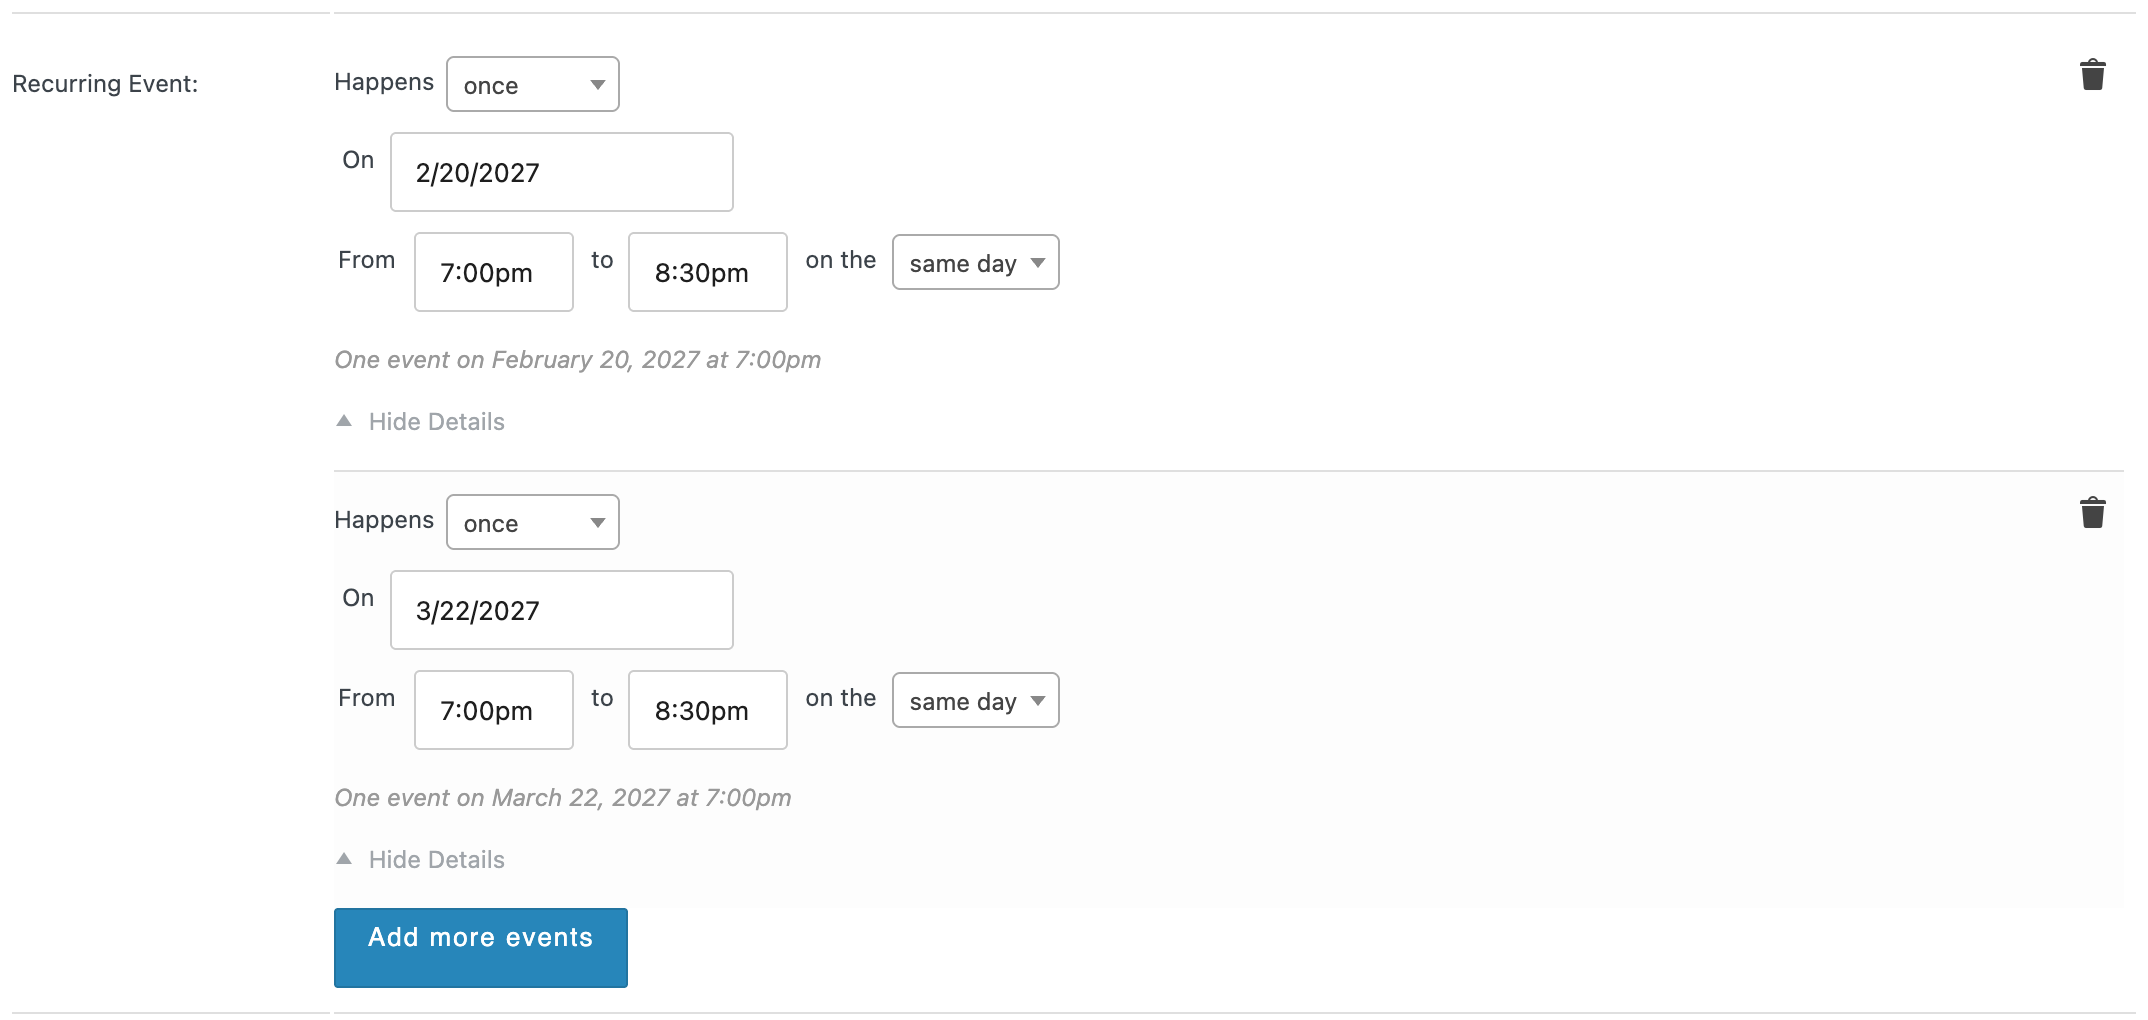
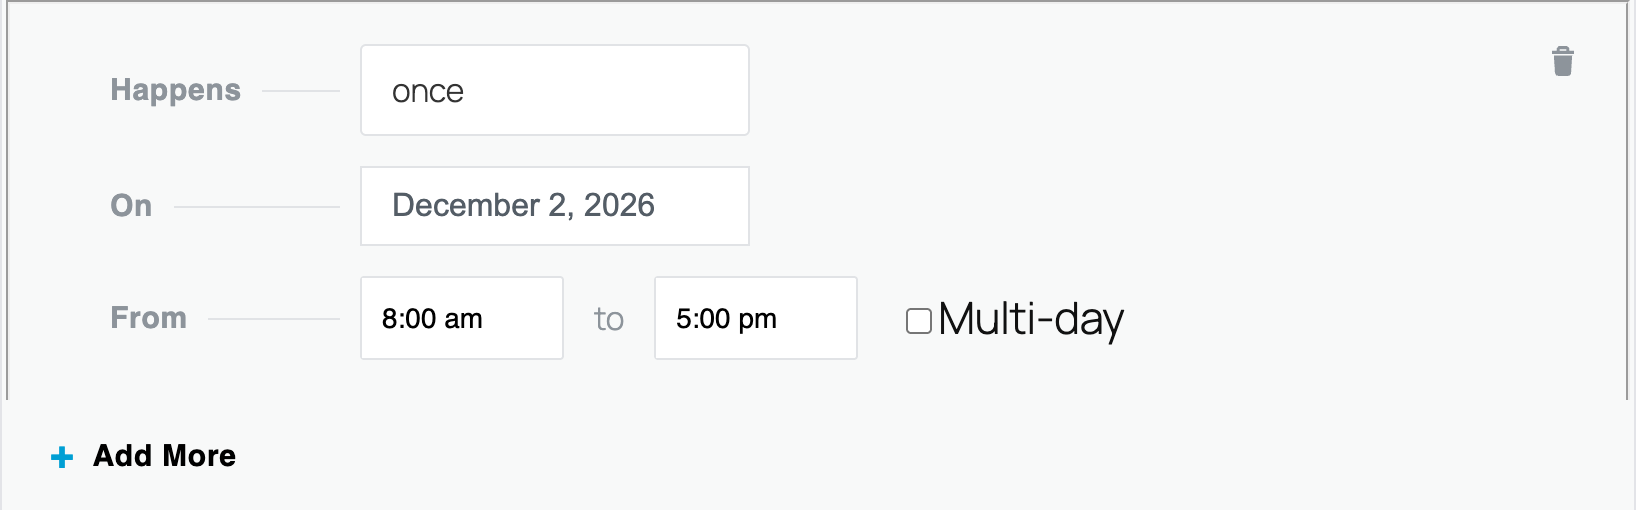
To add a single date, choose once from Happens and enter the date in the On field, or pick it from the date picker. Click Add more events in the Classic Editor or Add More in the Block Editor to add as many dates as you need. You can also add single dates to a patterned event, for example a make-up class.
Each date has its own From and to times. Check them for every date: in the Classic Editor, they start at 8:00 am to 5:00 pm, not at the event’s own time. To let a date run past midnight, choose an end day such as next day in the Classic Editor, or check Multi-day in the Block Editor.
Skip Dates with Exceptions
Exceptions remove dates from a recurring event. For example, a meeting on the first Saturday of every month can skip January 2, the day after New Year’s Day. The skipped date doesn’t appear on your calendar.
Add Exception appears once the event has a rule. Click it, then choose once to skip one date, or a pattern to skip dates that follow a pattern, such as every third Friday. In the Classic Editor, exceptions are listed under Event will not occur. In the Block Editor, they’re in the Exceptions section. Click Add Exception again to skip more dates. You can combine as many single-date and pattern exceptions as you need.
A pattern exception doesn’t remove the event’s first date, even when that date matches the pattern. To skip the first date, change the event’s start date instead.
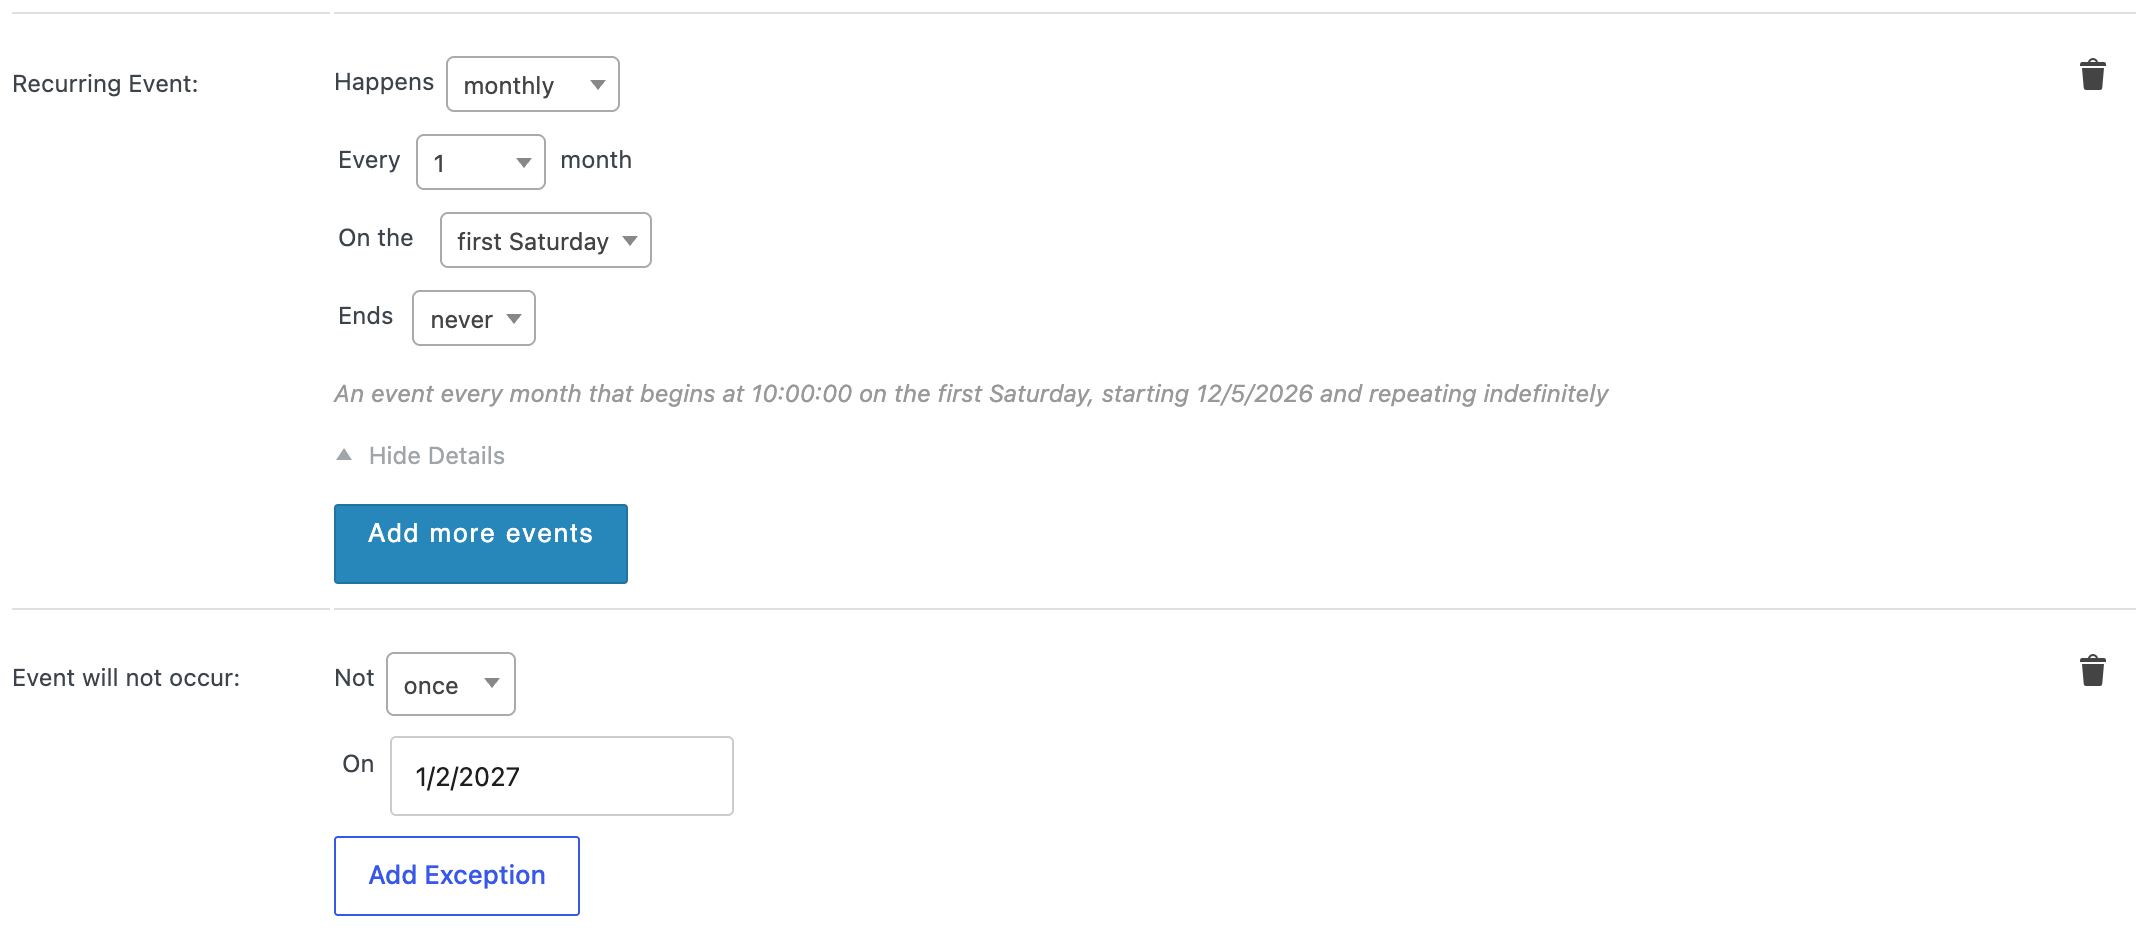
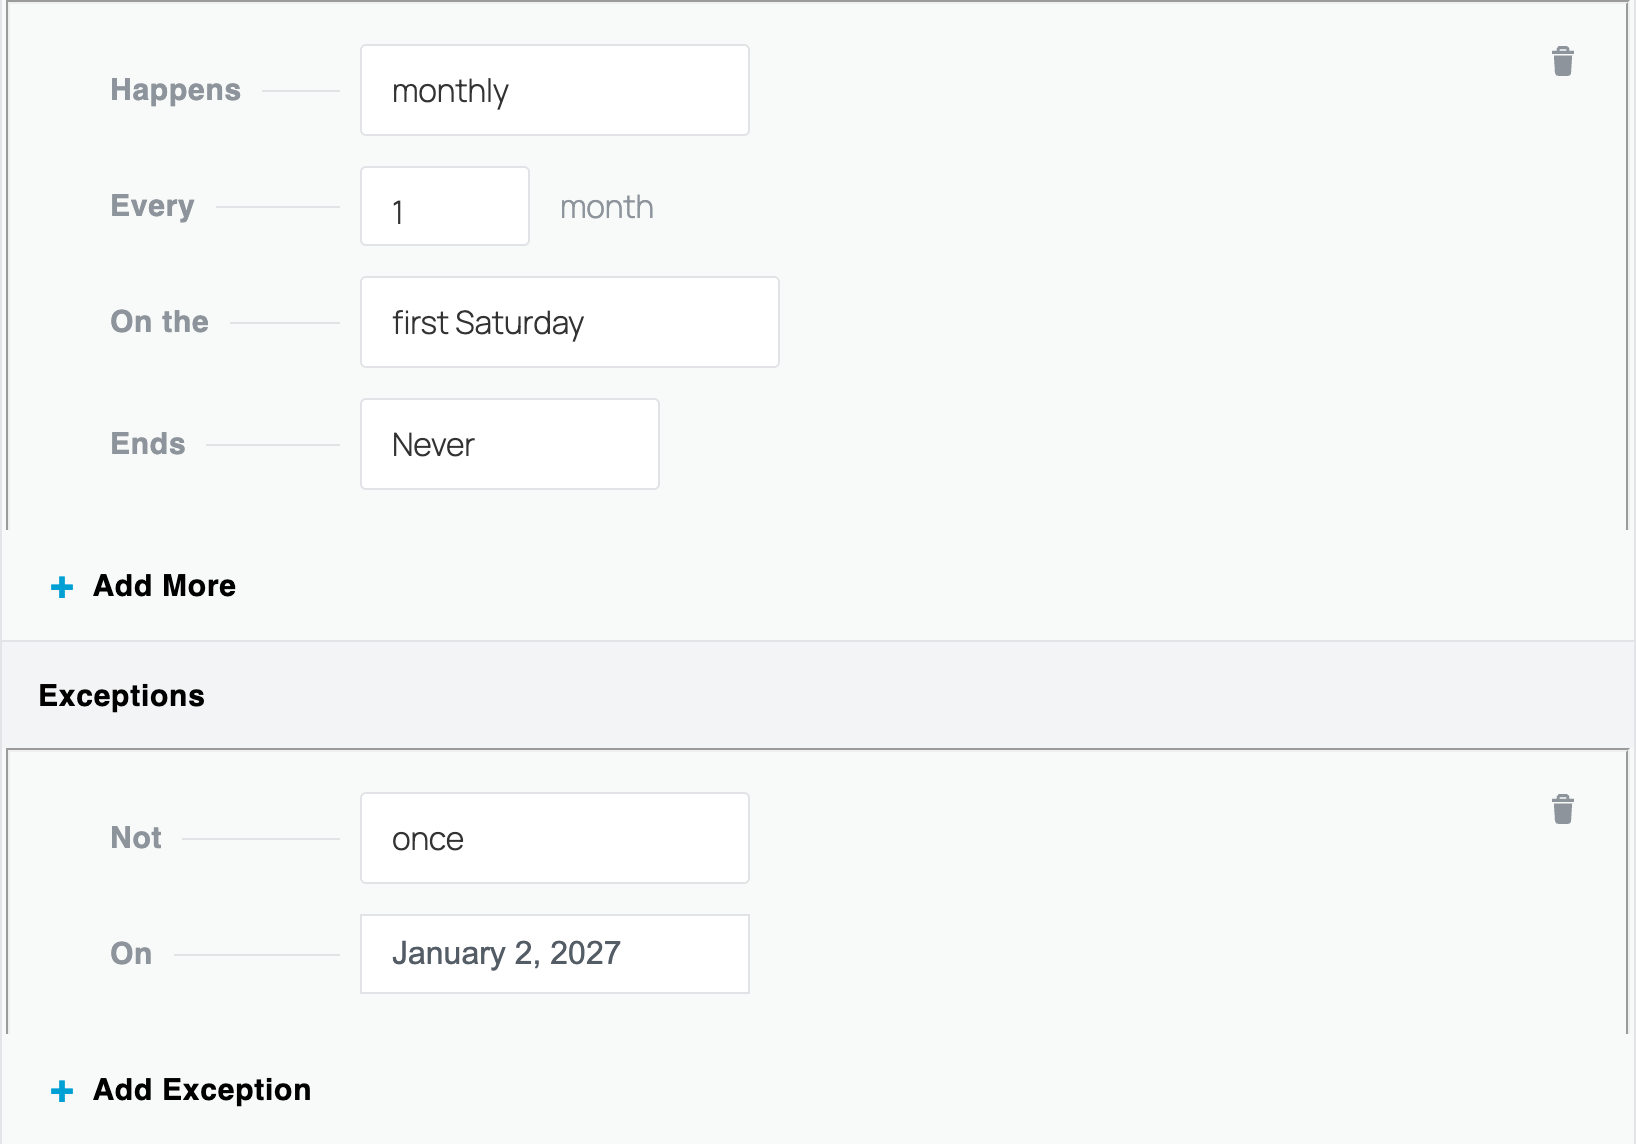
To remove a rule or an exception, click the trash can icon to the right of it.
Save the Event
Click Publish or Update. Events Calendar Pro creates each date when you save. If the event isn’t part of a Series yet, a Series with the same name is created for it, and a notice tells you how many dates it has, for example “This recurring event is part of a Series with 10 total events through February 3, 2027.”
In Events > All Events, a recurring event is listed once, with a recurring icon. Start Date shows its first date, End Date shows its last date, and the Series column links to its Series. For an event that never ends, End Date shows the last date created so far.

Editing One Date of a Recurring Event
The dates of a recurring event aren’t listed one by one in Events > All Events. To change one date, for example its time, venue, or description, without changing the others, open it from its Series:
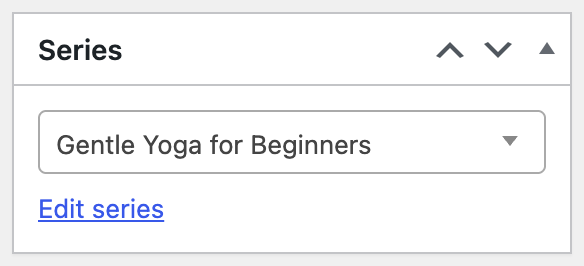
- Open the recurring event and click Edit series in the Series box. You can also click the Series name in the Series column of Events > All Events.
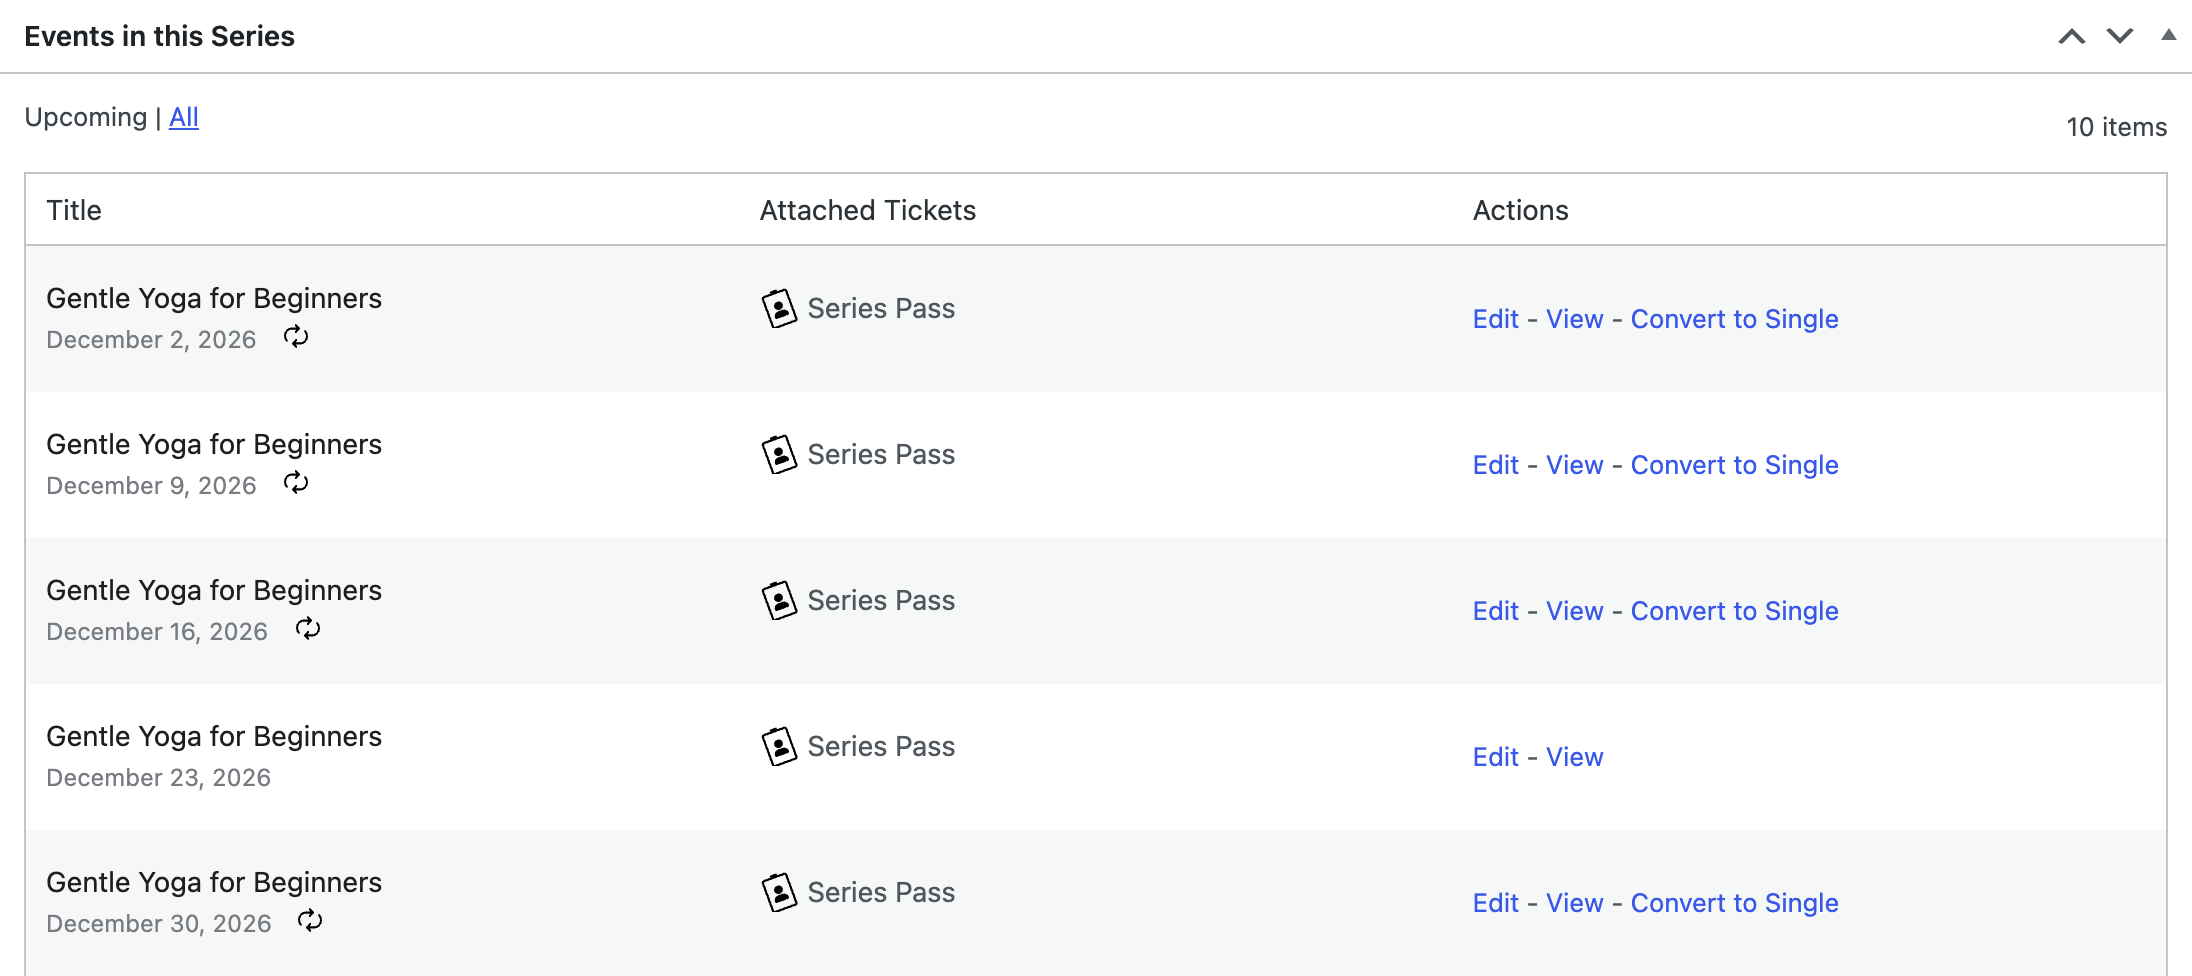
- In the Series editor, find the date under Events in this Series and click Edit. Check the date in the event’s Time & Date section before you make changes.
- Make your changes and click Update. The Edit Recurring Event dialog appears. Choose which dates the change applies to, then click Ok.
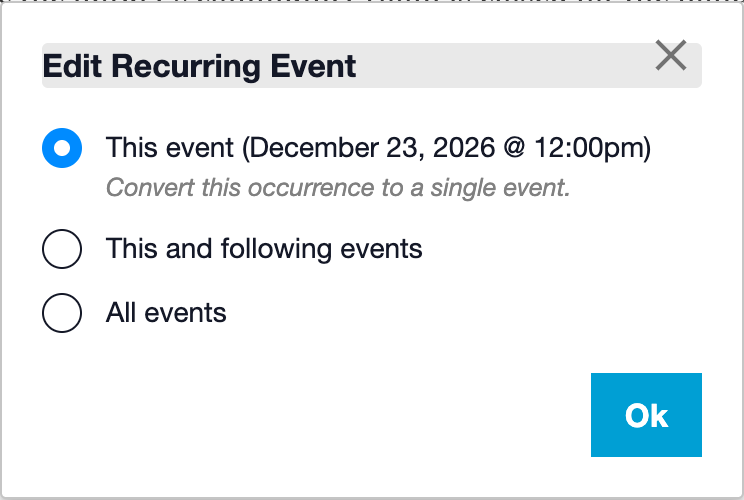
What Each Choice in the Dialog Does
- This event: Only the date you’re editing changes. It becomes a single event with no recurrence rules of its own and stays in the same Series. The other dates keep their details.
- This and following events: The date you’re editing and every later date change. Earlier dates keep their details. The recurring event is split in two: the original now ends before this date, and this date and the later ones become a new recurring event in the same Series.
- All events: Every date of the recurring event changes, and nothing is split off.
All events is selected by default, so check your choice before you click Ok. Depending on the date you’re editing, not every option is shown.
After you choose This event, the date is listed in Events in this Series without a recurring icon or a Convert to Single link, like December 23 in the screenshot above.
Convert One Date to a Single Event
In Events in this Series, each date of a recurring event also has a Convert to Single link. It has the same result as choosing This event: the date becomes a single event in the same Series, and the other dates don’t change.
The date is converted as soon as you confirm the prompt, before you make any other changes, and this can’t be undone. The new single event then opens in the editor, where you can edit it like any other single event.
Repeating on More Than One Pattern
To repeat an event on two patterns, for example on the first Tuesday and the third Wednesday of each month, use a Series. A Series groups any number of single and recurring events on one Series page.
- Create the first recurring event. When you publish it, a Series with the same name is created for it.
- Click Duplicate in the event editor, or hover over the event in Events > All Events and click Duplicate. The copy is saved as a draft in the same Series.
- Change the copy’s pattern and publish it.
The Series field in the event editor applies to the whole recurring event: changing it moves every date to the other Series. To move one date, first make it a single event by choosing This event when you save it, or with Convert to Single. Then change that event’s Series.
For more about creating and managing a Series, see Setting Up Event Series. For more about duplicating, see How to Duplicate Events.
Recurring Event Settings
Condense Recurring Events in Lists
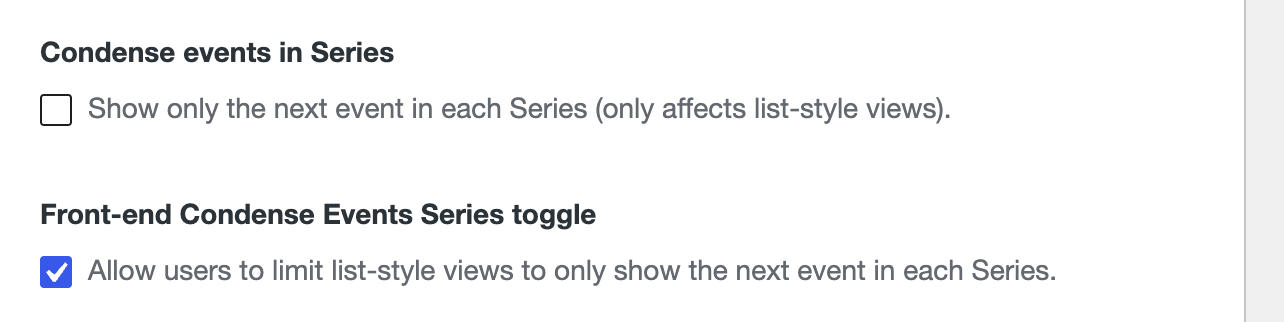
A daily or weekly event can fill a list view with the same title. Two settings in Events > Settings > General, under Viewing, help with this:
- Condense events in Series: List-style views, such as List view, show only the next date of each Series. Visitors can’t change this.
- Front-end Condense Events Series toggle: Adds a Condense Events Series toggle to list-style views, so visitors can choose. This option is hidden while Condense events in Series is checked, because the list is already condensed.
Click Save Changes.
Change the Recurrence Limit
When a pattern Never ends, dates are created up to 60 months (five years) ahead of the day you save the event. This limit keeps an endless event from adding too many dates to your database. To change it, add the snippet below with the Code Snippets plugin or to your theme’s functions.php file. You can raise it to 120 months (10 years) at most; a higher number is treated as 120. To learn more about adding snippets, see our guide to code snippets.
// Create dates up to this many months ahead for recurring events that never end.
function custom_recurrence_max_months( $value ) {
    return 120; // Change this to the number of months you need (120 at most).
}
add_filter( 'tribe_get_option_recurrenceMaxMonthsAfter', 'custom_recurrence_max_months' );
Recurring Events and Tickets
You can’t add standard tickets or RSVPs to a recurring event. The Tickets box shows “Standard tickets are not yet supported on recurring events.” Instead, you can:
- Sell one pass for every date: Add a Series Pass to the recurring event’s Series. A Series Pass gives an attendee access to every event in the Series. For example, for a weekly class that runs for ten weeks, people buy one pass and attend all ten classes. See Creating Series Pass Tickets.
- Sell tickets for each date: Create single events instead, add them to one Series, and add tickets to each event. This takes longer, but it lets people buy tickets for the dates they want, and the events still appear together on the Series page.
Next Steps
Now that you know how to set up recurring events, explore these related guides:
- Introducing Recurring Events: See what recurring events can do for your calendar.
- Setting Up Event Series: Group recurring and single events on one Series page.
- Creating Series Pass Tickets: Sell one pass for every date of a recurring event.
- Creating Events: Create the single events you add to a Series.