

General
Publishing and Scheduling Posts
WordPress makes it easy to control when your content goes live. This guide covers how to publish posts immediately, schedule them for a future date and time, and manage your scheduled content queue.
Publishing Posts
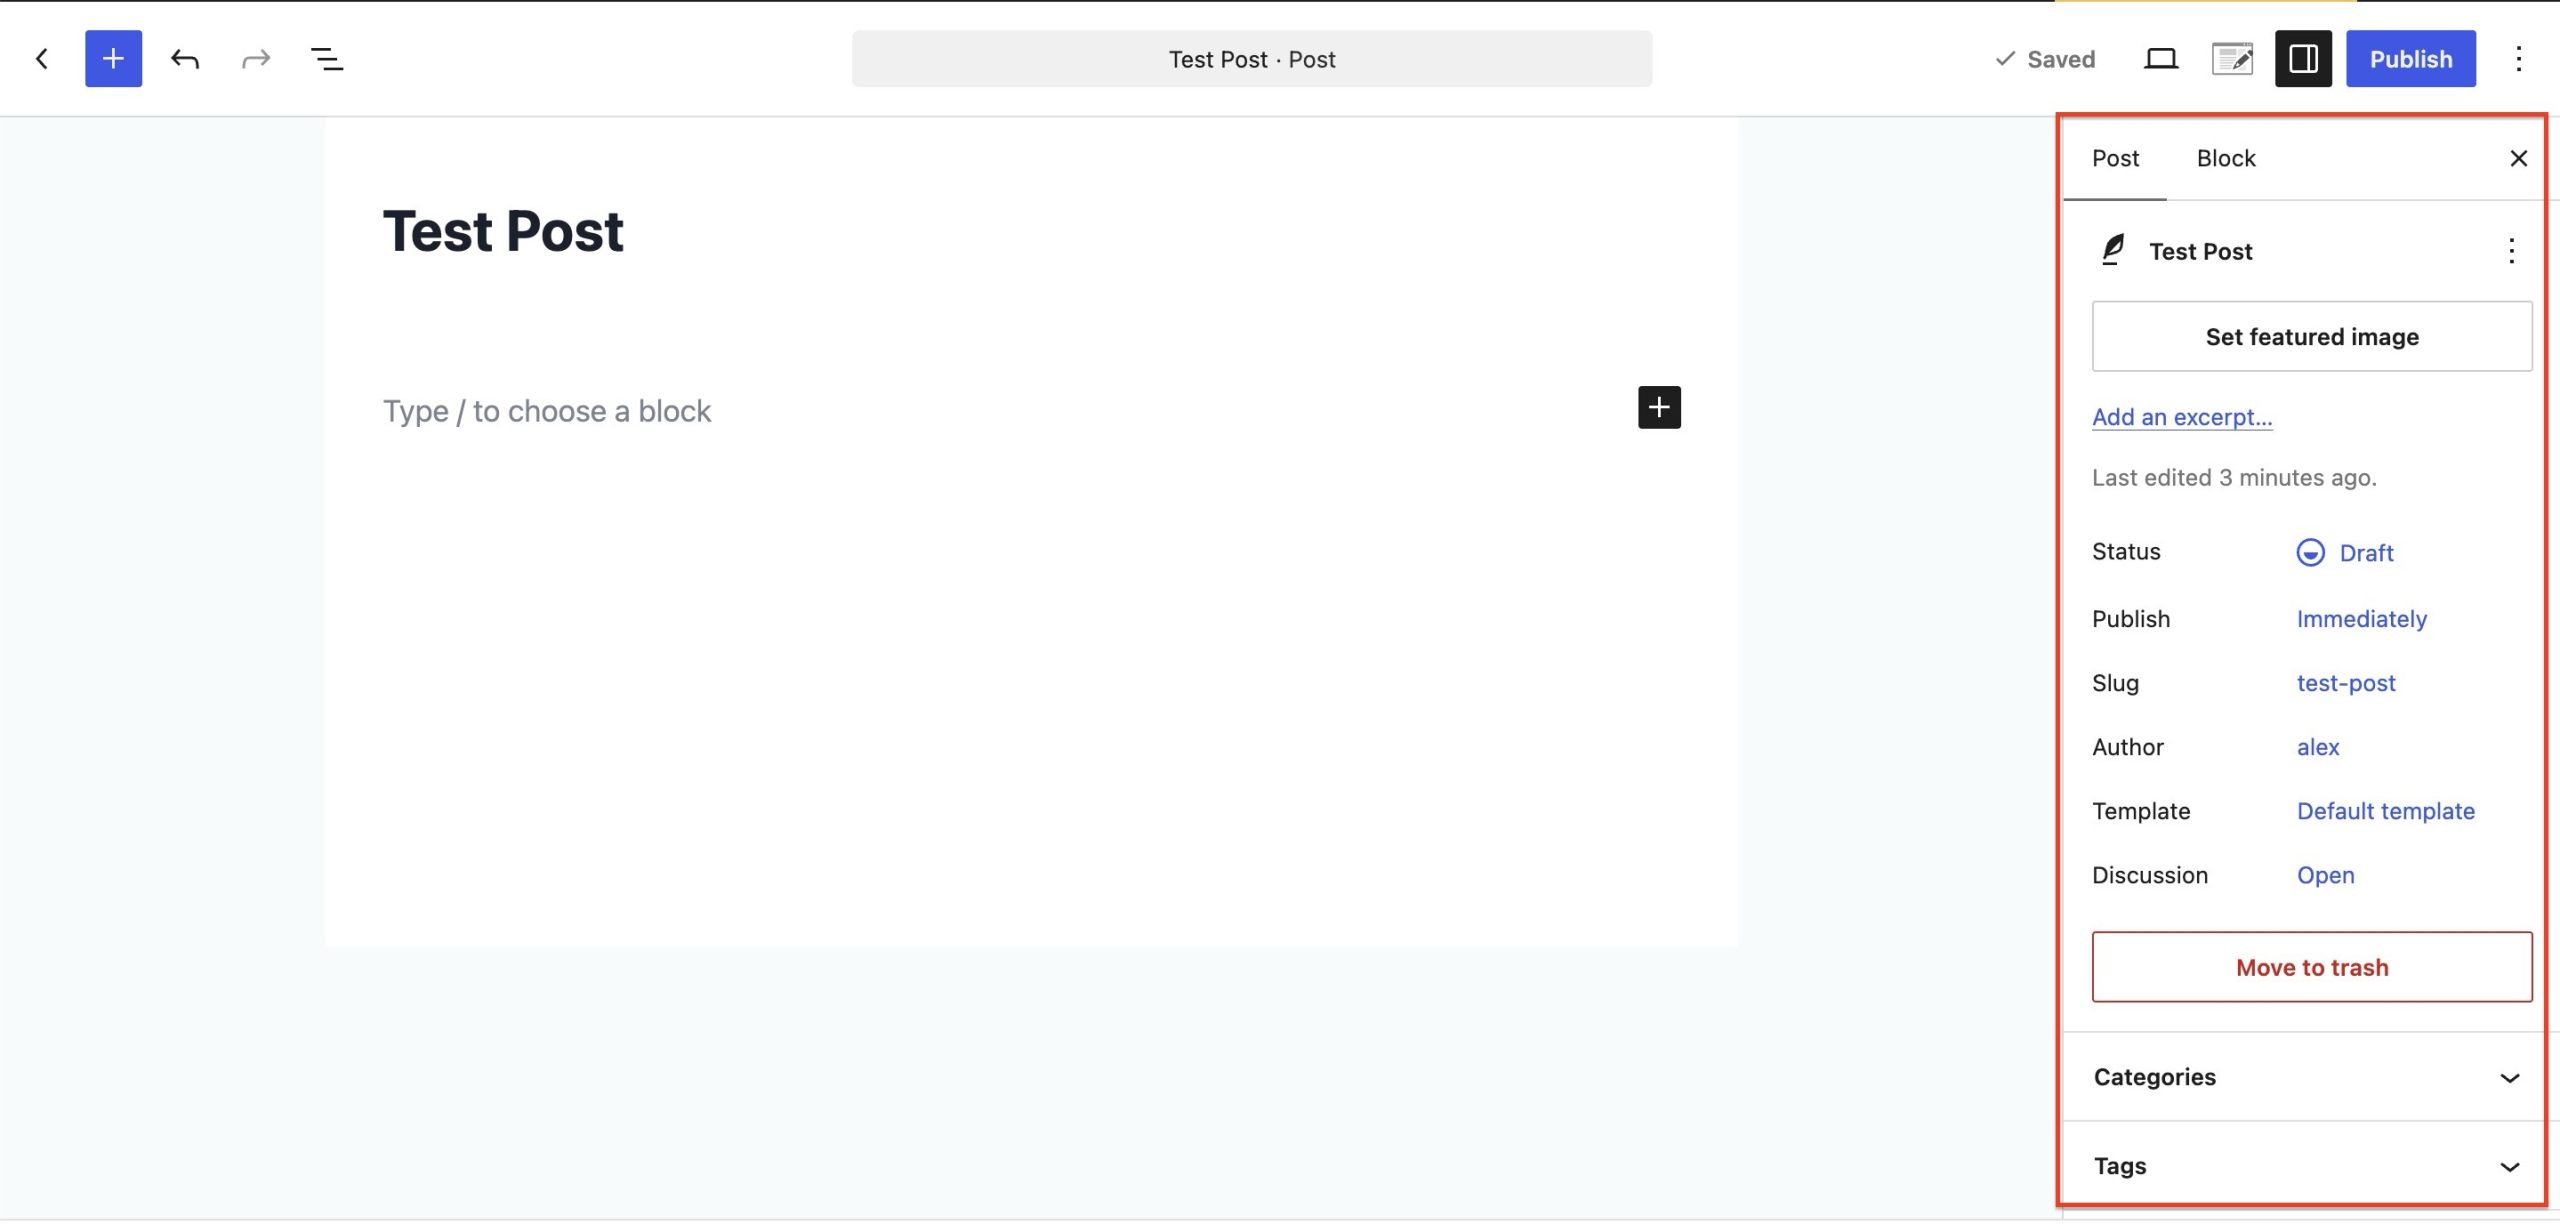
The publishing options for a WordPress post are found on the right-hand side of the editor under the Post tab:
Scheduling Posts
Scheduling WordPress posts is an easy way to control when your content is published. Use the built-in WordPress post scheduler to add a time to publish.
The WordPress posts scheduling feature is found in the Post tab on the right side of the post editor page.
To schedule a post for publication, click the date and time next to Publish. You’ll now see a drop-down option to select the month, date, and year to publish the post, even the exact hour and minute.
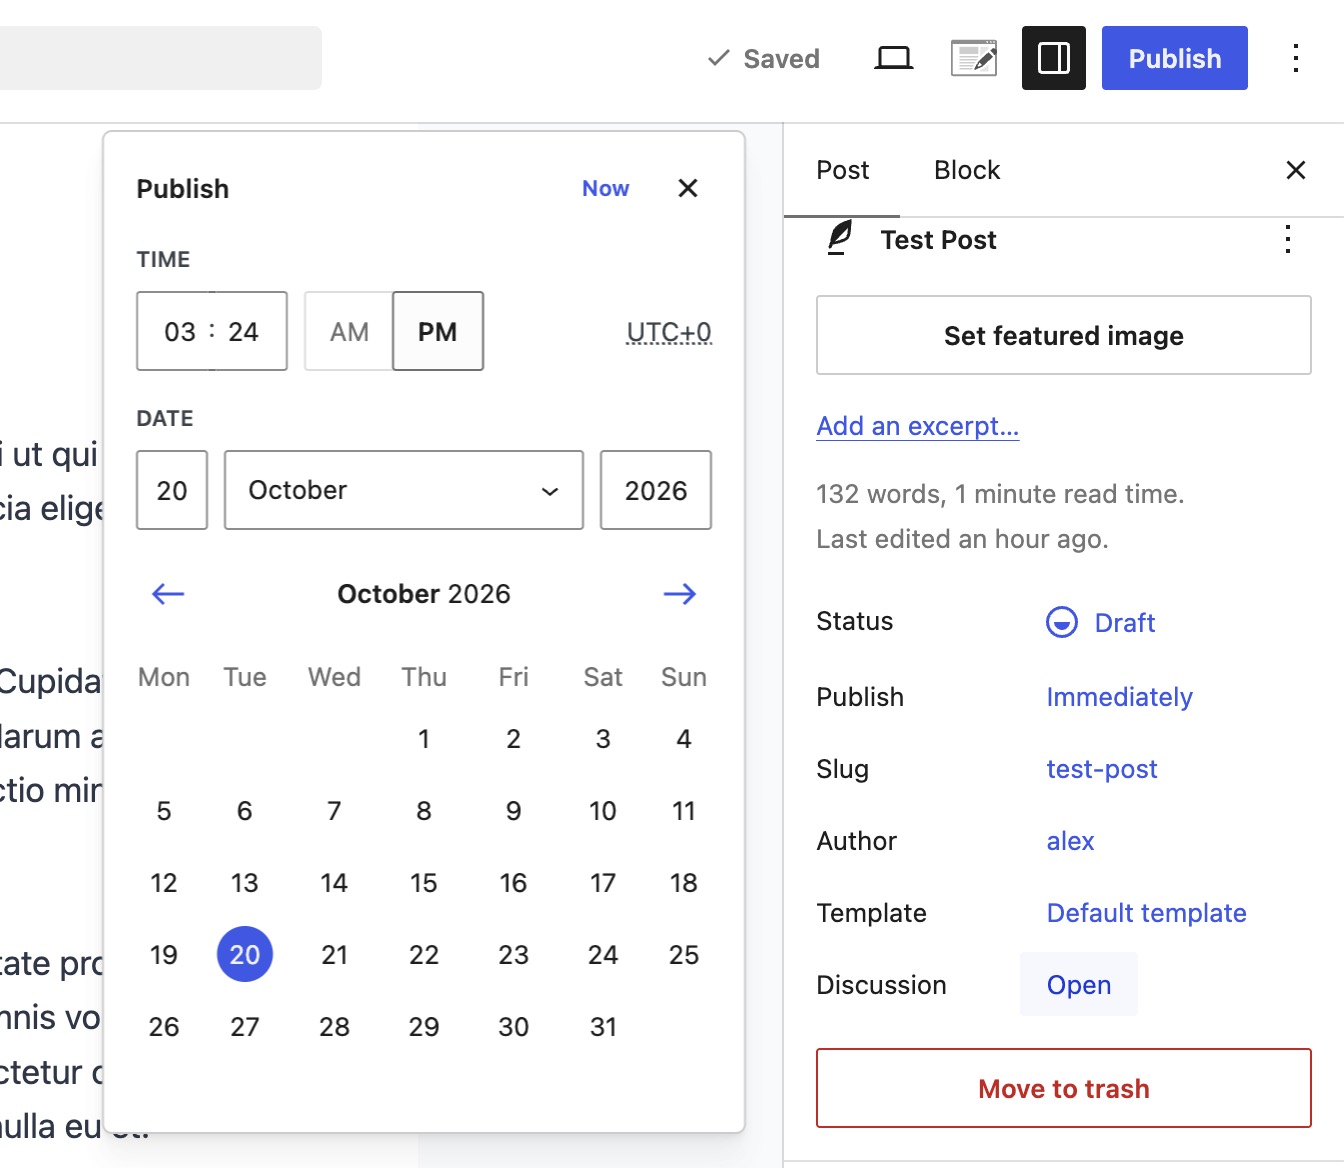
For example, if you’d like to publish this post at 8 a.m. tomorrow, select tomorrow’s date, set the time for 8 a.m., and click the x to close this box.
Click the Update button, and you’ll see this status changed to Schedule.
Post Settings and Options:
1. Post Status & Visibility
- Draft: Indicates the post is not ready to publish.
- Pending: Marks the post as waiting for review before publishing.
- Private: Restricts visibility so the post is only visible to site admins and editors.
- Scheduled: Sets the post to publish automatically on a chosen date.
- Published (default): Anyone can view the post once published.
- Password protected: Restricts access so the post is only visible to visitors who know the password.
- Sticky: Pins the post to the top of the blog.
2. Publishing Timing
- Publish Immediately: Default setting for instant publishing.
- Schedule Post: Choose a future date and time for automatic publishing. Useful for planning content in advance.
- Backdate Post: Change the date/time to adjust when the post appears in chronological order.
3. Drafts & Previews
- Save Draft: Save progress without publishing.
- Preview: See what the post will look like when live. Options include:
- Full-width desktop view
- Tablet view
- Mobile view
- Preview in a new browser tab
4. Pre-Publishing Checklist
- Before going live, WordPress shows a confirmation screen where you can review:
- Post visibility
- Publish date/time
- If you don’t want this step, you can disable it by unchecking the option at the bottom.
5. Publishing
- Once satisfied with all settings, click Publish to make the post live on your site.
Key Takeaway:
WordPress gives you flexible publishing controls—allowing you to schedule posts, control visibility, feature important content, and preview across devices before going live. These tools help you manage your publishing workflow effectively.