

Solid
Kadence Security Features Settings
Coming soon: Solid Security is becoming Kadence Security. You may see both names used while we update the product, documentation, and customer experience.
This article covers the Features tab in Security → Settings. For Global Settings and Notifications, see Kadence Security Global Settings and Notifications. For User Groups and Advanced Settings, see Kadence Security User Groups and Advanced Settings.
Kadence Security’s Features settings screen is divided into four major areas of security features that you can enforce on your site. Each of these areas contains modules you can turn ON/OFF, each with settings you can tweak further.
You can view the overview of each area below. Links to more thorough documentation are provided where necessary for a deeper look into specific features.
In wp-admin, open Security → Settings → Features. Save your changes when you’re done editing.
Login Security
Here, you can find the features that secure your site’s login functionality.
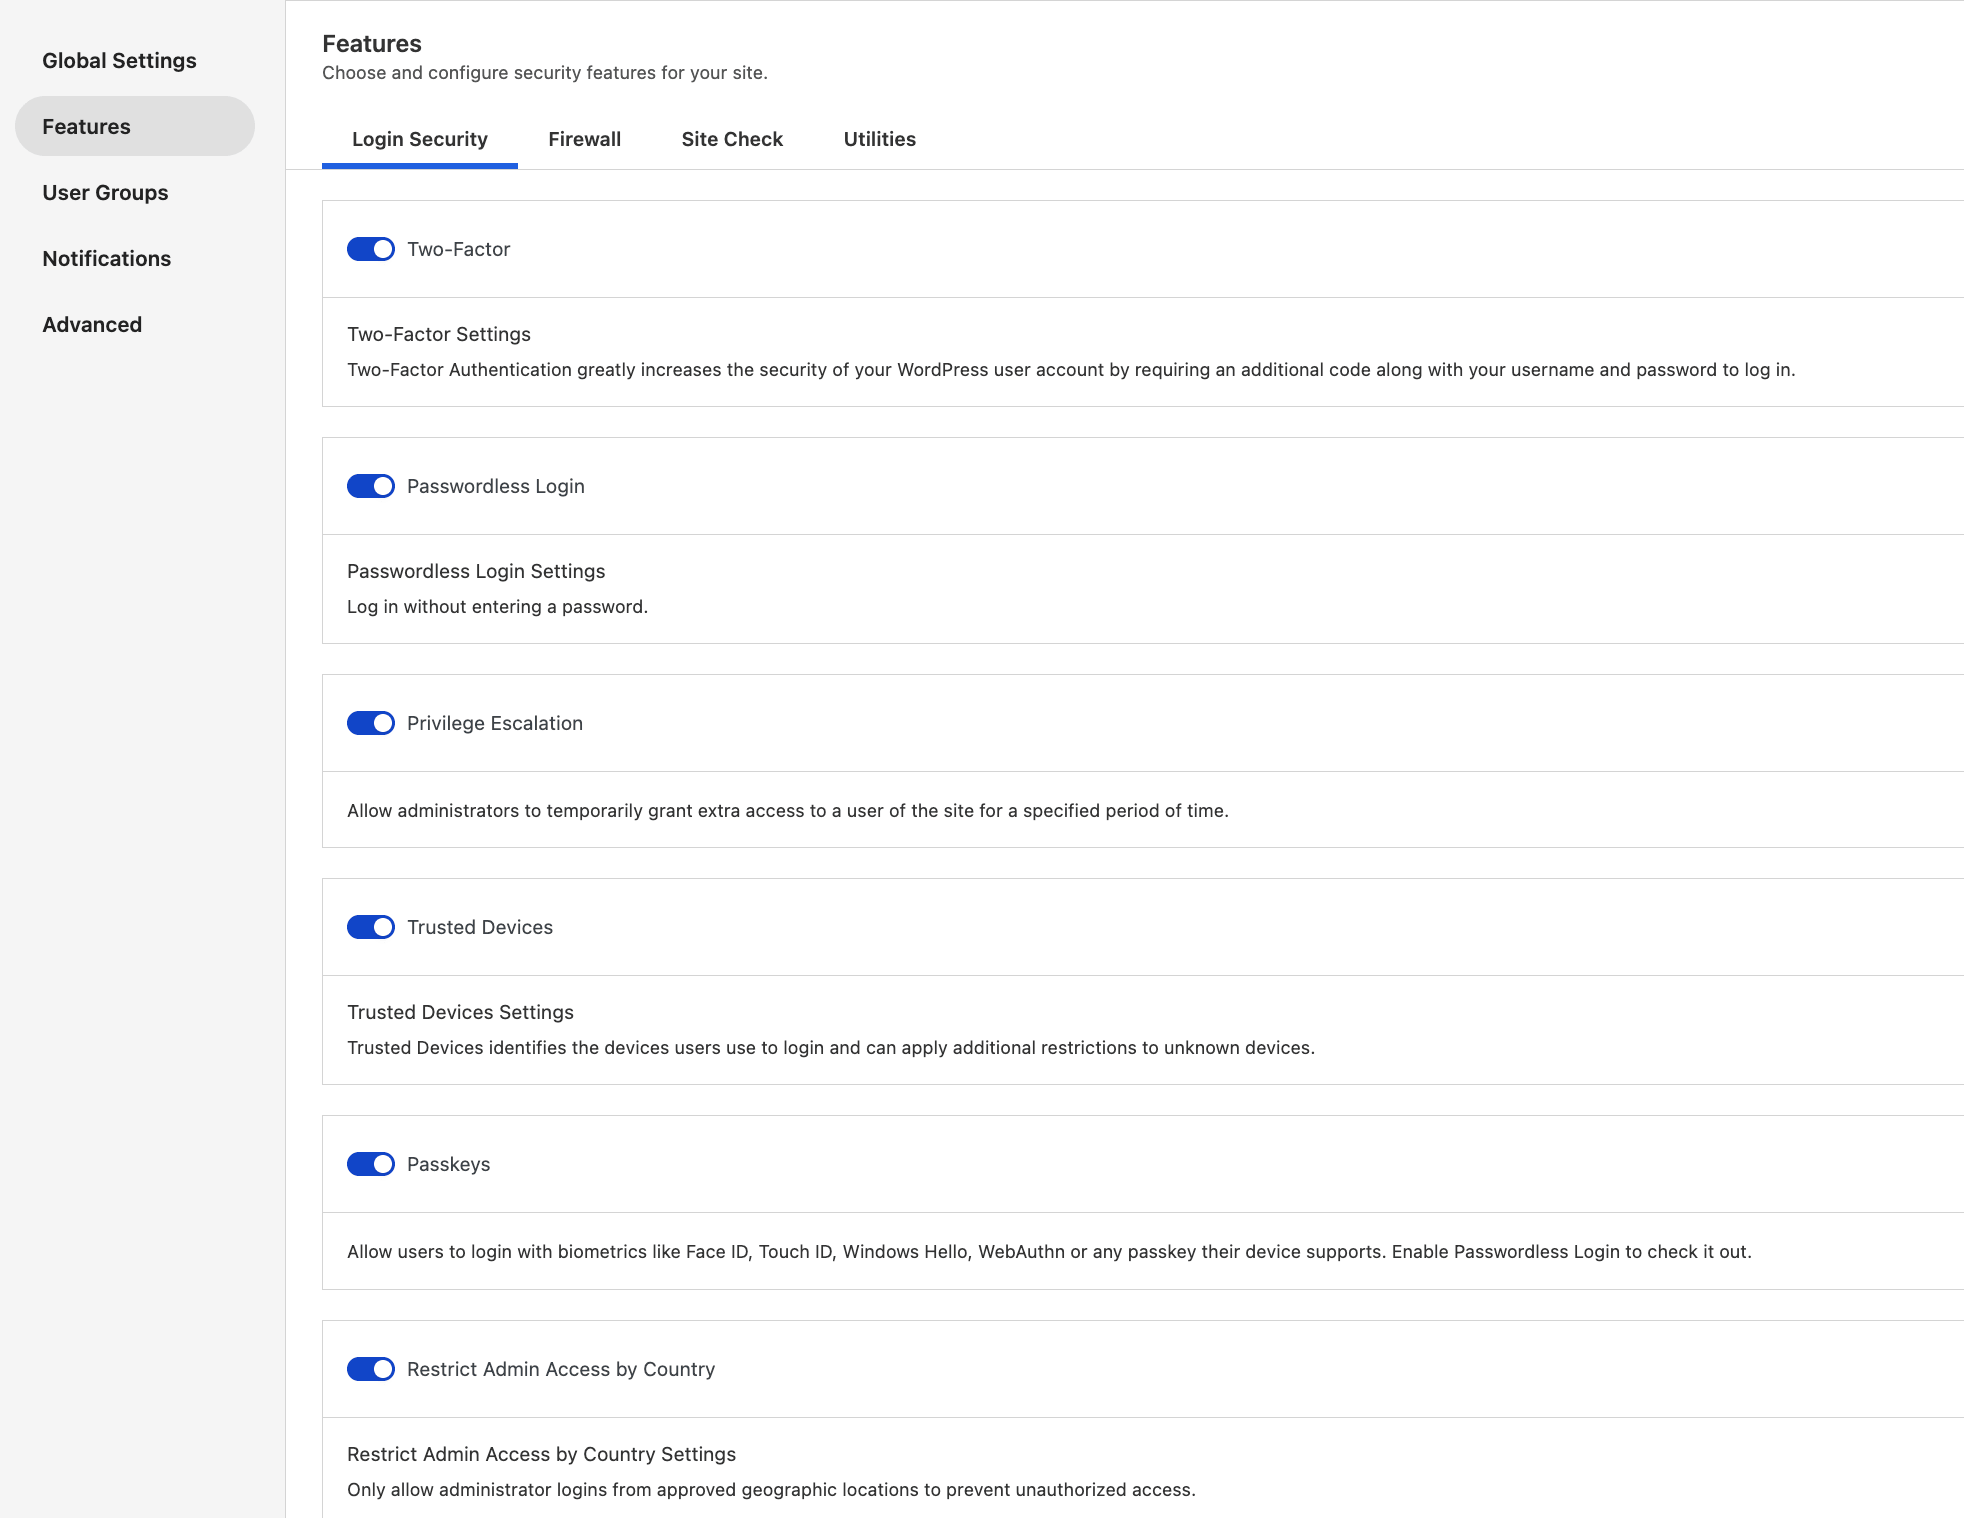
Two Factor
Enabling Two-Factor Authentication greatly increases the security of your WordPress user account by requiring additional information, beyond your username and password, to log in.
For full setup guidance, see Kadence Security Two-Factor Authentication (2FA) Settings Guide.
Privilege Escalation
Privilege Escalation allows administrators to temporarily grant additional access (Administrator or Editor privileges) to a site user for a specified period.
For example, a contractor can be granted developer access to the site for 24 hours, after which his or her status would be automatically revoked.
To grant extra access, head to the user’s Profile page and find the setting within the Kadence Security User Security UI
Note: When this setting is in place, the user’s displayed role remains the same—only their privileges are updated.
Passwordless Login
Enable Passwordless Login to bypass password and Two-Factor requirements at login by allowing users to log in with Magic Links or Passkeys.
The Magic Link email contains a special login link that redirects to the WordPress login page, and it’s sent to the user’s registered email address shown in your user profile.
Passkeys let you log in using roaming or platform authenticators without the hassle of remembering passwords.
Trusted Devices
Trusted Devices identifies the devices users use to log in and can apply additional restrictions to unknown devices. More information on Trusted Devices can be found here: Understanding Trusted Devices in Kadence Security.
Passkeys
Passkeys are a password-free login method that uses cryptographic keys stored on your device. Users can log in with biometrics (platform authenticators) like Face ID, Touch ID, Windows Hello, WebAuthn, or physical security keys (roaming authenticators) that their device supports.
See also What are Passkeys for WordPress Websites?.
Restrict Admin Access by Country
Restrict Admin Access by Country settings allow you to harden your site’s most sensitive area by establishing a geographic perimeter around your WordPress dashboard. This powerful defensive measure enables you to define a trusted list of approved countries for /wp-admin/ access, effectively neutralizing the threat of stolen credentials by blocking unauthorized login attempts from outside your region before they reach your site.
Firewall
The Firewall features help prevent bad users from brute-forcing their way into your site.
For a deeper look at Firewall configuration, Patchstack virtual patching, and related settings, see All about Firewall with Kadence Security.
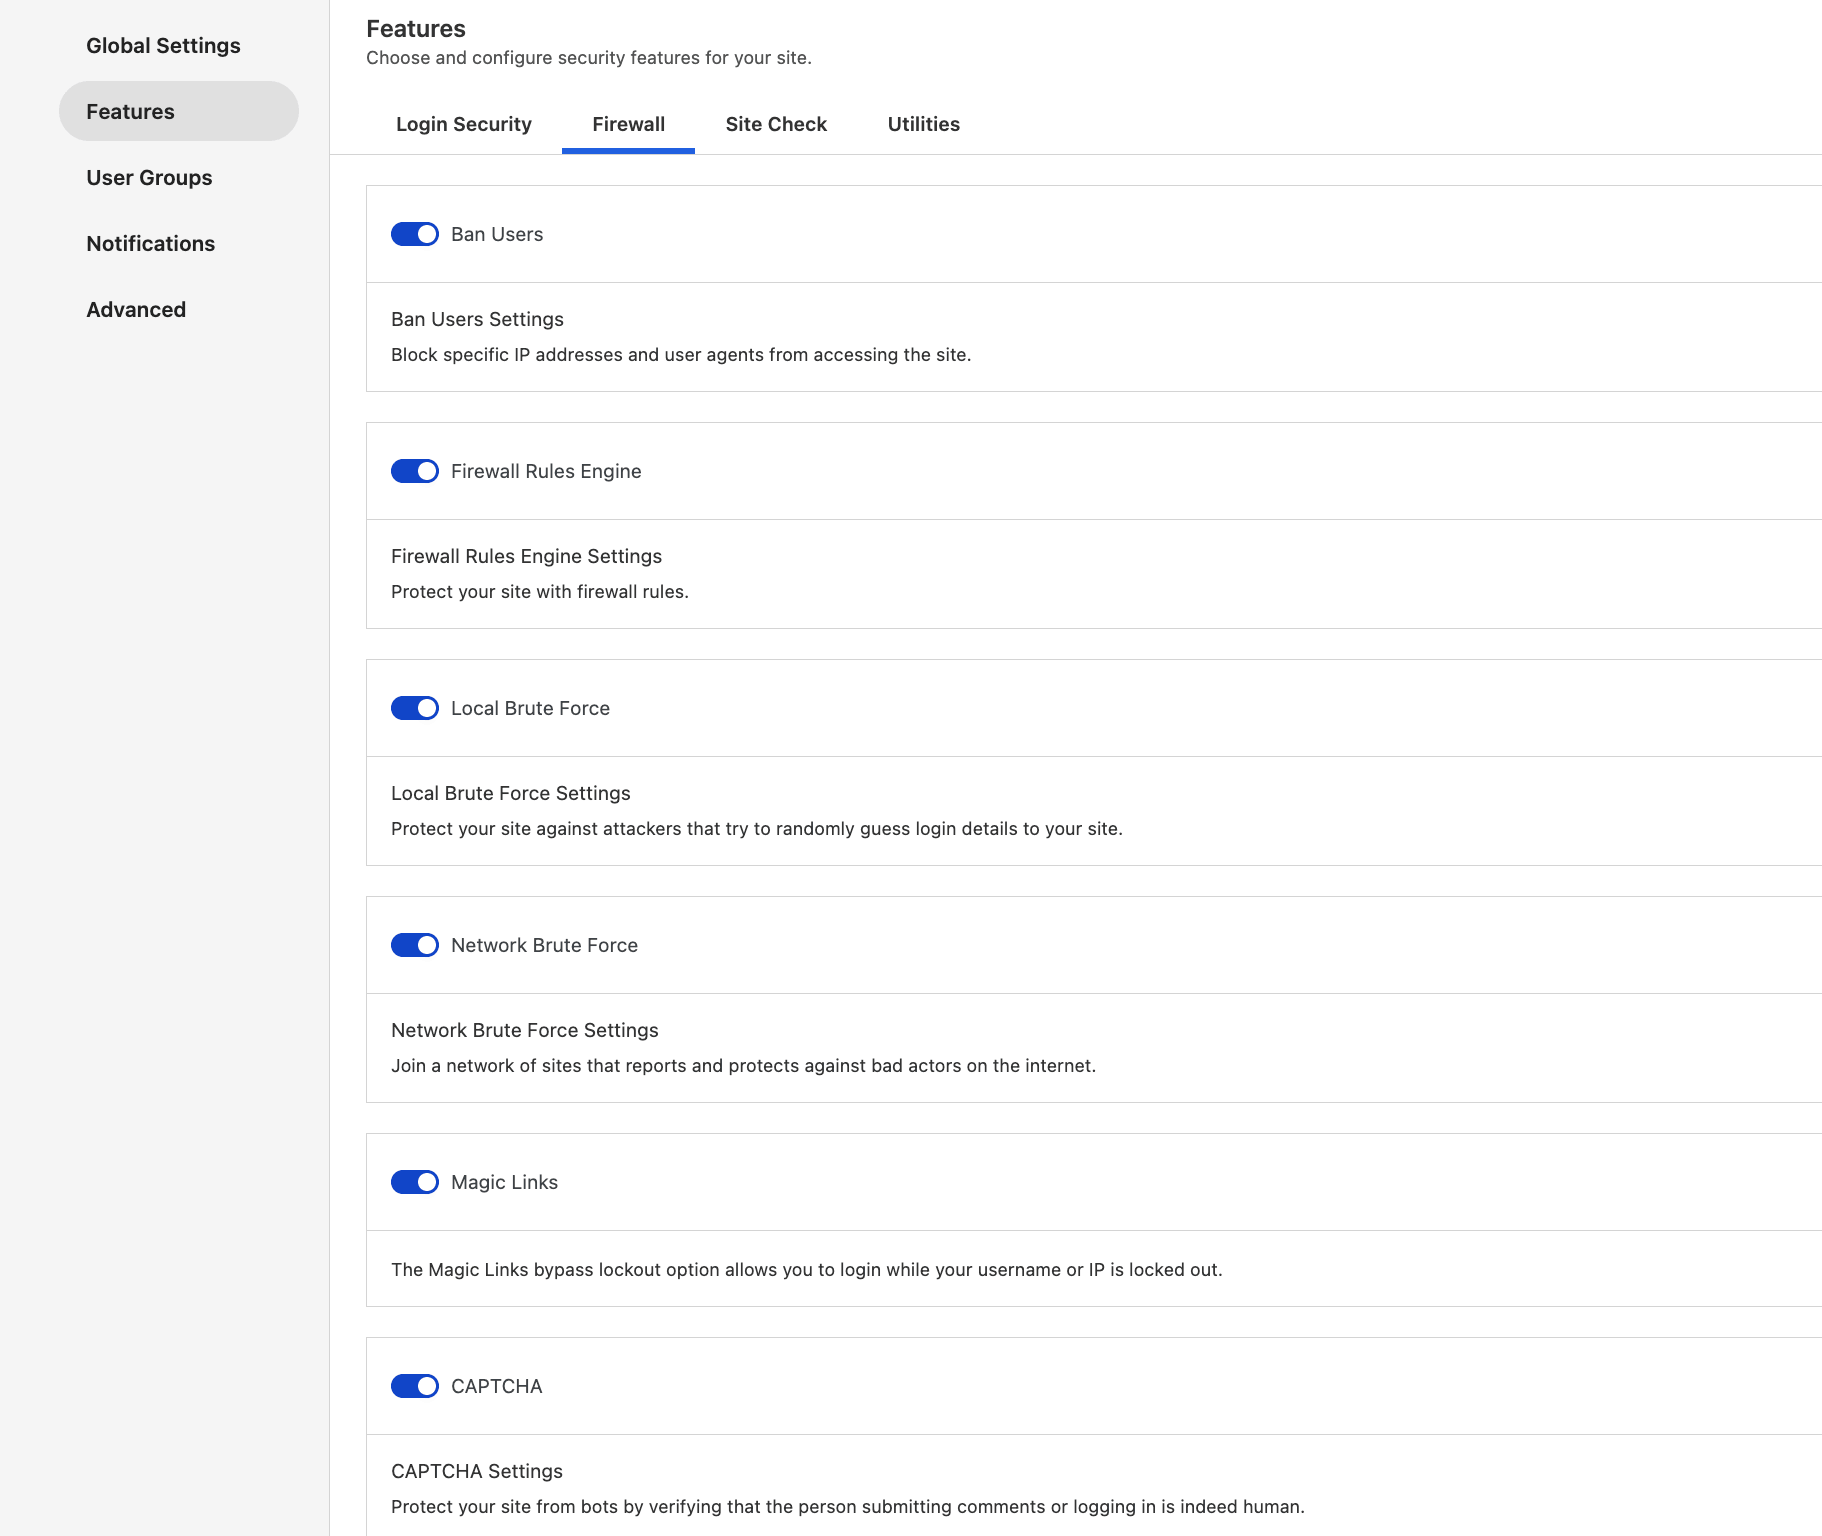
Ban Users
Enabling this lets you ban specific IP addresses and User Agents from accessing the site. When you open the dropdown for this setting, only the section for banning User Agents appears. The IP banning area is located on the Security -> Firewall or Security -> Dashboard pages.
Note: The Ban Users module is not available if IP Detection has not been configured for your site. See Global Settings → IP Detection in Kadence Security Global Settings and Notifications, including the “Feature unavailable” notice related to IP detection.
Default Ban List
Enabling Default Ban List adds the excellent ban list developed by Jim Walker of HackRepair.com.
Enable Ban List
Activating Enable Ban List gives you the option to limit the number of banned IP addresses in your server and lets you ban user agents.
Limit Banned IPs in Server Configuration Files
Set the limit of banned IP addresses allowed in your Server Configuration Files (.htaccess and nginx.conf) to reduce the chances of having a server timeout. This is good for servers with limited resources that cannot handle a large list of banned IPs in the server file. The default limit is 100.
Ban User Agents
Enter specific User-Agent Strings that will not be allowed access to your site.
Firewall Rules Engine
The Firewall module monitors traffic against known bad patterns (from Patchstack and your own rules).
This is where you configure the maximum number of firewall rule violations allowed per host/user within a set time period. If a visitor triggers too many violations, their IP will be locked out.
Adjust the Max Firewall Violations Per IP Address and Time period to determine how many violations are retained, matching how strict you want the site’s protection to be.
Local Brute Force
The Local Brute Force module limits the number of failed login attempts allowed before a lockout. Enabling this helps you protect your site against attackers who try to brute-force their way in by randomly guessing login details.
This module has a two-tier system:
- Temporary Lockouts: After 5 failed attempts per IP (or 10 per user), the IP/user gets temporarily locked out for 15 minutes (triggering the Site Lockout Notification).
- Permanent Bans: After 3 temporary lockouts are recorded within 7 days, the IP address is permanently banned and added to the Banned IPs list.
Default configuration:
- 5 failed attempts per host (IP), or
- 10 failed attempts per user account will trigger a temporary lockout (15 minutes).
- If a host/user hits 3 temporary lockouts within 7 days, they’ll be permanently banned.
You can customize these thresholds via the Max Login Attempts per IP/User and Minutes to Remember Bad Logins fields.
Network Brute Force
Enabling Network Brute Force lets you join Kadence Security’s network of sites that report against bad IPs on the internet.
How it works: Participating sites share data on malicious IPs. If an IP is flagged as abusive across the network, it can be immediately blocked on your site, even if the login attempt is technically valid.
Note: You must register an email address in the settings to get an automatic API Key.
Magic Links
The Magic Links module enables an option to help you bypass a lockout if it’s triggered accidentally.
How it works: When a lockout is tied to a specific user, a “Send Magic Link” button will appear on the lockout page. Clicking it sends an email with a short-lived login link.
Limitations: Magic Links only appear when the lockout is tied to a known user account. If the lockout is IP-based (e.g., repeated 404s, generic host bans), the “Send Magic Link” button won’t be shown.
CAPTCHA
Kadence Security Pro’s CAPTCHA allows you to set and configure protection for login forms on your site. This helps with everything from malicious logins to spam registrations, a common attack on sites that allow user registration.
To dive deeper into the CAPTCHA settings, supported providers, and best practices, learn more here: Using Kadence Security’s CAPTCHA.
Site Check
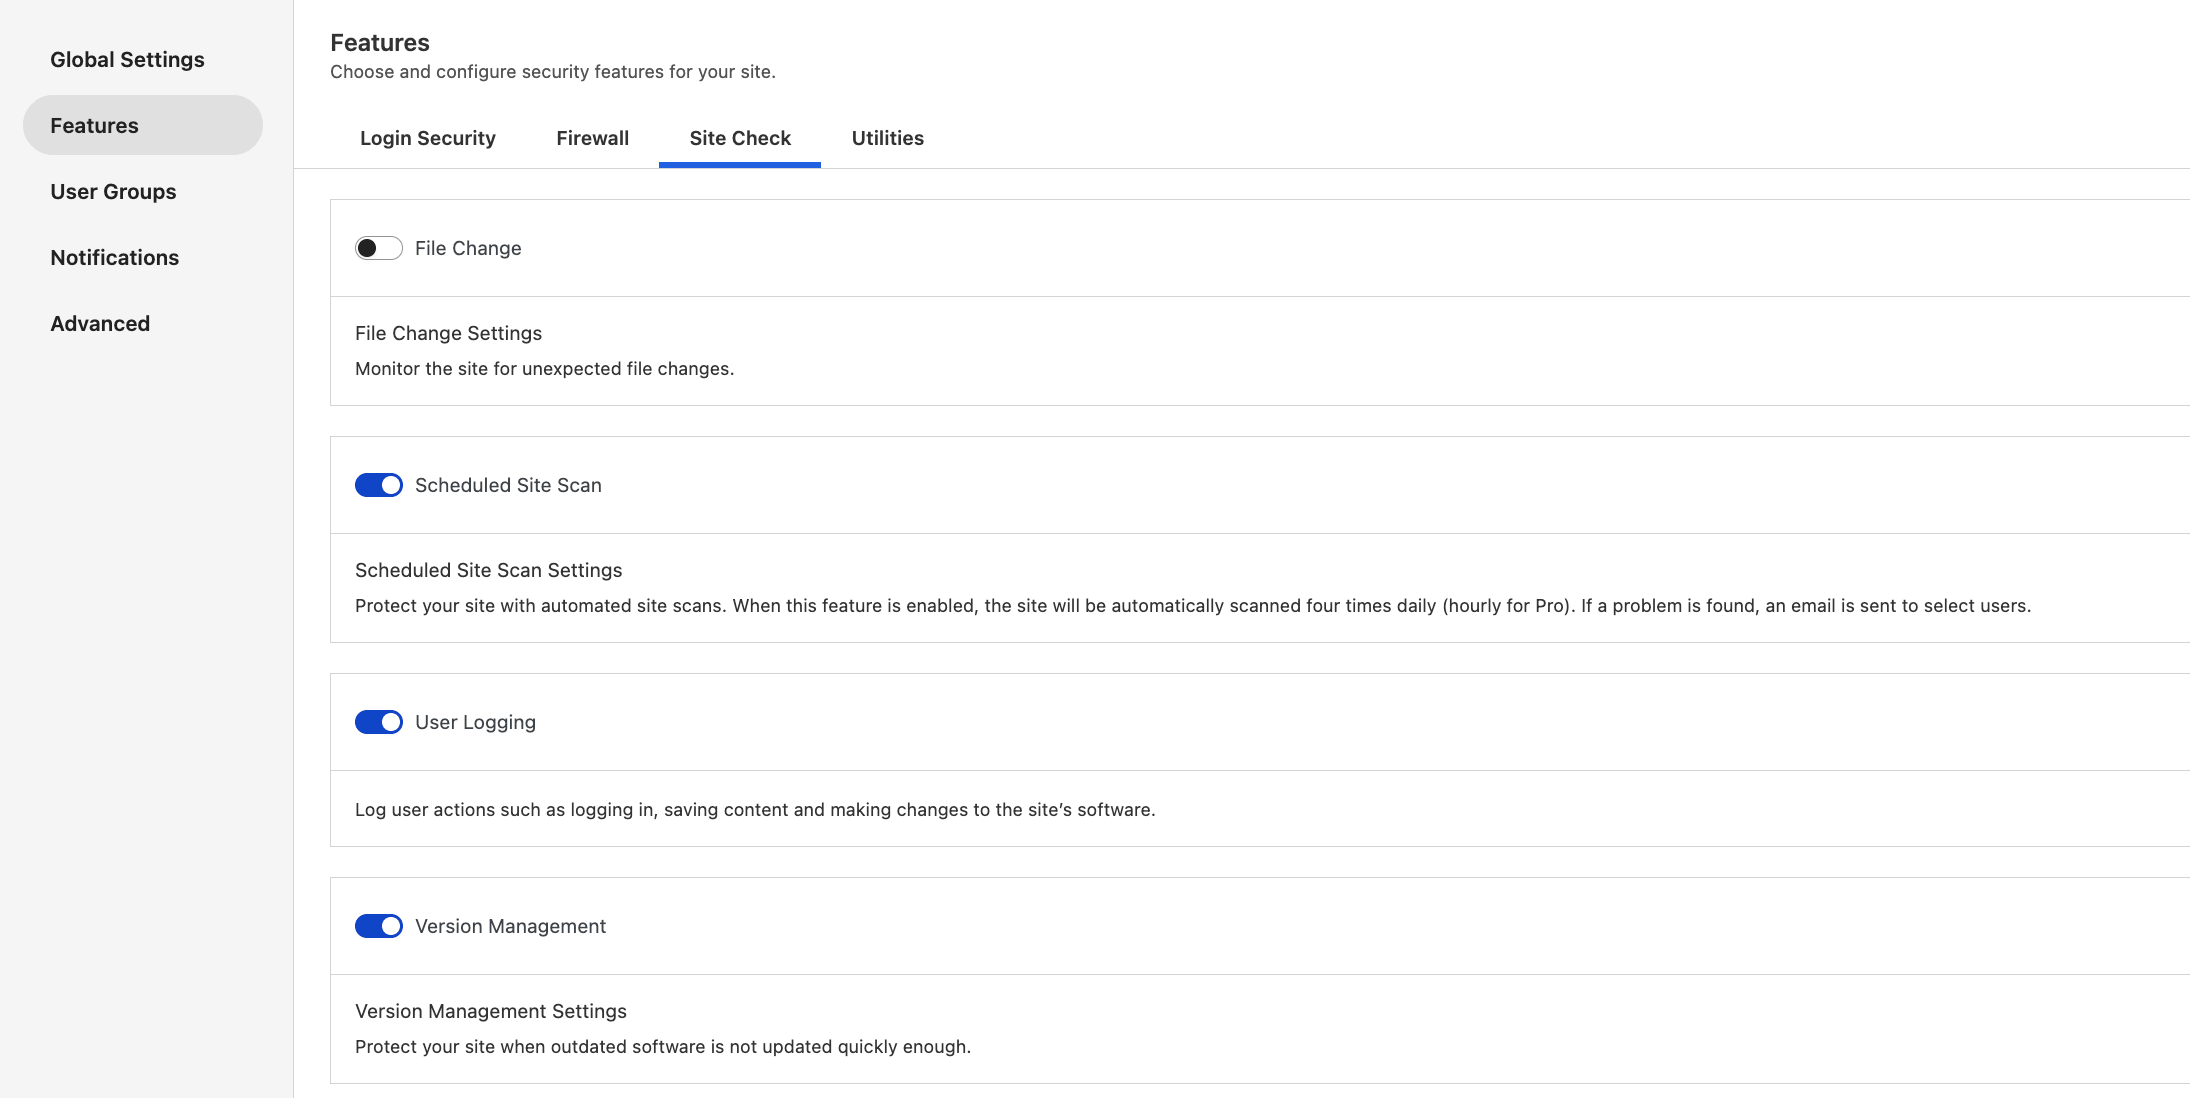
File Change
File Change detection enables monitoring of which files have changed in your WordPress installation, alerting you to changes you did not make. This feature helps identify security breaches by alerting you when files on your website change, since malware typically adds, removes, or modifies them.
Site Scan Scheduling
Automates the Site Scan to run four times per day if you use Kadence Security Basic, or every hour if you use Kadence Security Pro. If a vulnerability is found that wasn’t identified in the last scan and its priority meets the threshold defined in your settings, an email will be sent to the admin or selected users.
To activate automatic scanning, navigate to Security → Settings → Features → Site Check, and toggle ON the Scheduled Site Scan module.
Note: When Scheduled Site Scan is enabled, Kadence Security runs automatic site scans four times per day on Basic and every hour on Pro. If a scheduled scan finds issues that warrant a warning, Kadence Security can email Site Scan Results to selected users. For vulnerabilities, the email focuses on issues that meet the Vulnerability Notification Threshold (Scheduled Site Scan settings; default: medium and high priority) and were not already reported on the previous scan. Turn the email on or off and choose recipients under Notifications.
User Logging
User Logging enables logging of user actions such as logging in, saving content, and making changes to the site’s software.
Version Management
Version Management automates updates to WordPress core, themes, and plugins, and tightens protections when a site is running outdated software. It also integrates with vulnerability intelligence and the firewall to provide real-time protection.
Note: Enabling Version Management places Kadence Security in control of updates and disables WordPress’ default per-plugin/theme auto-update behavior. This avoids conflicts and gives more granular control over timing and risk.
See also Vulnerability Protection with Kadence Security.
Why use Version Management
Keeping software updated is one of the most effective ways to prevent compromises. Version Management helps in two ways:
- Automatic updates with control. Apply updates immediately, delay them for a defined period, or disable auto-updates for specific components that require testing.
- Real-time protection for known vulnerabilities. When an update fixes a security issue, Version Management can automatically apply it. If no fix exists, the firewall’s virtual patching (via Patchstack) provides interim protection.
Use Version Management if you:
- Maintain multiple plugins/themes and want a predictable update policy.
- Need to delay high-impact releases but still patch security issues quickly.
Where to enable Version Management
- In WordPress, go to Security → Settings → Features → Site Check → Version Management.
- Toggle Version Management ON, then expand the settings.
Version Management Settings
Core Updates
Automatically install the latest WordPress release. Recommended for maintenance and security releases. Major releases should be applied after testing on complex sites.
Plugin & Theme Updates
Choose how Kadence Security handles each plugin and theme:
- Enable – Update as soon as a release becomes available.
- Delay – Set a delay (in days) before applying an update. Useful for major releases that often get quick follow-ups.
- Disable – Exclude from auto-updates; you will update manually.
Auto Update If Fixes Vulnerability
When the Site Scanner detects a known vulnerability and an update is available, Kadence Security applies it immediately—regardless of any general delay setting.
Note: This setting determines the status for the Security → Firewall page’s Real-Time Updates Inactive/Active badge.
Why does Security Firewall show “Real-Time Updates Inactive”?
The Firewall screen shows a Real-Time Updates status depending on the Version Management settings:
- Active — Version Management is enabled. Vulnerability intelligence and virtual patching are in place, and update automation can act on scan findings.
- Inactive — Version Management is not enabled. Turn on Version Management to activate real-time protections and automation.
It is also recommended to confirm the site is licensed and can reach Kadence/Patchstack services (no outbound firewall blocks, no blocked REST requests).
Scan for Old WordPress Sites
Detect additional WordPress installations on the same hosting account that may have been abandoned and remain vulnerable.
Utilities
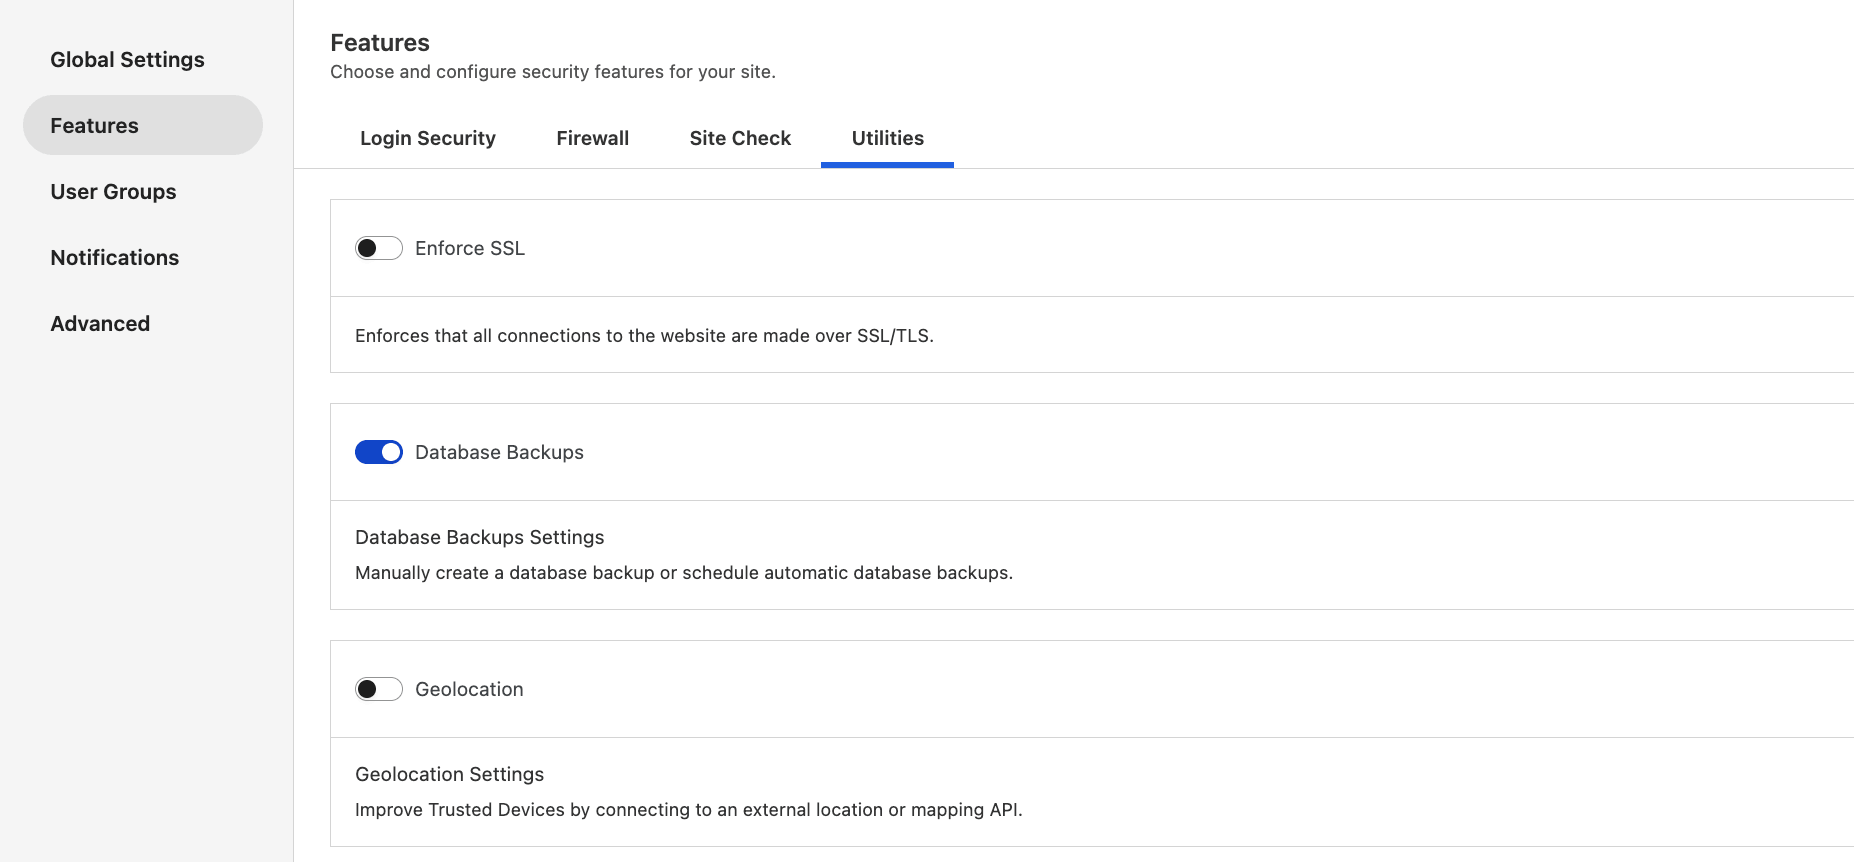
Enforce SSL
Enforce SSL ensures your website’s data is secure by forcing SSL connections with Kadence Security Pro.
This enforces that all connections to the website are made over SSL/TLS by adding the CF-Connecting – define( 'FORCE_SSL_ADMIN', true); constant on your wp-config.php file.
Note: This setting is not equivalent to an SSL certificate, so you still need to create one for your site.
Before You Begin:
- Obtain an SSL Certificate: Ensure your website has an active SSL certificate. Contact your hosting provider if assistance is needed.
Best Practices
- Test Your Website: After enabling forced SSL, thoroughly check your site for functionality, including identifying and fixing mixed content warnings.
Benefits of Forced SSL
- Enhanced Security: Protects sensitive data, such as login credentials and payment information.
- Improved SEO: HTTPS improves search engine rankings.
- Increased Trust: Reassures users that their data is secure, especially for e-commerce sites.
Database Backups
Database Backups ensure you can recover your website’s content and settings in the event of an emergency. While Kadence Security Pro’s Database Backups feature provides an excellent redundancy layer, exploring a complete backup solution, such as Kadence Backups (formerly Solid Backups — NextGen), is recommended for a more comprehensive approach to safeguarding your site.
This module lets you create a database backup or schedule automatic backups. These backups can be saved locally on your server, emailed to you, or both.
Note: This setting won’t appear if you have Solid Backups – Legacy activated on the site.
How it works
- The plugin first creates a raw
.sqlfile of your database. - If “Zip” is enabled, it attempts to compress that
.sqlinto a.zip. If the zip succeeds, the.sqlis deleted. - Once the backup is written, the system prunes older backups, keeping only the number you specify in “Backups to Retain“.
- Retention only applies to backups stored locally. If you select Email Only, pruning is skipped.
Set the Backup Interval:
Decide how often you want backups to run. Enter the number of days between backups in the “BACKUP INTERVAL” field. For example, entering “3” will create a backup every three days.
Choose Where to Save Backups:
- Save Locally and Email: This option saves a copy of your server’s backup and sends a copy to your email address.
- Email Only: This sends the backup to your email address only.
- Save Locally Only: This saves the backup only on your server.
Compress Backup Files (Optional):
- By default, Kadence Security Pro compresses your backup files with a zip archive. This usually helps, but if you have any problems with backups, you might need to turn this off.
Choose Which Tables to Back Up (Optional):
- Included Tables: List the specific database tables you want to include in the backup. WordPress core tables are always included automatically.
- Excluded Tables: List any tables you don’t want to include in the backup. This can be useful for very large tables, such as noncritical logs.
Why Back Up Your Database
Your WordPress database stores all your website’s content, settings, and user information. Regularly backing it up is crucial for these reasons:
- Protection against data loss: If your site crashes, gets hacked, or you make a mistake during an update, a backup lets you restore everything quickly.
- Easy migration: Moving your website to a new server is much simpler when you have a recent backup.
- Peace of mind: Knowing you have a secure copy of your data reduces stress and lets you focus on other things.
Common Issues
If you see raw .sql files piling up or pruning not working, the backup job likely isn’t reaching the zip + prune step. The following are the typical causes of this problem:
- PHP execution time too low (large DBs exceed 60s). See this guide on how to increase PHP execution time.
- Insufficient disk space for
.sql+.zip. - File permissions prevent deletion.
- WP-Cron timeouts or large tables slow the process.
Security Check Pro
Security Check Pro determines the appropriate method for identifying your site visitors’ IP addresses based on the server configuration.
Note: This setting is only shown in Kadence Security Basic. Kadence Security Pro uses the Security Check Pro setting by default.
Geolocation
Kadence Security Pro uses Geolocation for the Trusted Devices module to help you identify suspicious login attempts. By showing you the approximate location of unrecognized logins, you can quickly assess potential threats and take action to protect your site.
This improves the Trusted Devices feature by connecting it to an external location/mapping API of your choosing.
Why Use Geolocation
- Identify suspicious activity: See where unrecognized logins originate to determine whether they’re legitimate or potentially malicious.
- Strengthen site security: Geolocation data adds another layer of information to help you assess and respond to potential threats.
- Peace of mind: Gain greater awareness of who is trying to access your site and from where.
Important Notes
- Geolocation provides an approximate location, not an exact address.
- Keep in mind that some users might use VPNs or other methods to mask their true location.
Learn more about configuring Geolocation in Understanding Trusted Devices in Kadence Security.
Once you’ve configured the Features settings, don’t forget to save your changes!
Related: Kadence Security Global Settings and Notifications · Kadence Security User Groups and Advanced Settings · All about Firewall with Kadence Security · All about Kadence Security Site Scans · Vulnerability Protection with Kadence Security · Kadence Security Dashboard