

Solid Security
Security Logs
Coming soon: Solid Security is becoming Kadence Security. You may see both names used while we update the product, documentation, and customer experience.
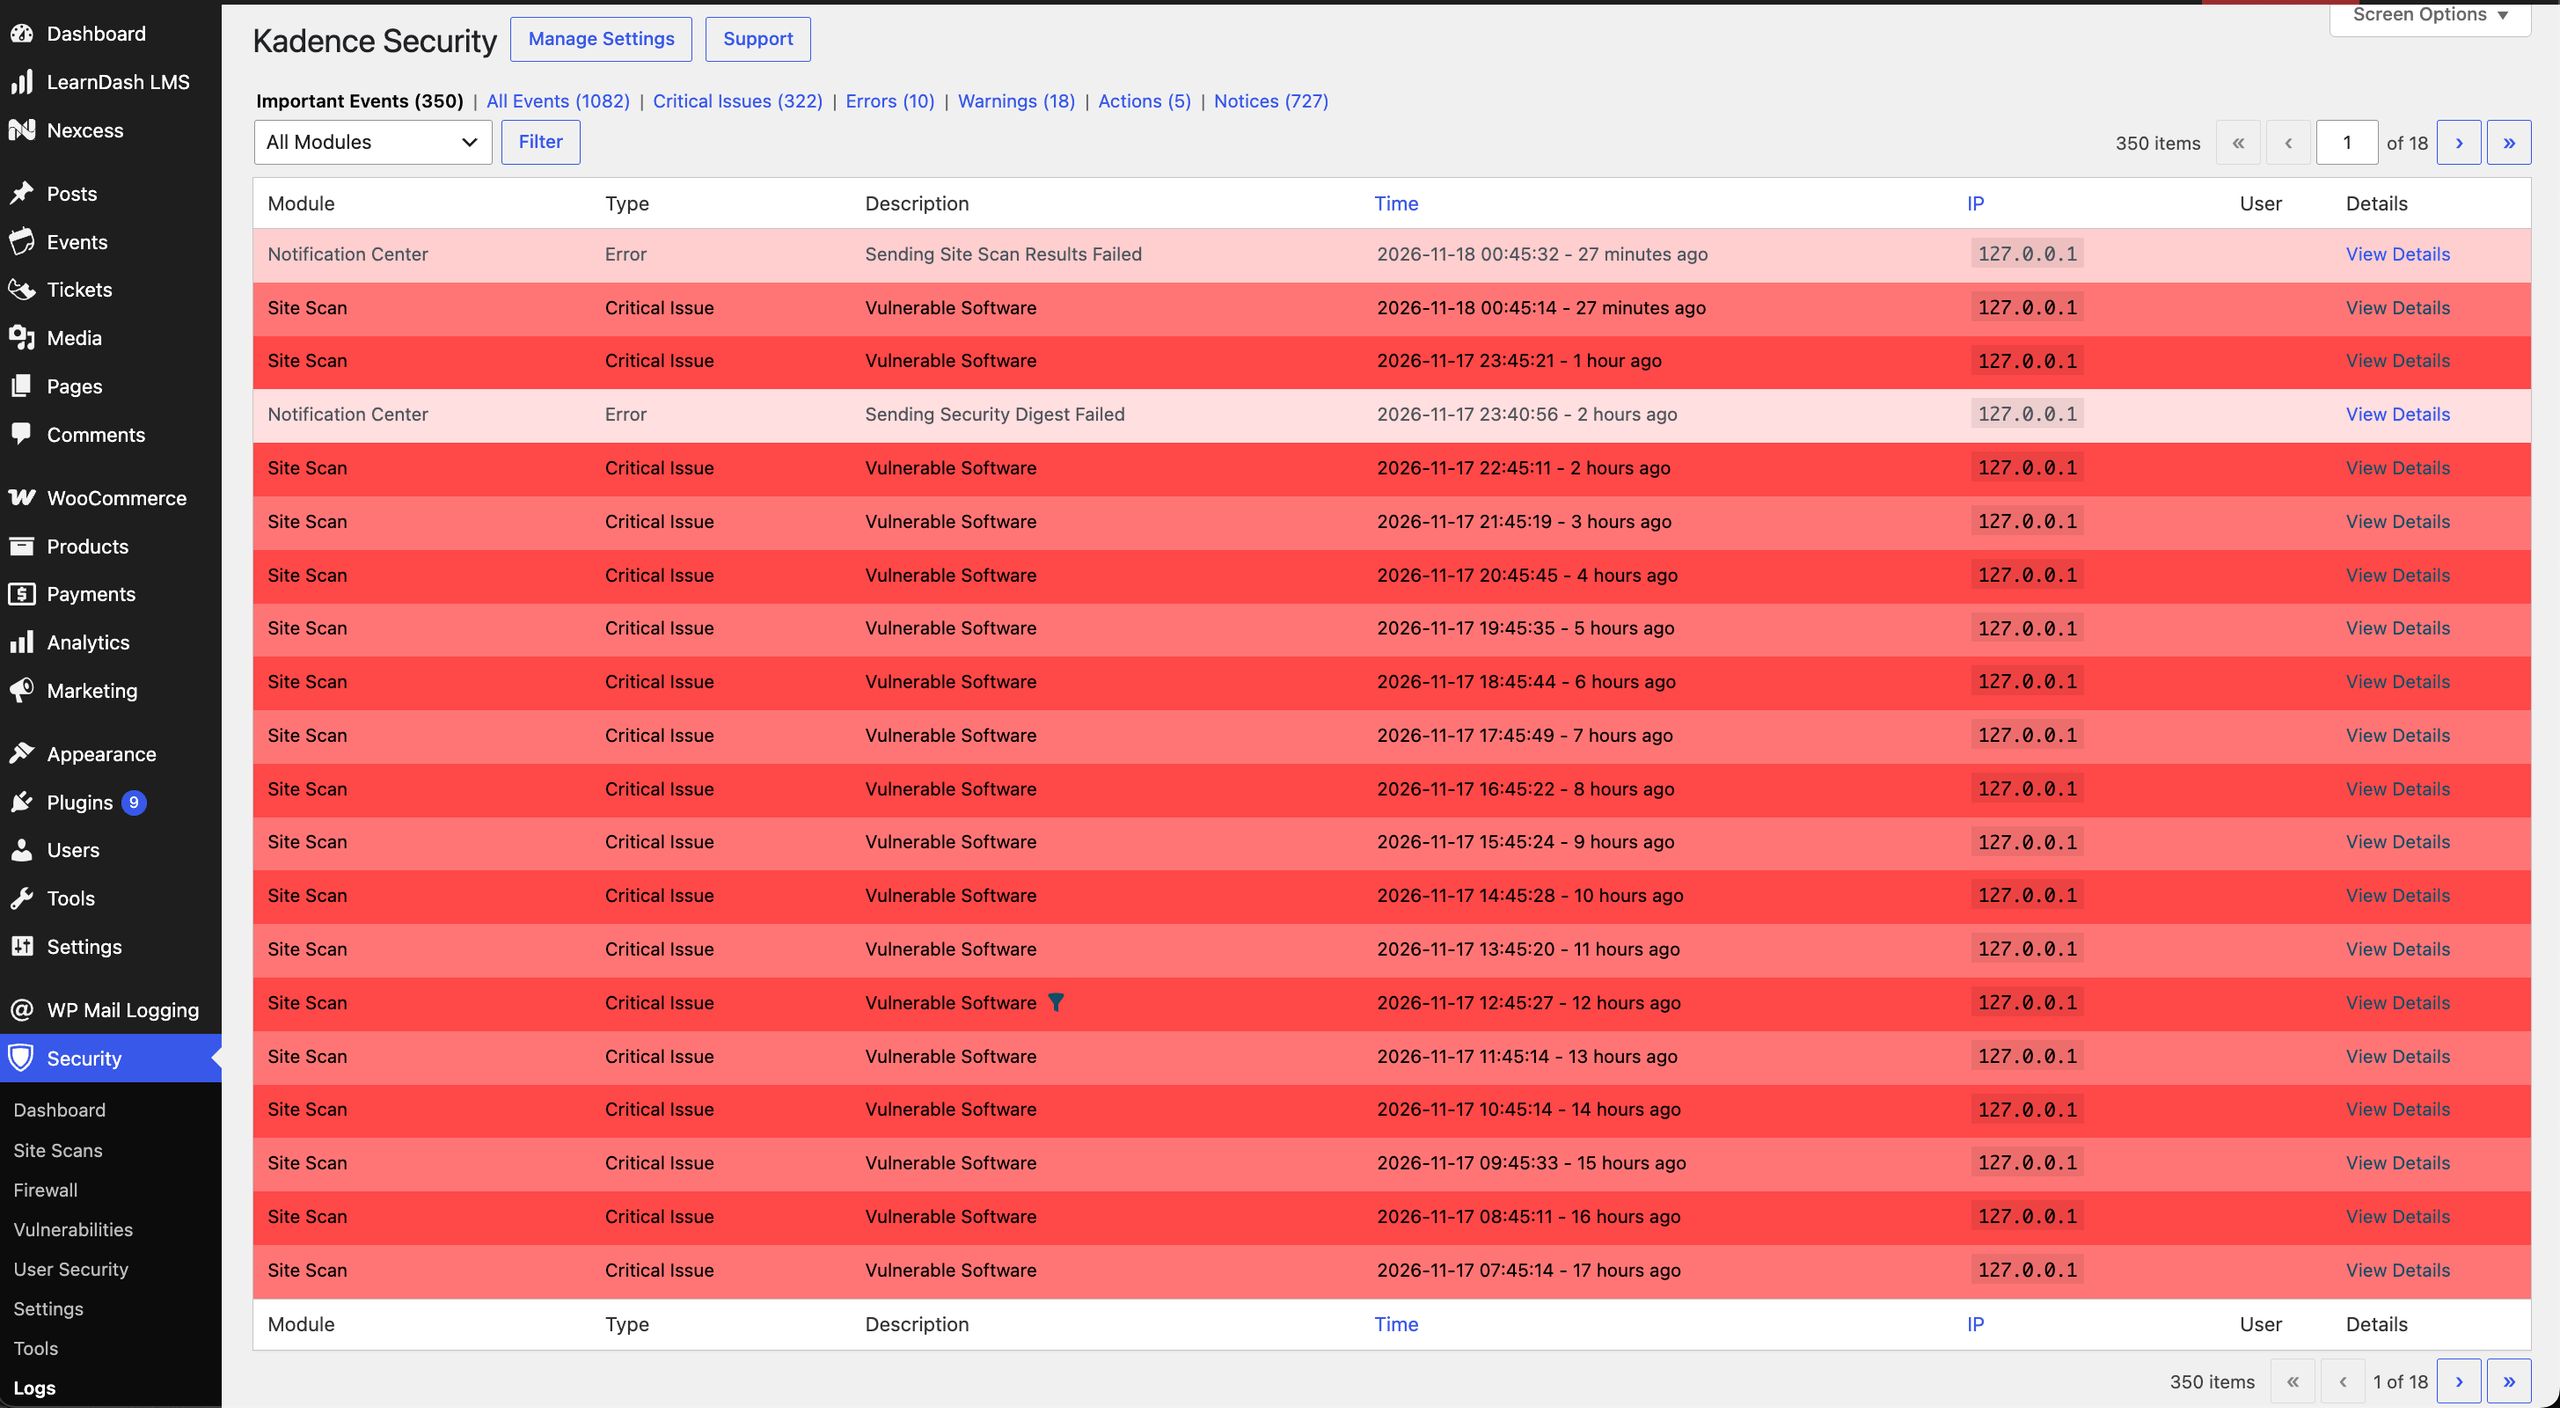
The Kadence Security Logs area provides you with an exhaustive view of security (or security-adjacent) activities on your WordPress site, giving you the ability to monitor and investigate potential security threats effectively. The logs help you identify patterns, such as repeated login attempts, or recognize vulnerabilities discovered by the Kadence Security Site Scanner.
You can configure various logging settings by navigating to Security → Settings → Global Settings. See Kadence Security Global Settings and Notifications.
Logging Methods
Kadence Security offers these logging methods, each with pros and cons:
Database Only
Stores the logs in your database, making them easy to access but potentially slowing down your site if they grow too large. The default number of days the logs are stored is 60 days.
Note: Database Only logging is the recommended choice for nearly all users, unless your site has high traffic and you find the logs to be bloating your database.
File Only
Store the logs in your filesystem for potentially faster processing, but the plugin doesn’t process them, so you’ll have to download and examine them manually. The default number of days the logs are stored with this setting is 180.
Both
Writes logs to the database and the filesystem. Use this when you want in-dashboard log viewing and an on-disk copy for external tools.
Reviewing log details
For every log entry, you can see critical information such as the module the log is for (for example, Site Scan or Brute Force), the type of event, the description, the timestamp, and the associated IP address or user.
Select View Details on a log entry to see important details of the entry as well as the option to view the raw details.

Selecting Show Raw Details provides a comprehensive view of the data captured during the activity. This is valuable when you want detailed insight into specific events for troubleshooting and/or debugging.
For Site Scanner entries specifically, see Diagnosis Tips: Raw Details of Site Scanner Logs. For Site Scan error codes, see Troubleshooting Kadence Security Site Scan Errors.
The key data that you can see in the raw details area are:
- Module: Specifies which module generated the log entry
- Type and Code: Identifies the entry’s category (ex.
site-scanner,brute_force) and its specific code (ex., Invalid-login, vulnerable-software) - Timestamp: Shows when the event occurred and when it was processed
- User Information: Includes user details like user ID, username, or associated IP address
- Event Information: Provides additional structured information about the event such as the authentication types used, the found vulnerabilities, or the error messages
- Server Details: Displays relevant server information such as request headers, referred data, or server settings

In the example screenshot, a login attempt was made into the site, and the attacker tried to log in via the /wp-login.php page using the username “red”, which is not a registered username.
There is nothing alarming in this example when viewed in isolation, but if it’s part of a pattern or if the attempt had used a registered username, it becomes a more significant concern. You could use the log’s raw data alongside other information to decide to:
- Enable Two-Factor Authentication
- Enforcing Strong Passwords on administrator accounts
- Creating an alternate admin account for the compromised admin username
- Regular monitoring of login attempts
- Adding CAPTCHA to the login form
- Identify admin user accounts that are attempting to log in from unauthorized countries
- Correct issues with your security headers configuration
Kadence Security Logs give you the information you need to take proactive measures to mitigate security risks on your site.
User Logging
The User Logging module of Kadence Security Pro logs the following user actions:
- Login/Logout
- Content update
- Plugin activation, deactivation, installation, and deletion
- User creation and deletion
- User Registration
But before you can see it on your Security Logs page, you need to take a few extra steps to activate it.
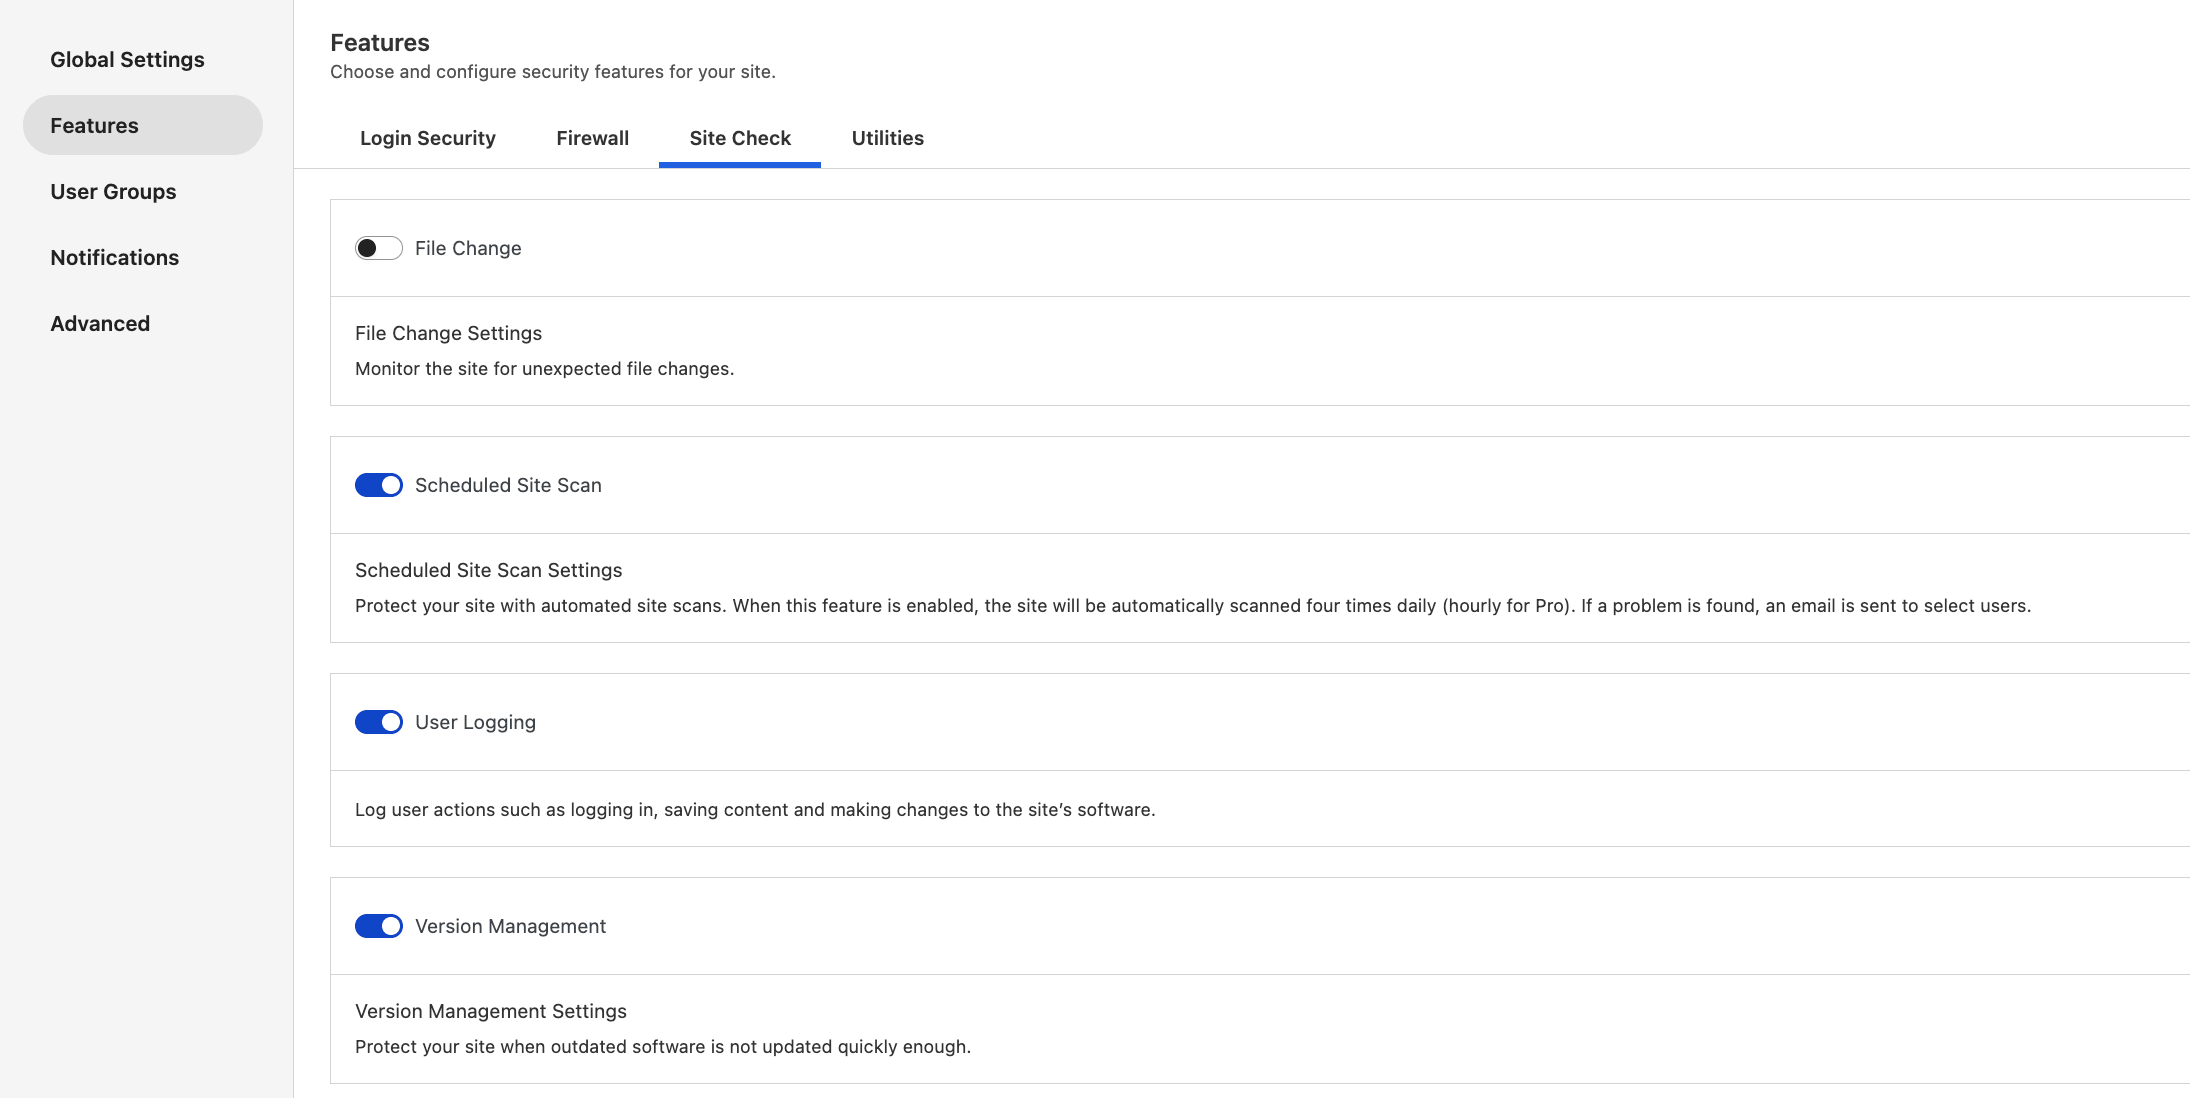
First, go to Security -> Settings -> Features -> Site Check and turn ON the User Logging module:
Next, go to the User Groups settings and activate the Activity Monitoring setting on your preferred user group (make sure to save the changes):

To view the User Logging logs, head to Security -> Logs and filter User Logging under the All Events tab:

Using Filters and Screen Options
On the Security Logs page, you can use the Filters and Screen Options settings to focus your analysis of log events.
The Filters tabs include: Important Events, All Events, Critical Issues, Errors, Warnings, Actions, and Notices.
The Critical Issues, for example, flags high-priority concerns such as detected vulnerabilities so you can address them promptly. The Error logs, on the other hand, record site issues encountered by Kadence Security, such as failures to send emails or run scans.
By default, you will see the Important Events filter first when navigating to the Security Logs page. To change this behavior, you can open the Screen Options settings located at the top-right corner of the page:
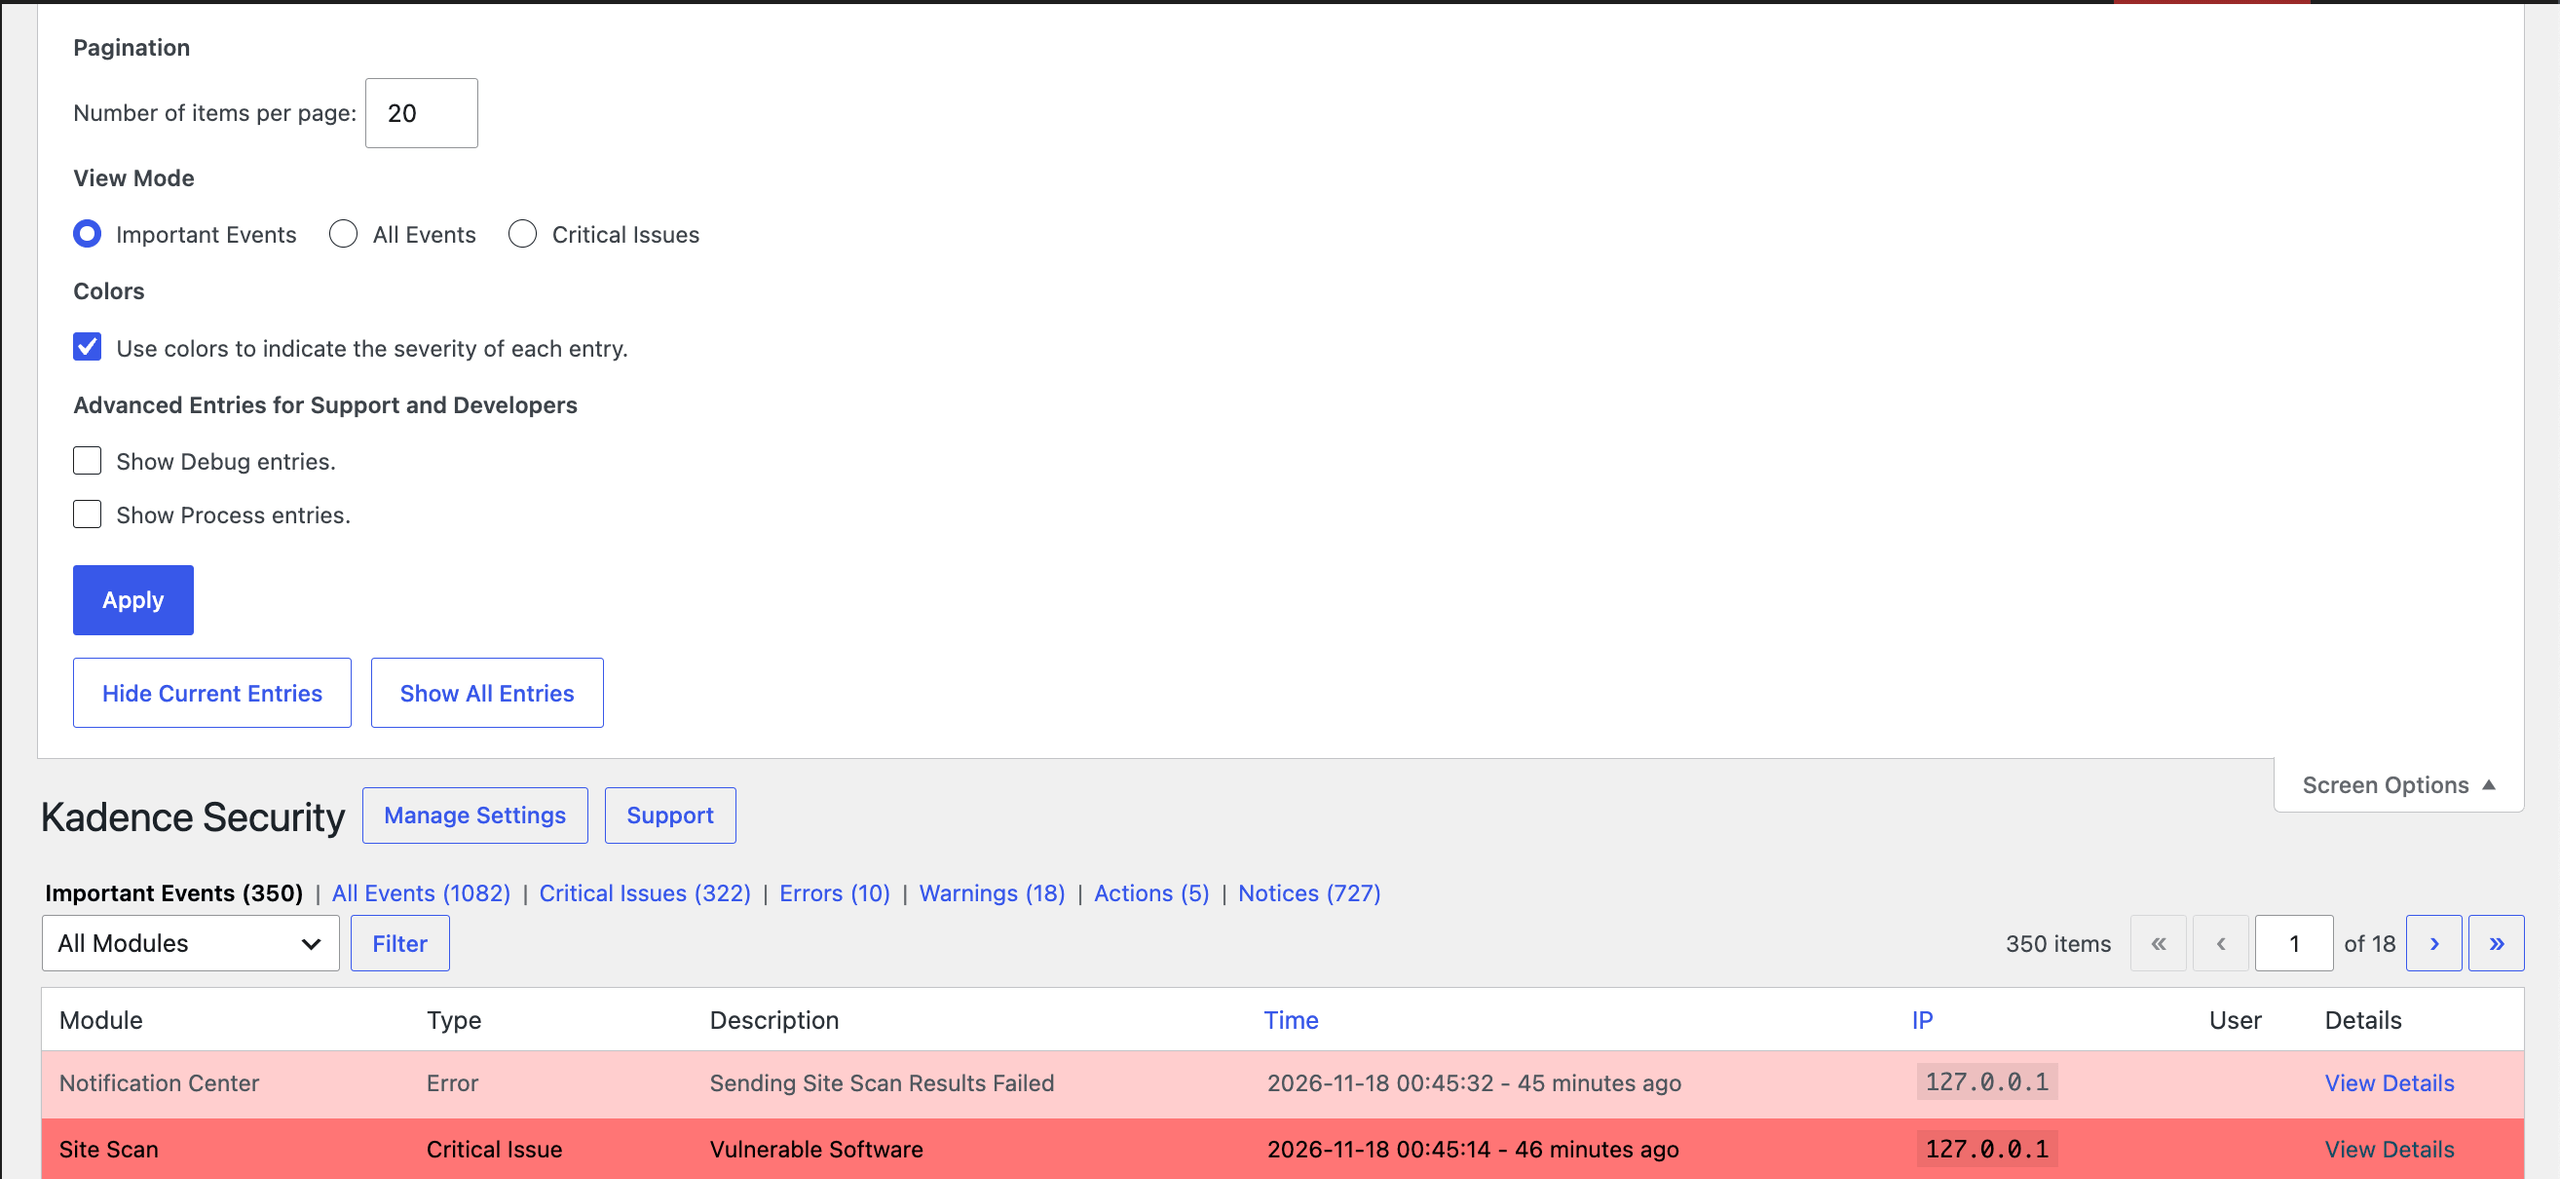
In addition to changing the View Mode, you can use the Screen Options settings to customize the Security Logs display to your preferences.
The Debug and Process advanced entries will display logs related to the plugin operations and/or system processes. While both can be useful for troubleshooting, note that they will also increase your log size.
In essence, the Security Logs area gives you valuable, actionable insights to help safeguard your site’s integrity. By monitoring logs and leveraging the data they provide, you can proactively address potential security threats and ensure a secure environment for both you and your users.
Clearing Security Logs
Kadence Security automatically purges old log entries based on your Logging retention settings. You can configure how many days to keep logs by navigating to: Security → Settings → Global Settings → Logging
If your logs appear not to be clearing as expected, you can use the following methods:
Automatic Log Cleanup
Kadence Security removes logs once they reach your configured retention period. If logs are not being purged, verify that the number of days is set correctly in the Logging settings.
Manual Cleanup via Database
For sites where logs have grown large, you can manually clear the itsec_logs table if you have database access.
You may empty this table through phpMyAdmin or another database management tool.
Using a Third-Party Log Cleaner
Some users prefer using automated tools to manage older logs. A community-built solution is: Log Cleaner for Kadence Security (this is not an official KadenceWP plugin but is commonly used by customers)
Troubleshooting Log Purging (WP-Cron)
If logs are not clearing automatically, the scheduled log-purge process may not be running.
- Enable the Kadence Security Debug menu (see how to enable Debug Mode).
- Open the Scheduler table and look for the
purge-log-entriestask. - From here, you can: Manually trigger the task; Reset all Kadence Security scheduled tasks, which can fix stuck entries.
If the task appears but does not run, it may indicate an issue with your site’s WP-Cron configuration on the server, which you’ll want to check with your hosting provider.