

The Events Calendar
Creating RSVPs with Event Tickets
Sometimes you may not want to sell tickets and charge a price for an event but would still like to have a list of people who will be attending. The RSVP ticket type in Event Tickets provides this functionality.
Instead of buying a ticket, entering credit card or PayPal information, or going through any other part of the checkout process, with the RSVP “ticket” option users just:
- Select a quantity for how many spots to RSVP.
- Enter their name and email address to confirm that they will be attending the event.
- Immediately receive a simple ticket confirming their reservation at the email address they entered.
This article will show you how to enable and use the RSVP features of Event Tickets and Event Tickets Plus.
Note: There is no eCommerce or payment-collection functionality with RSVPs. This article is only about the RSVP feature; to learn about selling tickets with Event Tickets and Event Tickets Plus, check out the Making a Ticket tutorial.
Enabling RSVP Functionality
If you have The Events Calendar installed and activated on your site, then the RSVP meta box from Event Tickets will be enabled on events automatically. It will show up in the wp-admin edit screen for the events post type.
If you do not have The Events Calendar installed or would like to enable tickets on any other post type, first head to Tickets → Settings in your wp-admin. Once here, head to the “General” tab and check the boxes for each post type you want to use. Read more about Event Tickets settings.
Using RSVP Functionality
Enabling RSVP
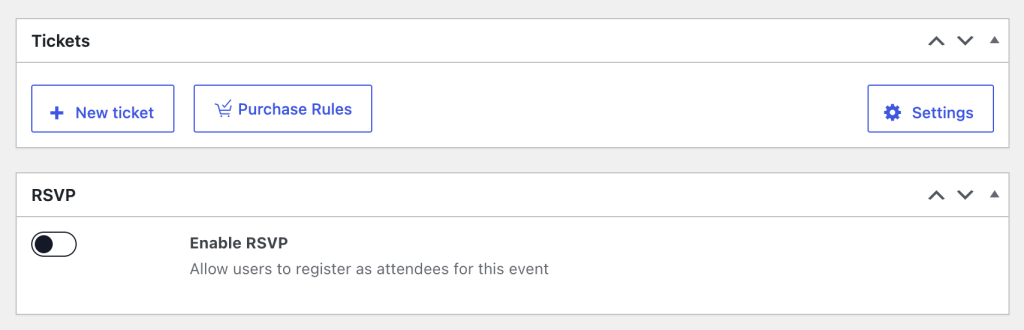
To add RSVPs, first head to the creation/edit screen. Scroll down and you will find the RSVP meta box (or RSVP block).
You’ll see the option to Enable RSVP on the event.
RSVP Fields
Once you’ve enabled RSVP, you’ll see additional options. Additional options such the RSVP waitlist are only available with Event Tickets Plus (part of our Pro license tier).

- Limit is the total number of spaces that are available: if you leave this blank it is assumed that there is no limit. If you have a limited number of spots for your event, you’ll want to make sure to set this accordingly.
- Open RSVP dictates when the RSVP becomes available. If you’re using RSVPs on a post or page, this field is required. If you are making RSVPs on an event, you don’t need to set this field- by default sales will start when you publish the event or ticket.
- Close RSVP does the reverse – you can set this to a date after which users cannot RSVP. As with the start sale field, setting this is optional for events and the default is to stop sales when the event itself starts.
If you have Event Tickets Plus, you will also see an option here for collecting attendee information. This feature allows you to request additional information beyond the name and email of the person RSVPing. You can learn about this feature in our separate Attendee Information article.
If you’re using the block editor, enabling RSVP will look just a little bit different. Click in the default Event RSVP block or add a new RSVP block.
Accepting RSVPs
Once you’ve enabled RSVP, site visitors can RSVP for the event. Once RSVPs are allowed according to the Open RSVP option, users will see something like this on your page:


If they click Going and enter their information, users will be tracked as RSVP attendees and receive a confirmation over email.
Letting Attendees Edit RSVPs
Uers who have made RSVPs for your events to log in and edit their RSVP responses, attendee information, and more. From the event page, they can click the View RSVP link to go to their own page to make any necessary changes. Note that this feature requires attendees to create an account and log in before registering for your events.

Next up we recommend that you learn about managing ticket orders and attendees. If you have any further questions please don’t hesitate to connect with the team over at our help desk.