

The Events Calendar
Creating Event Tickets
Tickets let visitors buy a spot at your event, or access to any other post or page on your site. This article shows you how to create and edit a ticket, and how to set capacity, share capacity between tickets, add a sale price, choose when tickets are on sale, and collect attendee details.
Where tickets live in the editor
You can add tickets to events, or to any post type enabled in Ticket Settings (see ticket settings). The Ticket Settings control which post types can have tickets. In the Classic Editor, you’ll find the Tickets metabox below the main content.

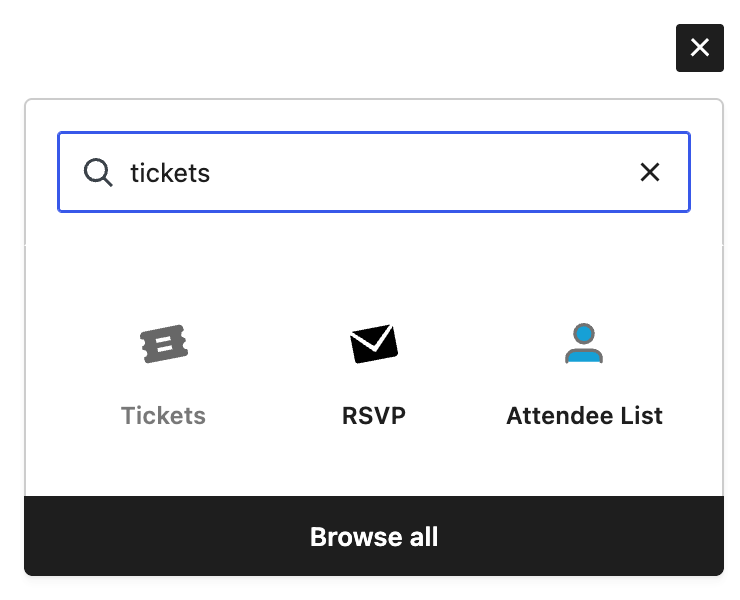
In the Block Editor, default Ticket and RSVP blocks may appear when you create an event. You can also add Ticket and RSVP blocks to the main content of any post type. For a quick tour, see An Introduction to Tickets Blocks.
Create your first ticket
These steps cover the essentials. Where a step has further options, it links to a detailed section later in this article.
- Open the event, post, or page where you want to sell tickets.
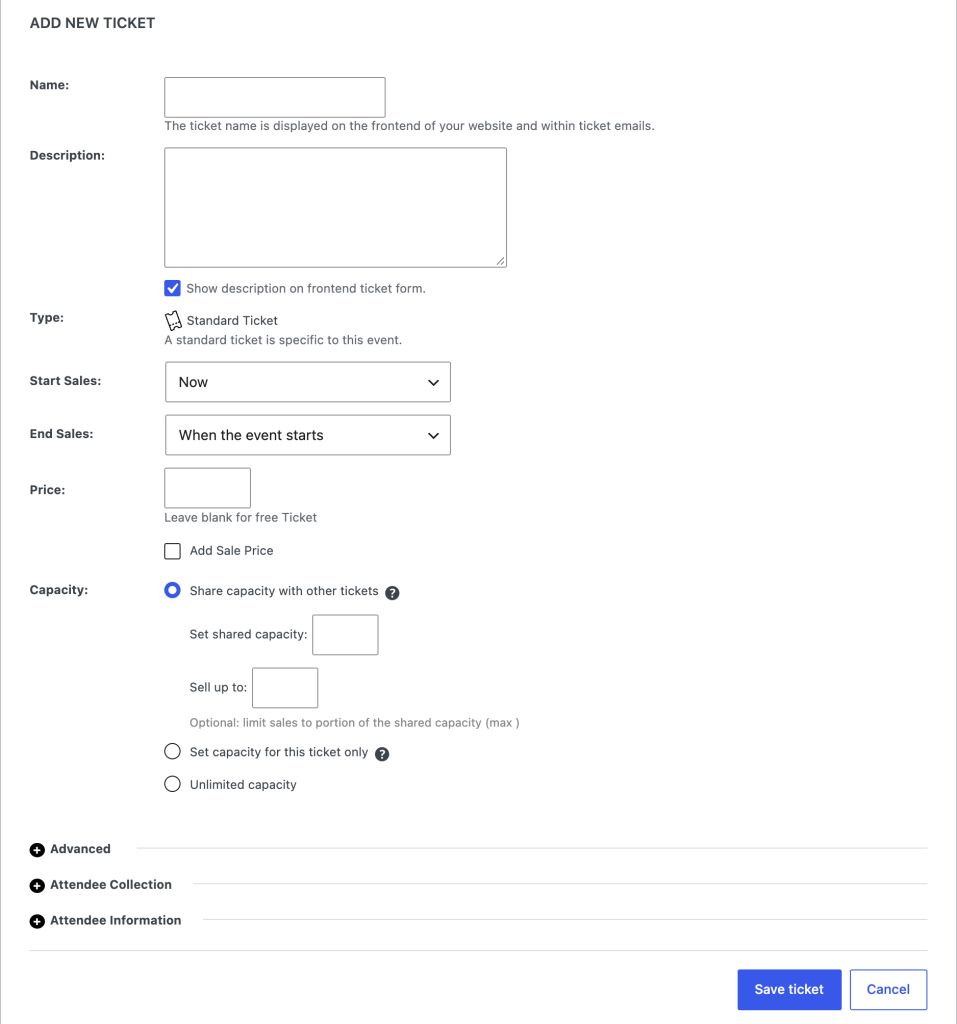
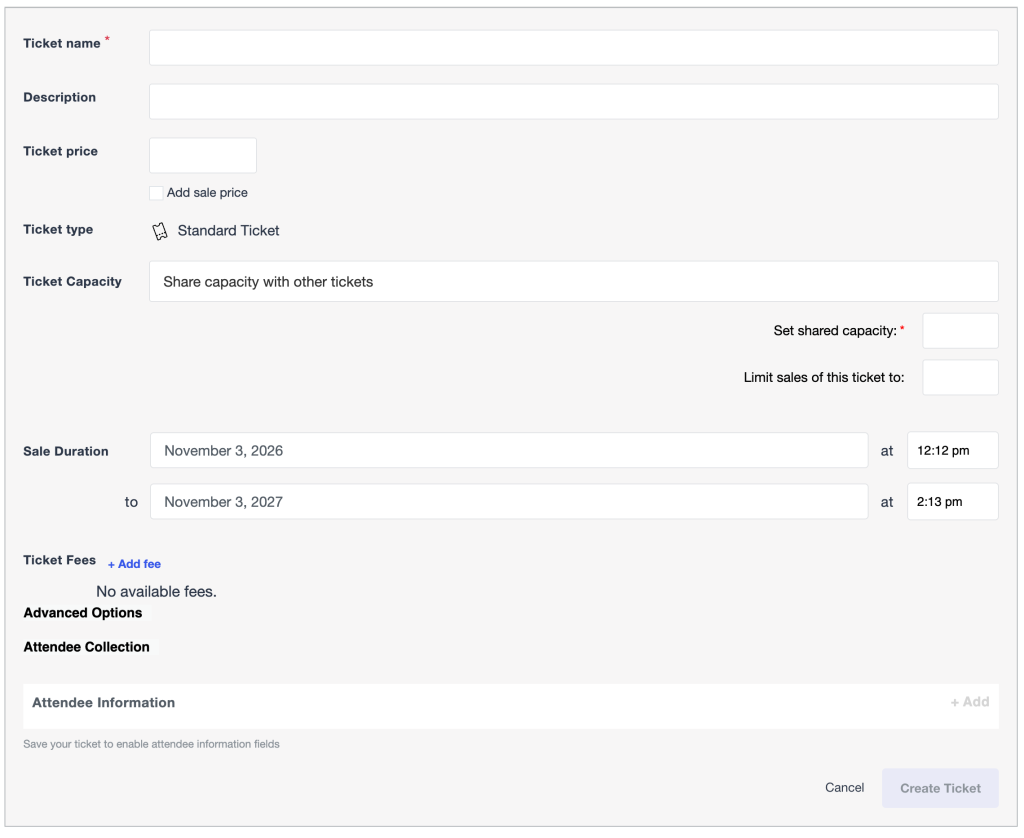
- Find the Tickets metabox (Classic Editor) or Tickets block (Block Editor), then click + New ticket. The ticket form opens.
- Enter a name for the ticket, such as Standard, Adult, or Concession.
- Optional: add a description with anything buyers should know, such as “bring waterproof jackets” or “not recommended for children”.
- Enter the price. Leave it blank for a free ticket. To discount the price for a limited time, see Add a sale price.
- Choose how many tickets are available. For details, see Set capacity.
- Set when sales start and end. By default, sales start Now and end When the event starts. See Choose when tickets are on sale.
- You can also collect details about each attendee. See Collect attendee information.
- Save the ticket.
Set capacity
Capacity is how many tickets you can sell. If your event has a limited number of spots, set it so you never oversell.
Set capacity for a ticket
If you use the free Event Tickets plugin without a premium license, enter the number of tickets available in the ticket’s Capacity field. Leave it blank for no limit.
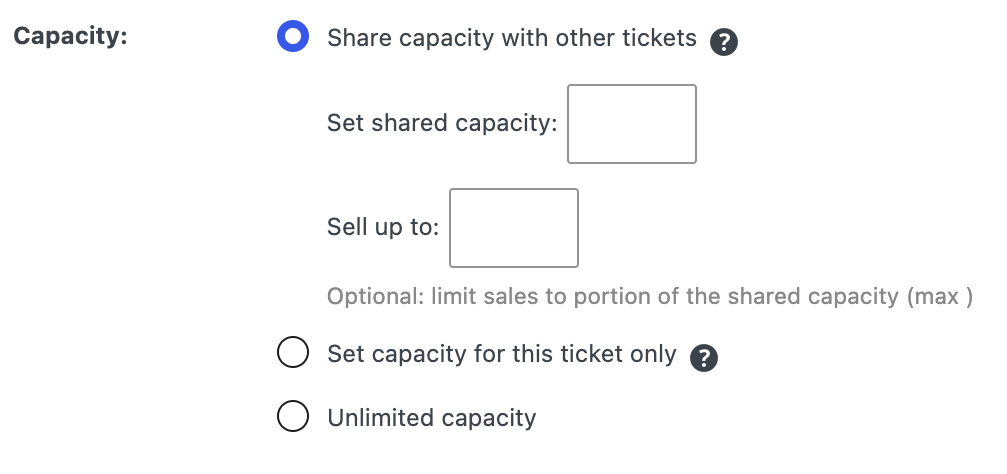
With a premium license, the field becomes a Ticket Capacity setting with three options:
- Share capacity with other tickets: this ticket draws from a pool shared with your event’s other tickets. See Share capacity between tickets.
- Set capacity for this ticket only: this ticket has its own number of spots.
- Unlimited capacity: buyers can purchase as many as they like.

Share capacity between tickets
Shared capacity lets several tickets come out of one pool of stock. Say your venue has 100 seats and you sell three ticket types: children, adults, and seniors. If you set each ticket’s capacity to 100, you could sell more than 100 tickets in total and run out of seats. Instead, set a shared capacity of 100 for the event. Attendees can buy any of the three tickets, but no more than 100 tickets sell in total.
To set it up:
- On each ticket, choose Share capacity with other tickets.
- Enter your event’s total in Set shared capacity. In the example above, that’s 100.
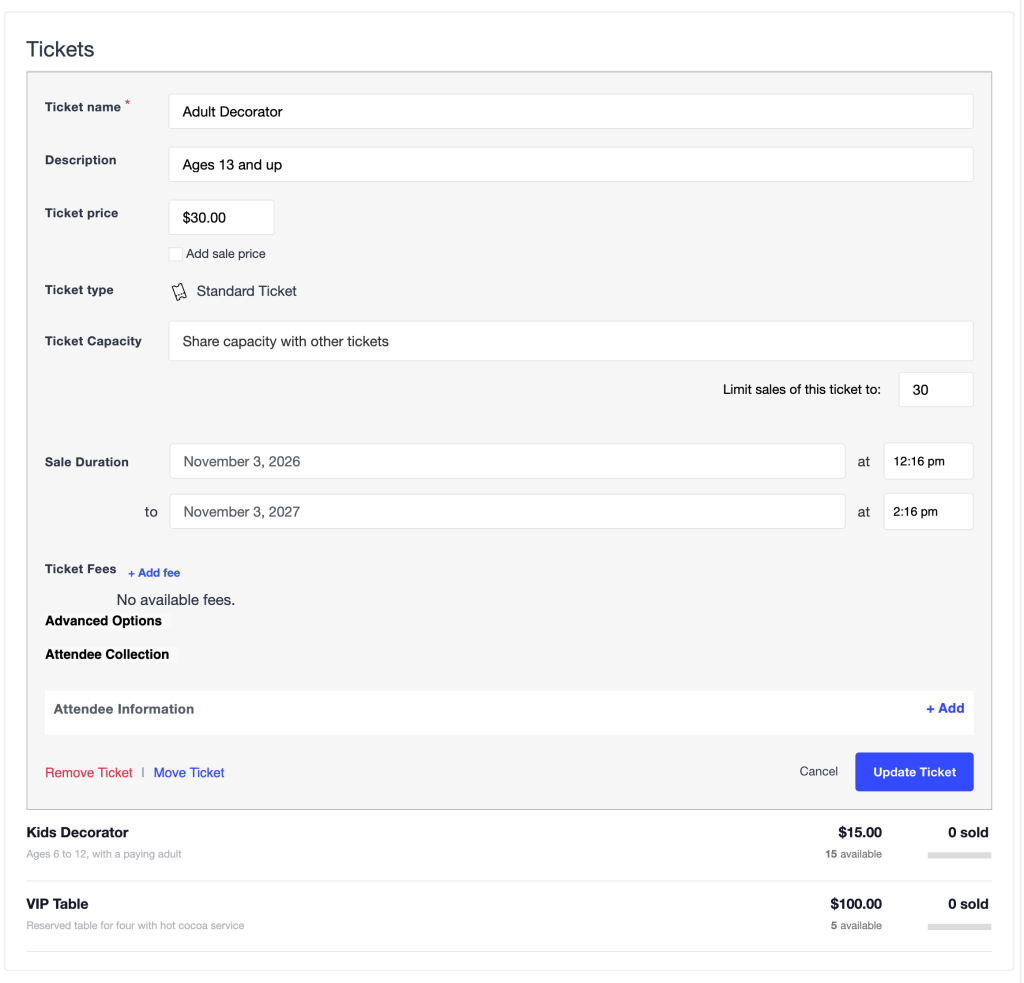
- Optional: to cap how many of one ticket can sell, fill in Sell up to (Classic Editor) or Limit sales of this ticket to (Block Editor). For example, allow at most 50 children’s tickets out of your 100.
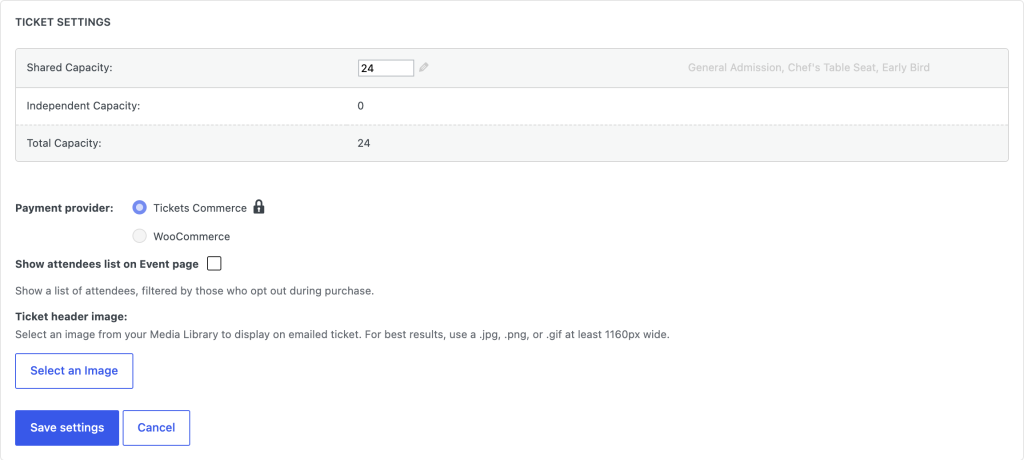
You can also change the shared total later. Click Settings in the Tickets metabox, then edit Shared Capacity. The panel also shows Independent Capacity and Total Capacity.
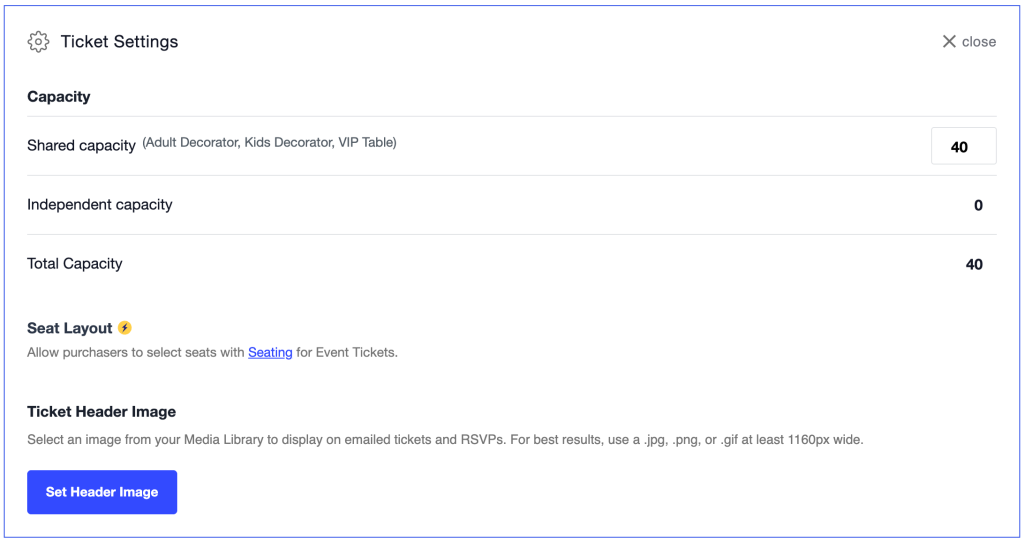
As tickets sell, the remaining stock drops for every ticket that shares it.
For more on how capacity and remaining stock are calculated, see How Event Tickets Are Calculated.
Choose when tickets are on sale
Set the sales window
Start Sales sets when tickets become available and End Sales sets when they stop. For tickets on an event, the defaults are Now and When the event starts. Change them if you want sales to open later or close earlier. For tickets on a post or page, you must set a start date. You can pick a calendar date and time, or choose a date relative to the event.
Relative sales dates
Instead of picking a calendar date, you can tie the start or end of ticket sales to the event’s start time. For example, start sales 2 weeks before the event starts.
- Open the Start Sales or End Sales dropdown.
- Choose On a relative date.
- Enter a number and choose a unit of time. For example, 2 weeks sets the date to 2 weeks before the event starts.
Add a sale price
A sale price is a special lower price for a set period during the ticket sale window. It’s only available when you sell tickets with Tickets Commerce.
To add one:
- Enter the regular price.
- Check Add Sale Price.
- Enter the Sale Price.
- Set the window when the sale price applies, using Sale Starts and Sale Ends. This is separate from the ticket’s own sales window (Start Sales and End Sales), and the sale price can only apply while tickets are on sale. Pick Now to start right away, or On a relative date to tie a date to the event, such as 1 week before the event starts. The form shows how long the sale lasts, for example “Tickets on sale for 25 days”.

Don’t see the sale price option? Check the Payment provider under Event-level ticket settings.
Collect attendee information
By default, checkout collects only the buyer’s name and contact details. Two premium features let you collect more: details for each attendee, and custom questions.
Collect details for each attendee
When someone buys several tickets at once, Attendee Collection lets you record a name and email for each ticket, not just for the buyer. In the ticket form, choose one of three options:
- No Individual Attendee Collection (the default): every ticket uses the buyer’s name and email, and the buyer gets one email containing all their tickets.
- Allow Individual Attendee Collection: the buyer can keep themselves as the attendee or enter someone else’s details.
- Require Individual Attendee Collection: the buyer must enter a unique name and email for every ticket before checkout. Each attendee gets their own ticket email.
To change the default for new tickets, go to Tickets › Settings › Attendee Registration.
Build a custom form
Attendee Information lets you build a custom form to collect extra details from attendees, such as t-shirt sizes. Add the fields you need to a ticket, save them as a fieldset to reuse on other tickets, and review the responses from the event’s Attendees screen. For field types, managing saved fieldsets, and more, see Using Attendee Registration Forms with Event Tickets.
Edit, duplicate, or delete a ticket
Each ticket in the Tickets metabox has options to edit, duplicate, or delete it.
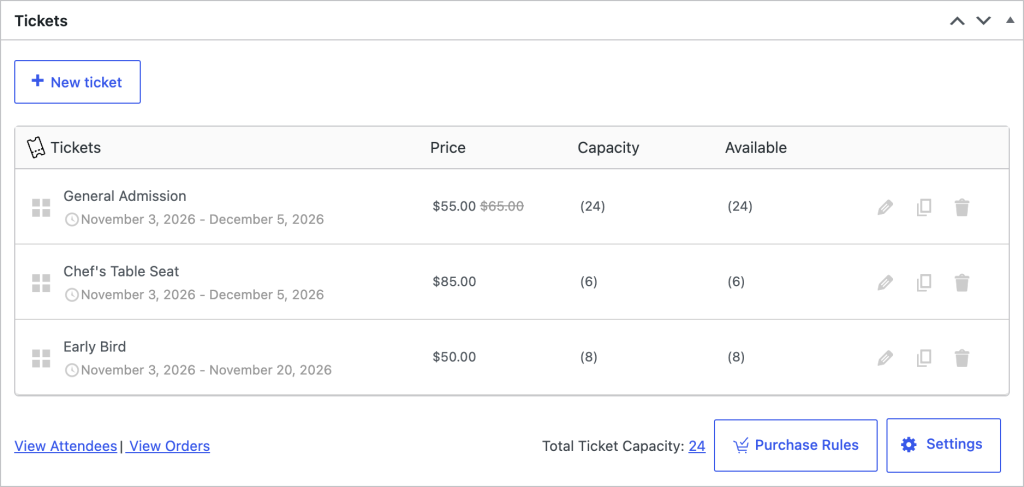
- Edit: open the ticket, change what you need, and save.
- Duplicate: makes a copy of the ticket directly below the original.
- Delete: removes the ticket. Deleting a ticket does not delete its existing attendees or orders.
In the Block Editor, select a ticket to open its form. Click Update Ticket to save changes, or use Remove Ticket to delete it. Move Ticket moves it to another event or post. See Moving Event Tickets and Attendees.
View attendees and orders
After tickets start selling, you can see who bought them and manage each order. The Tickets metabox has View Attendees and View Orders links. You can also reach an event’s attendees and orders from Events by hovering over the event and clicking Attendees or Orders. To see all attendees for all events in one list, go to Tickets › Attendees.
For how orders are completed, order statuses, refunds, and resending confirmations, see Managing Ticket Orders and Attendees.
Purchase rules
Purchase rules are a premium feature that automatically controls how tickets can be bought, such as offering discounts, setting limits or minimums, restricting by user role, or requiring certain ticket combinations. They work only when you sell tickets with Tickets Commerce. Create and manage them under Tickets › Purchase Rules, or use the Purchase Rules button in the Tickets metabox.
To set one up, see Using Purchase Rules for Event Tickets.
What buyers see
If a ticket is for sale but sold out, the ticket form still shows. Buyers can’t purchase it, and it’s marked “Sold Out” with 0 available. With the premium waitlist feature, buyers can leave their details and get an email with a purchase link when a spot opens. See Creating Waitlists for Event Tickets.
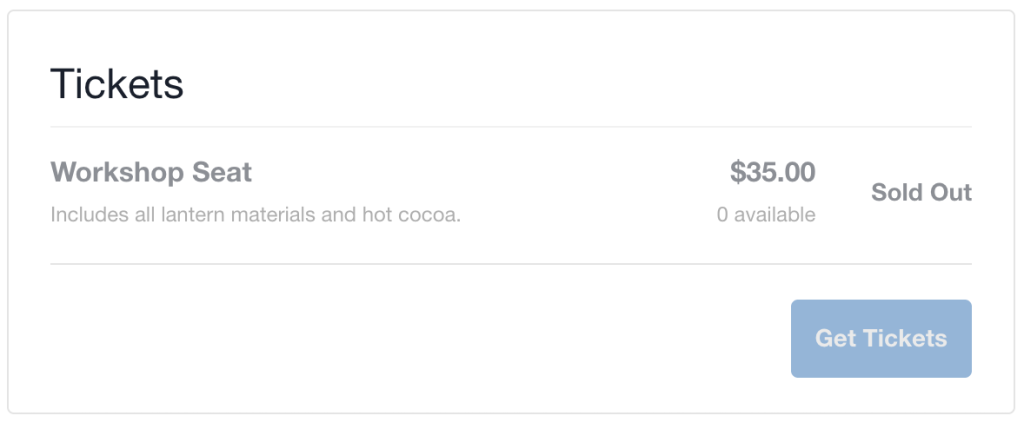
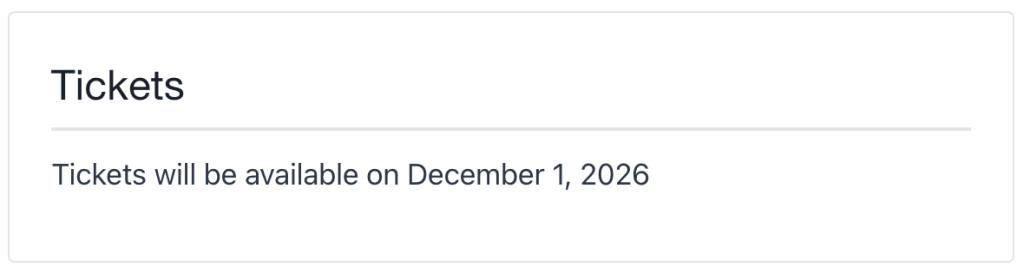
If tickets aren’t sold out but a visitor views the event page outside the sales dates, the ticket form doesn’t show at all. A short message appears instead, such as “Tickets will be available on December 1, 2026”.
Ticket types
Different ticket types let you sell tickets to different kinds of events. Standard tickets are included. The Series Pass type is a premium feature.
Standard tickets
Standard tickets are the default for single events, posts, or pages. They give access to one specific date and time, and you create them in the WordPress editor. They support assigned seating. They can’t currently be added to recurring events.
Series Passes
Available as a premium feature, a Series Pass gives access to all events in a Series, including single and recurring events. You manage them from the Series admin page, and buyers can purchase one from the Series page or from any event in the Series. Series Passes work well for multi-day events, events with several venues or stages, or any time you want to upsell attendees to more events. They don’t support assigned seating. Learn more in Creating Series Pass Tickets.
Event-level ticket settings
Choose the payment provider
The Payment provider option sets which ecommerce provider handles ticket sales for an event. If you use WooCommerce, it lets you choose the provider that handles ticket creation, checkout, and order management for that specific event. In the Block Editor, these options are in the block sidebar.
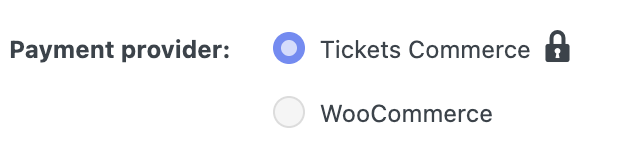
An event can use only one payment provider, so the setting locks as soon as you add the event’s first ticket. To switch providers, delete all of the event’s existing tickets first.
The setting also appears locked if the event belongs to a Series that has a Series Pass. An event must use the same provider as its Series.
Show who’s attending
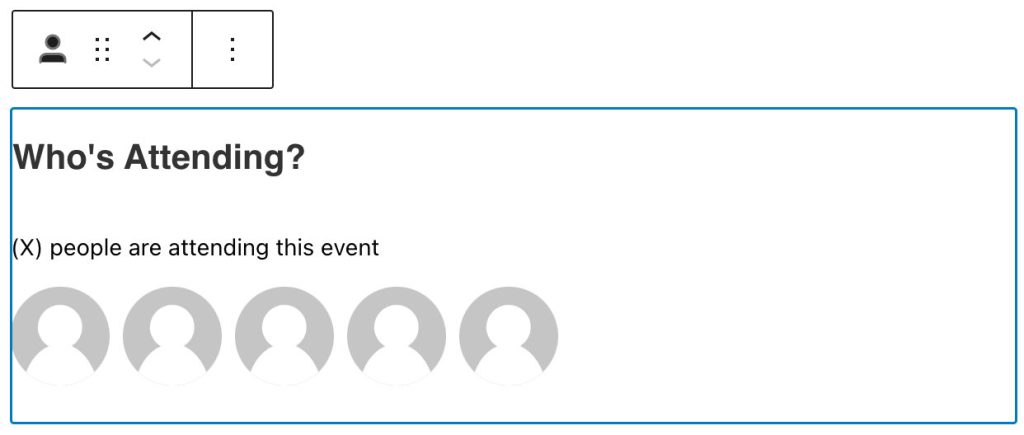
To display the Gravatar of each attendee who buys a ticket on the event page, use the setting for your editor. In the Classic Editor, check Show attendees list on Event page. In the Block Editor, the event page shows attendees only if you add the Attendees block to the event.
Assigned seating
Assigned seating is a premium feature that lets attendees pick their own seat from a visual layout when they buy. Each ticket’s capacity comes from your event’s Seat Layout and the ticket’s Seat Type. Read more in Creating Tickets with Assigned Seating.
Link to the ticket form
Event pages include an anchor link that sends people straight to the ticket form on a single event page.
The default link looks like yoursite.com/event/[event-slug]/#buy-tickets, for example yoursite.com/event/rock-concert/#buy-tickets.
Not sure how to build it? Open your event’s page, add #buy-tickets to the end of the URL, then copy the full address from your browser.
Next steps and related articles
Next, learn how to manage ticket orders and attendees and how Event Tickets calculates availability. For stock problems, see Common Stock Issues. Still stuck? Contact the team through the help desk.
- Charging Fees with Event Tickets
- Creating Coupons for Event Tickets
- Using Attendee Registration Forms with Event Tickets
- Saving Time with Ticket Presets
- Creating Waitlists for Event Tickets
- Sell Event Tickets with Tickets Commerce
- Sell Event Tickets with WooCommerce
- Creating Tickets with Assigned Seating