

Give
How to Create Custom Form Fields with the Visual Donation Form Builder
Often times you may want to add one or many custom form fields to one or many donation forms. GiveWP has many hooks that developers can use to insert content, including custom fields, within donation forms. The following article will help developers programmatically add custom form fields and display them within the donation payment records.
Creating custom form fields with the Visual Donation Form Builder is a quick and easy way to customize your forms for your organization’s unique needs. You can create forms and gather important data in just a few simple steps while presenting elegant, clean forms that your donors will love working with.
Choosing where to locate the field
First, you’ll need to determine where to place the custom field on your form. You can do this by referencing the name of the section node on your donation form. You will have the option to place your custom field either before or after your section node. The following is a list of the section nodes that a donation form typically has:
donationAmount: This node contains the donation amount block as well as the donation frequency block (if you have the Recurring Donations add-on active)name: Includes the first name and last name fields for the donor.email: Contains the email address field.phone: Contains the phone number field.billingAddress: Contains the billing address fields.company: Contains the company name field.comment: Contains donor comments.anonymous: Contains the “Make this an anonymous donation” field.tributes: If you have the Tributes add-on active, this node will contain all the fields that are relevant to Tributes.
Adding the field
The following example shows how to add a text field after the email section node:
add_action('givewp_donation_form_schema', static function (\Give\Framework\FieldsAPI\DonationForm $form) {

    $field = \Give\Framework\FieldsAPI\Text::make('favoriteColor')
        ->showInReceipt()
        ->label('Your favorite color:')
        ->placeholder('Your favorite color')
        ->defaultValue('Red');

    $form->insertAfter('email', $field);

});
This code will display the following form with custom fields (favorite color in this case):
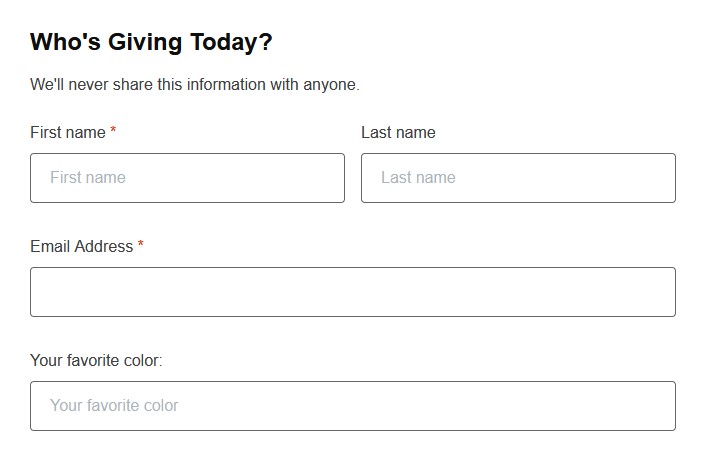
This particular custom field includes characteristics such as appearing after the email section node, having a default value of “red”, a label of “your favorite color”, and that it should be displayed on the donation receipt.
Custom Field Parameters (Visual Form Builder)
A custom field can have multiple parameters that define its behavior, appearance, and storage. The following is a list of parameters grouped by what they affect:
Identity & Type (Required)
- name — The unique key used to identify the field internally (in HTML name attributes, submitted form data, and meta storage). No two fields in the same tree can share a name.
- type — Tells the API what kind of input this is (text, select, checkbox, etc.), which determines how it renders and validates.
Labeling & Copy Shown to the Donor
- label — The visible field label (e.g., “Email Address”).
- description — Longer explanatory text about the field.
- helpText — Short supporting text, usually shown under the input as a hint.
- placeholder — Greyed-out example text inside an empty input.
Values
- defaultValue — Pre-fills the field before the donor interacts with it. For select/radio fields, this doubles as the “currently selected” value (via getSelected()).
- options — The list of choices for select, radio, or checkbox-style fields (each is a value plus an optional label).
- allowMultiple — Determines whether more than one option or value can be selected at once (e.g., a multi-select field).
Constraints & Validation
- required — Whether the donor must fill this in before submitting.
- minLength / maxLength — The minimum or maximum character length allowed.
- readOnly — The field is displayed but cannot be edited by the user.
- showIf / showWhen (Visibility Conditions) — Makes the field conditionally appear only when another field has a certain value (e.g., show “Company Name” only if “Donating as” equals “Company”). Note: When a field is hidden by these conditions, it is automatically excluded from required-field validation, preventing errors for fields the donor never saw.
Position
The insertBefore and insertAfter methods let you place a new field (or group) at a specific position in the tree relative to an existing field, rather than just appending it to the end. They live in the InsertNode trait, which Group/Form collections use. Each takes two arguments:
- $siblingName — The name of the existing reference field you want to insert next to.
- $node — The new Node (field, group, etc.) to insert.
Persistence & Display
- scope / metaKey (HasPersistence) — Controls if and where the submitted value gets saved—as donation meta, donor meta, or via a custom scope. metaKey is the actual database key under which the data is stored.
- storeAsDonorMeta — A shortcut that sets the scope to save on the donor record instead of the individual donation record (useful for things like a donor’s birthday, which belongs to them rather than a specific gift).
- showInReceipt — Controls whether this field’s value is printed on the donation receipt or confirmation email sent to the donor. By default, fields are not shown on the receipt; calling ->showInReceipt() opts it in. This method has two companions:
- receiptLabel — Lets you override the label used on the receipt (in case you want different wording there vs. on the form itself).
- receiptValue — Lets you pass a callback to transform or format the raw value before it’s printed (e.g., turning a stored code into a friendly display string).
- showInAdmin — The equivalent of showInReceipt, but dictates whether the value is displayed on the donation details screen in the WordPress admin for staff to see.
- emailTag — Registers the field’s value as a merge tag (like {myfield}) that can be inserted into GiveWP’s other email templates (donation notifications, etc.), separate from the receipt.
Option-Based Forms (V2)
GiveWP has a built-in Fields API for programmatically adding fields with just a few lines of code. This article walks developers through that process, and outlines how the Fields API simplifies the process of customizing Donation forms on your WordPress site.
Note: Looking for a non-code method to add form fields? Check out the Form Field Manager Add-on for a quick and easy way to add custom form fields. This document is for developers. The code snippets below can be added using any method outlined in the documentation about adding custom PHP to your WordPress website.
Why add custom fields?
By default, GiveWP collects name, email, and donation amount on each donation, and that information is stored in a combination of Donor and Donation meta within the WordPress database.
The ability to add custom fields programmatically opens up new functionality for developers looking to extend GiveWP.
For example, at the time of this writing, if you want to gather custom data on a donation form that is mapped to the Donor meta (as opposed to Donation meta) there’s not a method to do that from within the UI or using an add-on. So, information like “t-shirt size” or “contact phone number” that doesn’t generally change from one donation to the next could be added to the Donor meta using the Fields API.
Any data that’s not gathered by default can be collected using the Fields API, even on a hidden field.
Groups and Fields
Individual custom fields are grouped into “groups” and then form templates use those groups to display the fields relative to one another.
Default fields like name, email, and billing address are not currently in defined groups, and that may change as GiveWP moves toward a more modular form building interface. Development priority is to maintain backward compatibility for existing form templates as we move in a more modular direction.
To use the Fields API, you need to specify a group (or create a new one) and then define the characteristics of the field you want to add to it. Then the API passes that along to the Form Template for display on the front end of the site.
Form Locations
When you add a field, you first pick a location on the form, defined by the following hooks. Essentially you are saying to the API “create a group on one of these hooks” and you can either append to an existing collection that is already defined on that hook, or add a new one.
Note: while all of these hooks will work for the foreseeable future, there are some that are too vague and will likely be deprecated in future versions of the plugin. Pay attention to deprecation notices in PHP error logs, and also this documentation will be updated.
- give_fields_before_donation_levels
- give_fields_after_donation_amount
- give_fields_after_donation_levels
- give_fields_payment_mode_top
- give_fields_payment_mode_before_gateways
- give_fields_payment_mode_after_gateways
- give_fields_payment_mode_after_gateways_wrap
- give_fields_payment_mode_bottom
- give_fields_donation_form
- give_fields_donation_form_top
- give_fields_purchase_form_top
- give_fields_donation_form_register_login_fields
- give_fields_donation_form_before_cc_form
- give_fields_cc_form
- give_fields_before_cc_fields
- give_fields_before_cc_expiration
- give_fields_after_cc_expiration
- give_fields_after_cc_fields
- give_fields_donation_form_after_cc_form
- give_fields_purchase_form_bottom
- give_fields_donation_form_before_personal_info
- give_fields_donation_form_after_personal_info
Example One: Simple Text Field
The code in this example will demonstrate how to add a simple text field.
add_action( 'give_fields_after_donation_amount', function( $group ) {
    $group->append(
        give_field( 'text', 'mothersName' )
            ->showInReceipt()
            ->minLength(2)
            ->label( __( 'What is your mother\'s name' ) )
            ->maxLength(30)
            ->placeholder( 'Mother\'s name' )
            ->storeAsDonorMeta()
            ->required() // Could instead be marked as readOnly() (optional)
            ->helpText( __( 'This is a field used to add your mother\'s name' ) ) //how this is displayed is up to the template, but if the template has help text displayed, this is how to set it.
    );
});
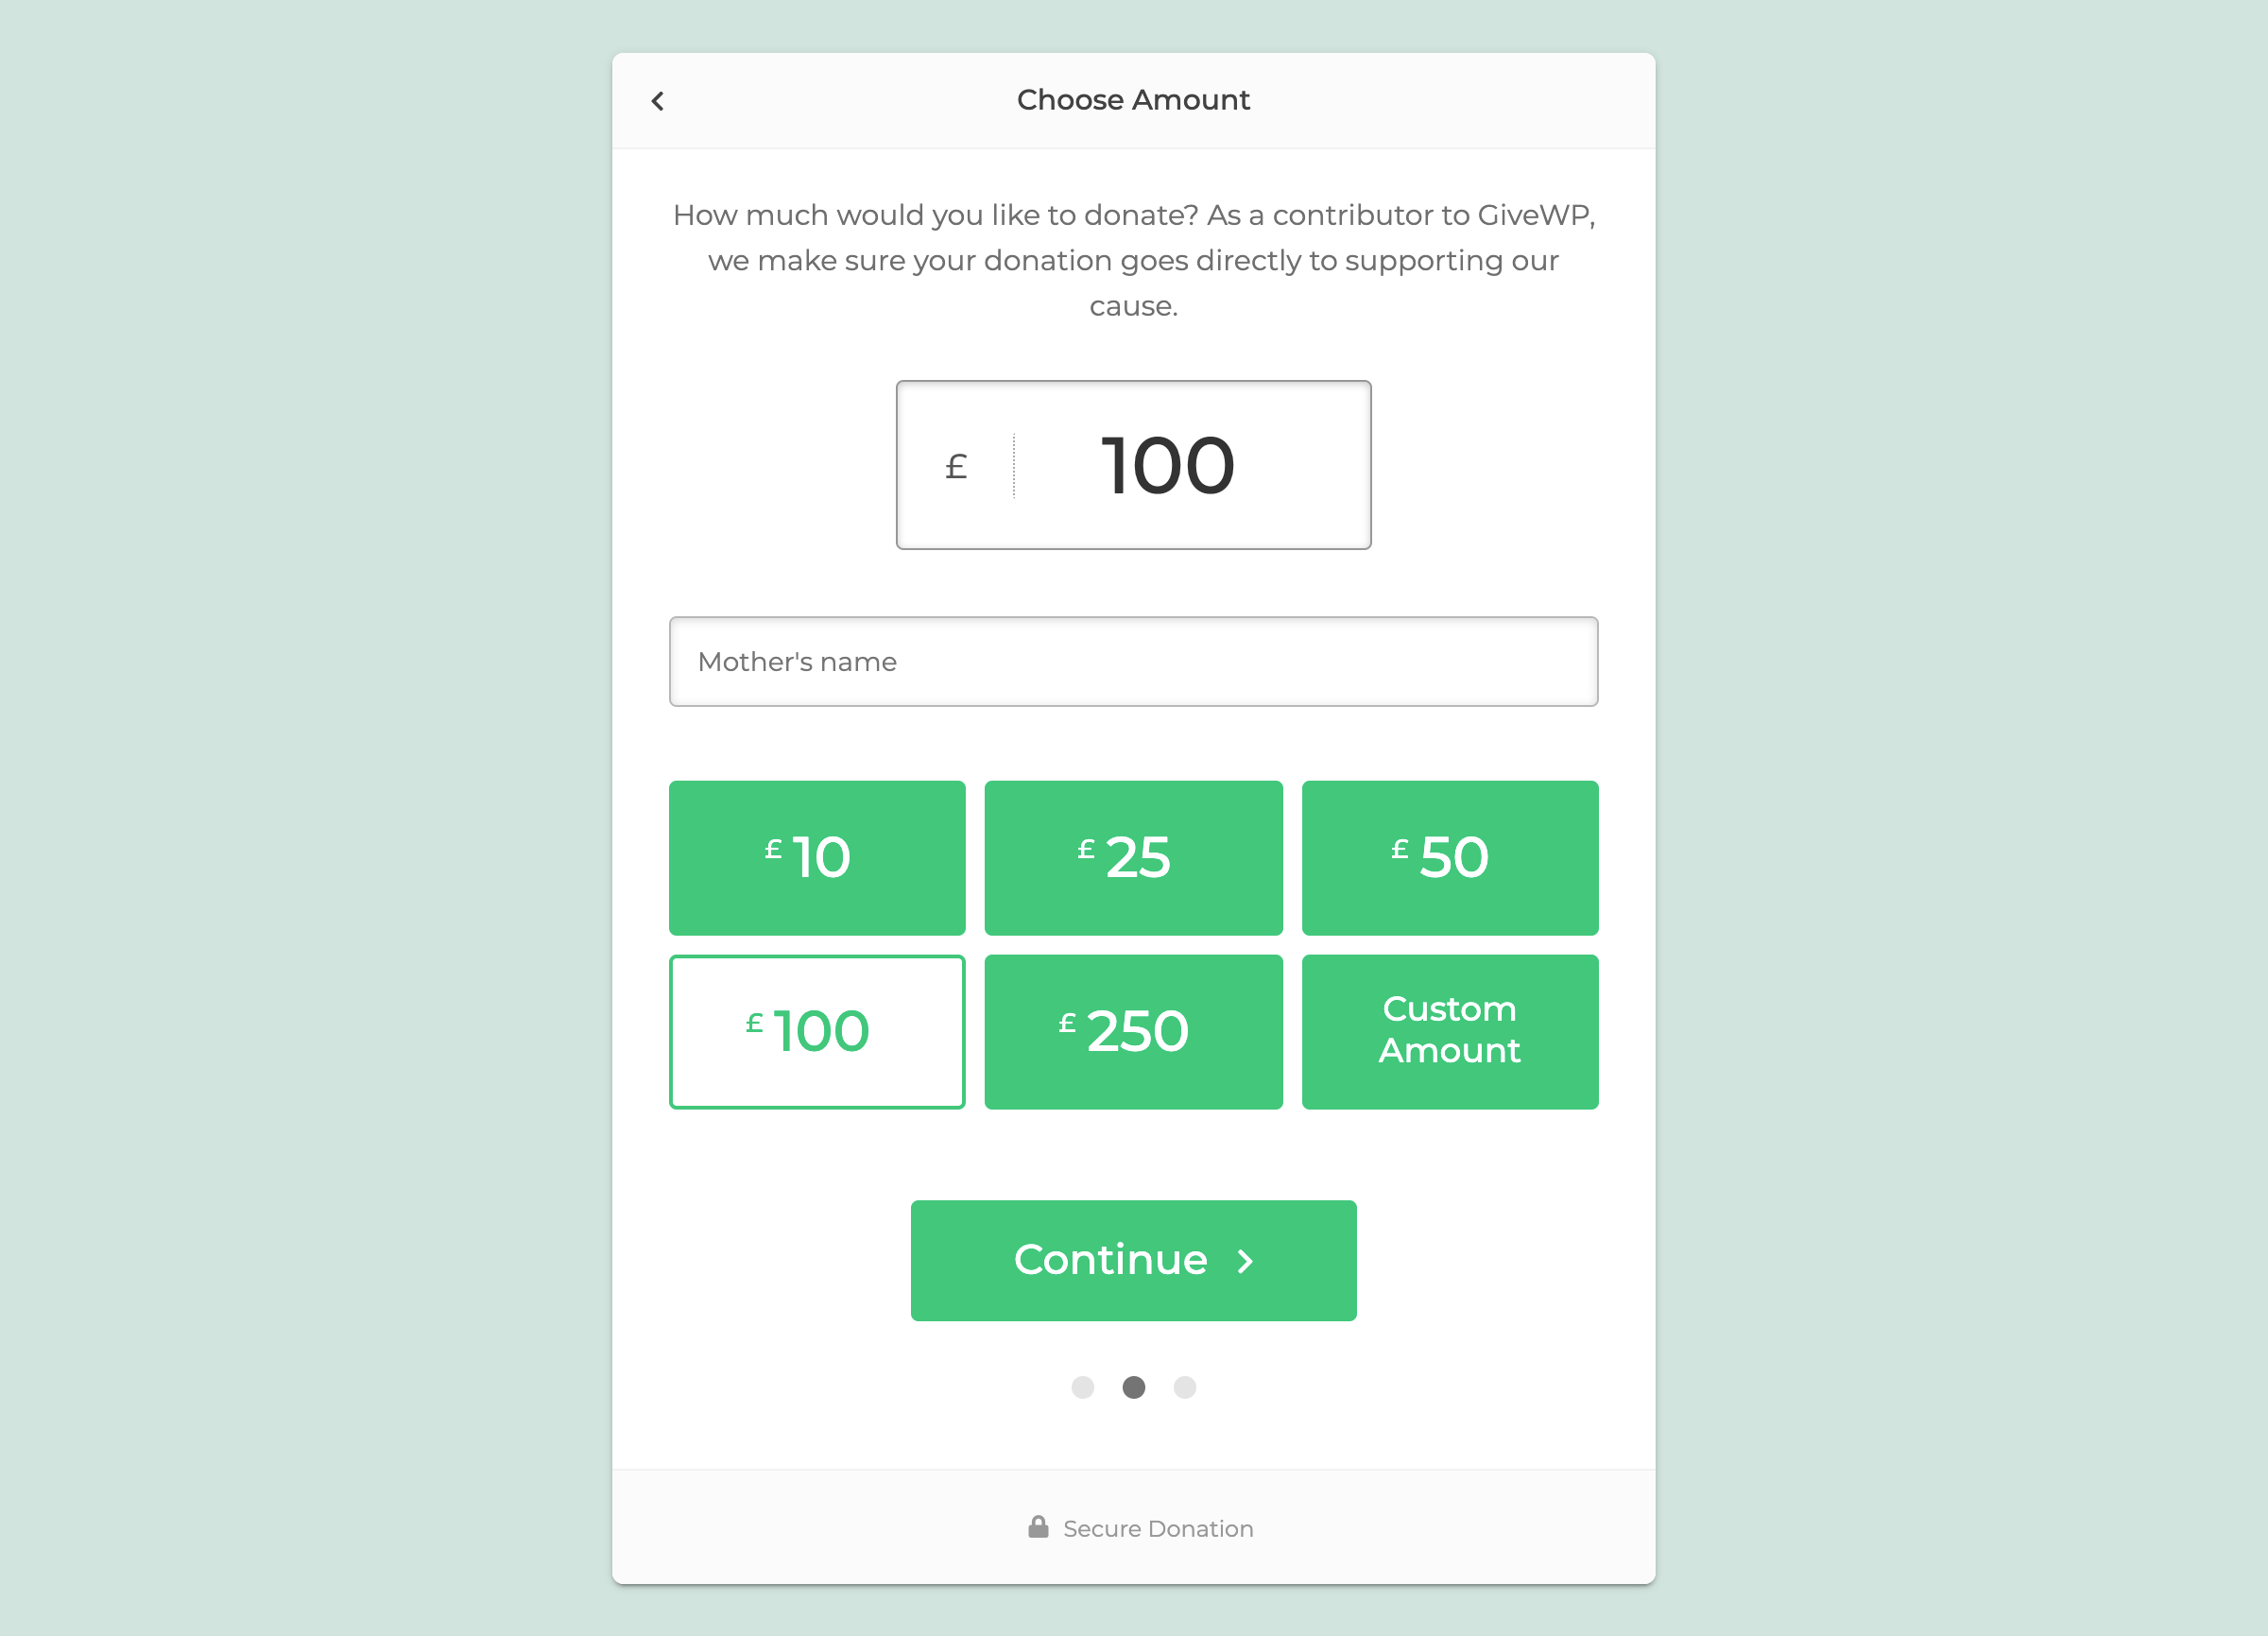
The field added has the following characteristics:
- Its label is What is your mother’s name?
- It should appear in the donation receipt
- Its minimum length is 2 characters
- Its maximum length is 30 characters
- The placeholder for the field is Mother’s name
- It should be stored as donor meta
- It’s a required field
- Its help text is This is a field used to add your mother’s name
This code will generate a field for your donation form that will look like the following:
Example Two: Select Field
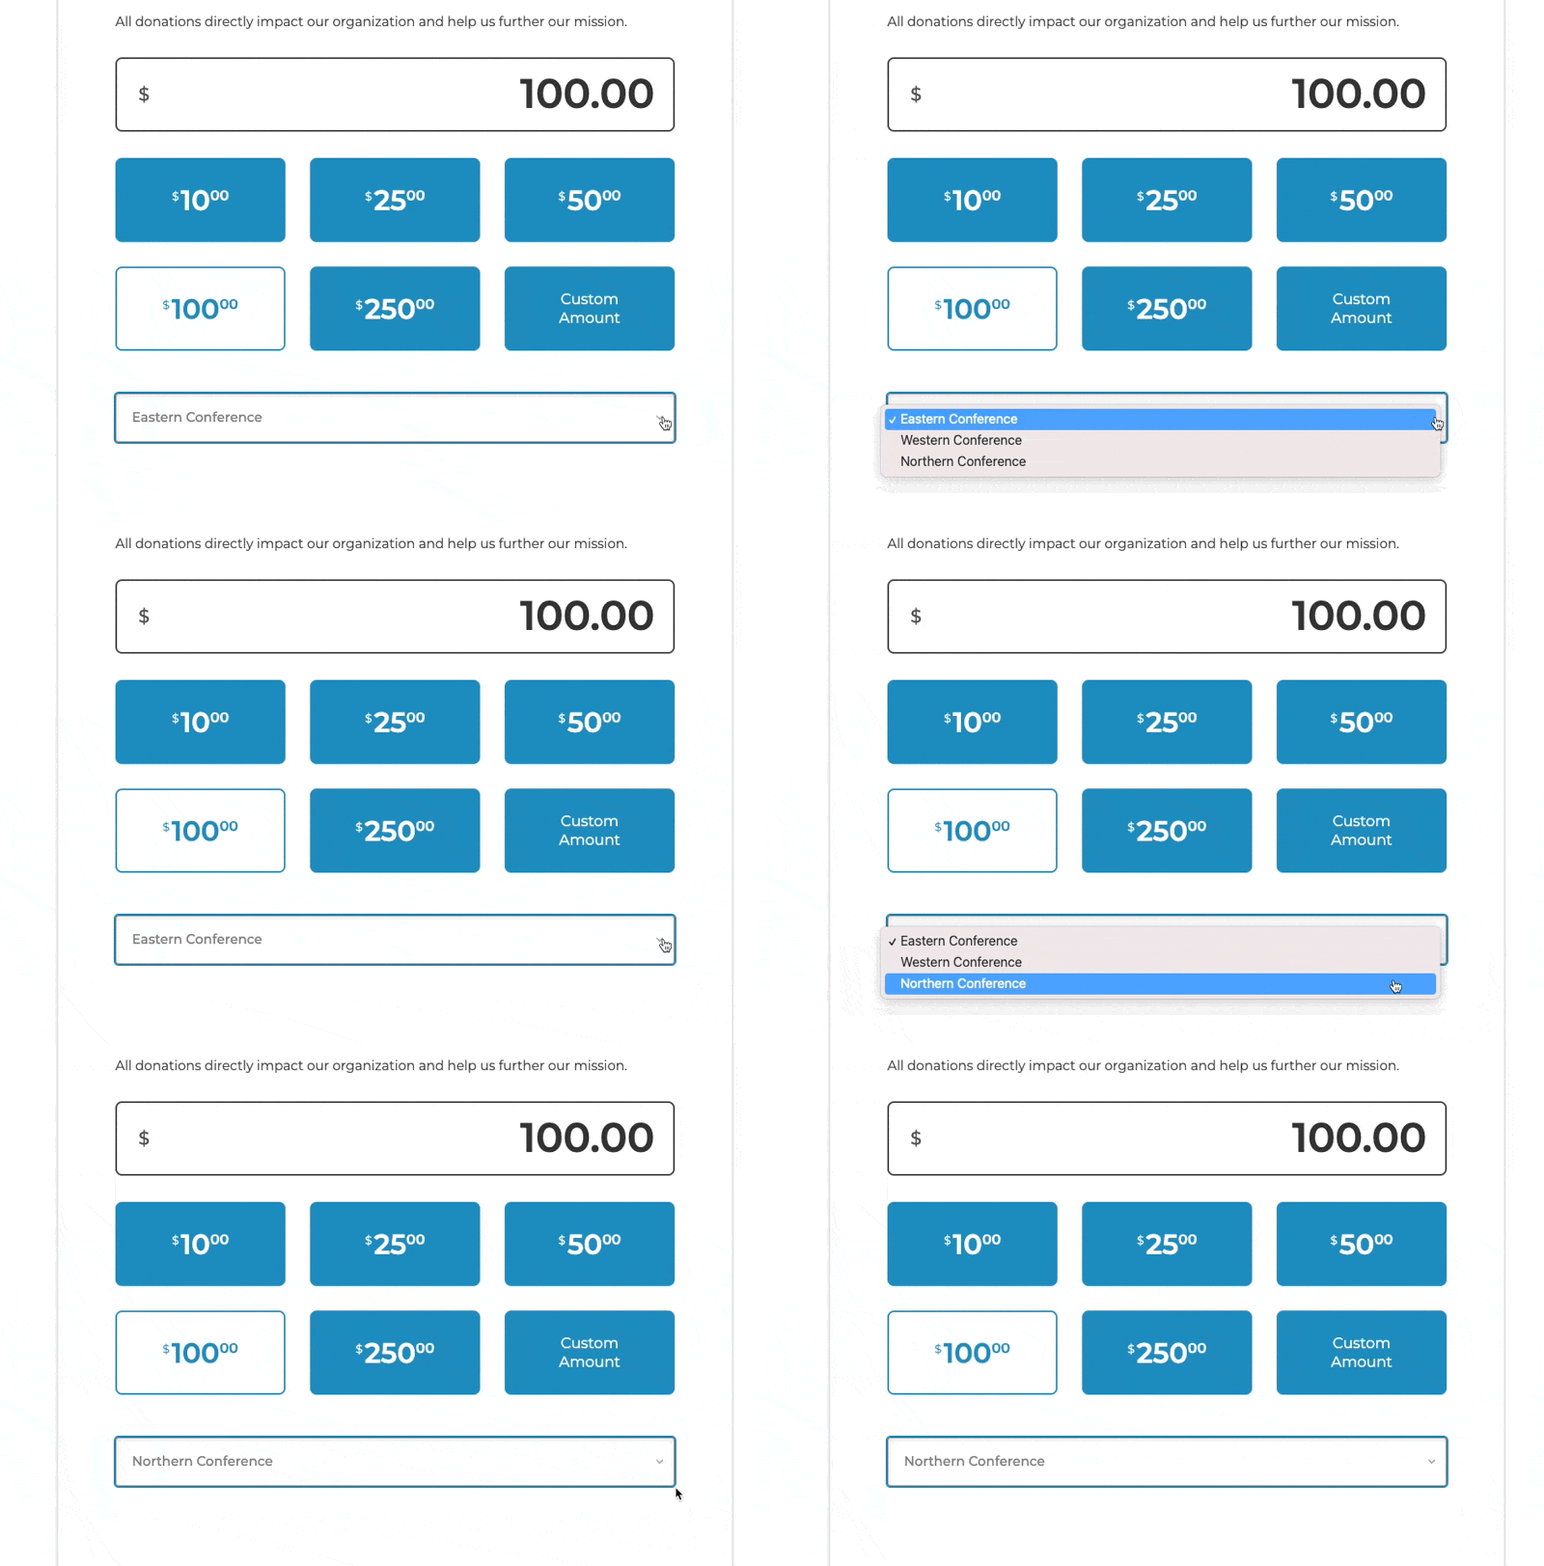
The following code snippet adds a select (dropdown) field to all forms on the site:
add_action( 'give_fields_after_donation_levels', function( $collection ) {
    $collection->append(
        // Select field with options.
        give_field( 'select', 'myConference' )
            ->options(
                [ 'east', __( 'Eastern Conference' ) ],
                [ 'west', __( 'Western Conference' ) ],
                [ 'north', __( 'Northern Conference' ) ],
            )
            ->label( __('Conference') )
    );
});
This code generates the following form:
Example Three: A custom field added to donor meta
The following code snippet creates a field where the data is stored to Donor meta, as opposed to Donation meta.
add_action( 'give_fields_after_donation_amount', function( $collection ) {
    $collection->append(
        give_field( 'text', 'Birth City' )
            ->showInReceipt()
            ->label( __('Birth City') )
            ->minLength(2)
            ->maxLength(30)
            ->placeholder('Your birth city')
            ->storeAsDonorMeta()
            ->required() // Could instead be marked as readOnly() (optional)
            ->helpText( __( 'This is a field used to add your birth city.' ) )
    );
});
Example Four: A hidden field populated from a URL parameter
The following example adds a hidden field:
add_action( 'give_fields_after_donation_amount', function( $collection ) {
    $collection->append(
        give_field( 'hidden', 'donationSource' )
            ->label( __( 'Donation Source', 'give' ) )
            ->showInReceipt()
    );
});
You can populate that field with anything, programmatically based on donor behavior, device, etc.
One way to programmatically populate that field would be with a query parameter on the URL itself, so that if a donor visits the form on a URL like https://example.com/?donationSource=springSocialCampaign, the hidden field would be populated with “springSocialCampaign.”
Here’s a sample snippet for that:
add_action( 'give_donation_form_after_submit', function() { ?>
	<script>
		let searchParams = new URLSearchParams(window.location.search);
		// Change the parameter name here
		let donationSource = searchParams.has('donationSource') ? searchParams.get('donationSource') : '';
		// Change the target variable here
		jQuery("input[name='donationSource']").prop("value", donationSource);
	</script>
<?php } );
Please note: the hidden field data above will not show in the admin screens. It will save to the database and will be exported using the Export Donation History tool.
To wrap things up, let’s take a look at another example of how to create a custom field, display the field on the donation details page, and add the field to the donation history export page.
append(
        give_field( 'text', 'guestName' )
            ->showInReceipt()
            ->minLength(2)
            ->label( __( 'Donation on behalf of...' ) )
            ->maxLength(30)
            ->emailtag( 'guestName' )
            ->placeholder( 'Name of guest' )
            ->required() // Could instead be marked as readOnly() (optional)
            ->helpText( __( 'This is a field used to add the guest name on behalf of whom you are donating' ) )
    );
});

/**
* This function displays custom field in the Donation details page in the backend. Add an if statement for each additional field.
*/
function render_givewp_field_api_fields( $payment_id ) {

    $field_name = give_get_meta( $payment_id, 'guestName', true );

    if ( $field_name ) : ?>

        <div id="guestName-wrap" class="postbox">
            <!--Replace 'Field Label' with a relevant label. -->
            <h3 class="handle">Guest Name</h3>
            <div class="inside" style="padding-bottom:10px">
                <?php echo esc_html( $field_name ); ?>
            </div>
        </div>

    <?php endif;
}
add_action( 'give_view_donation_details_billing_after', 'render_givewp_field_api_fields', 10, 1 );

/**
* This function adds the custom field as a checkbox option in the Donation History Export page. Add a <li> element for each additional field
*/
function export_option_givewp_field_api_fields() {
    ?>
    <li>
        <label for="give-guestName">
            <input type="checkbox" checked="checked" name="give_givewp_export_option[guestName]" id="give-guestName"> <?php esc_html_e( 'Guest Name', 'give' ); ?>
        </label>
    </li>
    <?php
}
add_action( 'give_export_donations_standard_options', 'export_option_givewp_field_api_fields' );


/**
 * This function exports the actual data for the custom field.
 */
function export_givewp_field_api_fields( $data, $payment ) {
    $guestName = $payment->get_meta( 'guestName' );

    if ( isset( $guestName ) ) {
        $data['guestName'] = wp_kses_post( $guestName );
    }

    return $data;
}
add_filter( 'give_export_donation_data', 'export_givewp_field_api_fields', 10, 3 );
Conclusion
The Fields API is a step toward the future with GiveWP, enabling you and other third-party developers to extend GiveWP Donation forms in functionality without having to be concerned with markup or display. The Fields API is also documented with additional field types, options, and methods in the public GitHub repository.