

Solid Central
Migrations 101
Coming soon: Solid Central is becoming Kadence Central. You may see both names used while we update the product, documentation, and customer experience.
Migrations is a Kadence Central Pro feature (formerly Solid Migrations in Solid Central).
Migrating a WordPress site is often time-consuming and may require manual work or third-party tools. Migrations in Kadence Central handle most of the process for you.
This guide walks through the migration flow in Kadence Central and the steps to move a site from an origin server to a destination server. By completing these steps, you will be able to migrate a WordPress site between a connected origin site and a destination site using Kadence Central.
What are the differences between a Migration and a Deployment?
For Kadence Central customers, Migration and Deployment refer to two similar but distinct processes:
- Migration: Move an entire WordPress site, including files, database tables, plugins, themes, and media, from one server to another. The destination site’s domain is updated to match the origin site as part of finalizing the migration.
- Deployment: Sync code and database tables from one environment to another (for example, staging to production) without the full domain cutover workflow of a migration. See Deployments 101. If you are moving a whole site from one server to another, you are in the right place.
Important: To run a migration, the origin site must use your registered domain name (for example,
mydomain.com) with DNS configured correctly. Temporary or placeholder domains (for example,tempsite.mydomain.com) are not supported as the origin for Migrations. Use Migrations when moving an existing live site to a new server.
How Migrations Work
Kadence Central automates most of the move, but some steps still require your action, especially DNS changes and final verification. Below are the steps in the process.
Step 1: Connecting the Origin Site to Central
If the origin site is not already connected to Kadence Central, connect it first.
Before you start, gather:
- WordPress admin login for the origin site
- SFTP or SSH credentials for the server hosting the origin site
- Log in to the Kadence Central dashboard.
- Open Sites and click Add Site.
- Complete the connection flow using your WordPress credentials so Kadence Central can test the connection and add the origin site.
- When prompted, enter SFTP or SSH credentials for the origin server so Kadence Central can verify server access before the migration starts.
For connection issues, see Tips for troubleshooting Kadence Central.
Step 2: Start a Migration
To begin migrating an origin site to a new server:
- Log in to Kadence Central.
- Click Sites and select the site you want to migrate from.
- On the site dashboard, click the Deploy icon, then select Start a Migration.
You will choose a destination site from those already connected to Kadence Central, or connect a new destination site (see the next section) if it is not yet in your account.
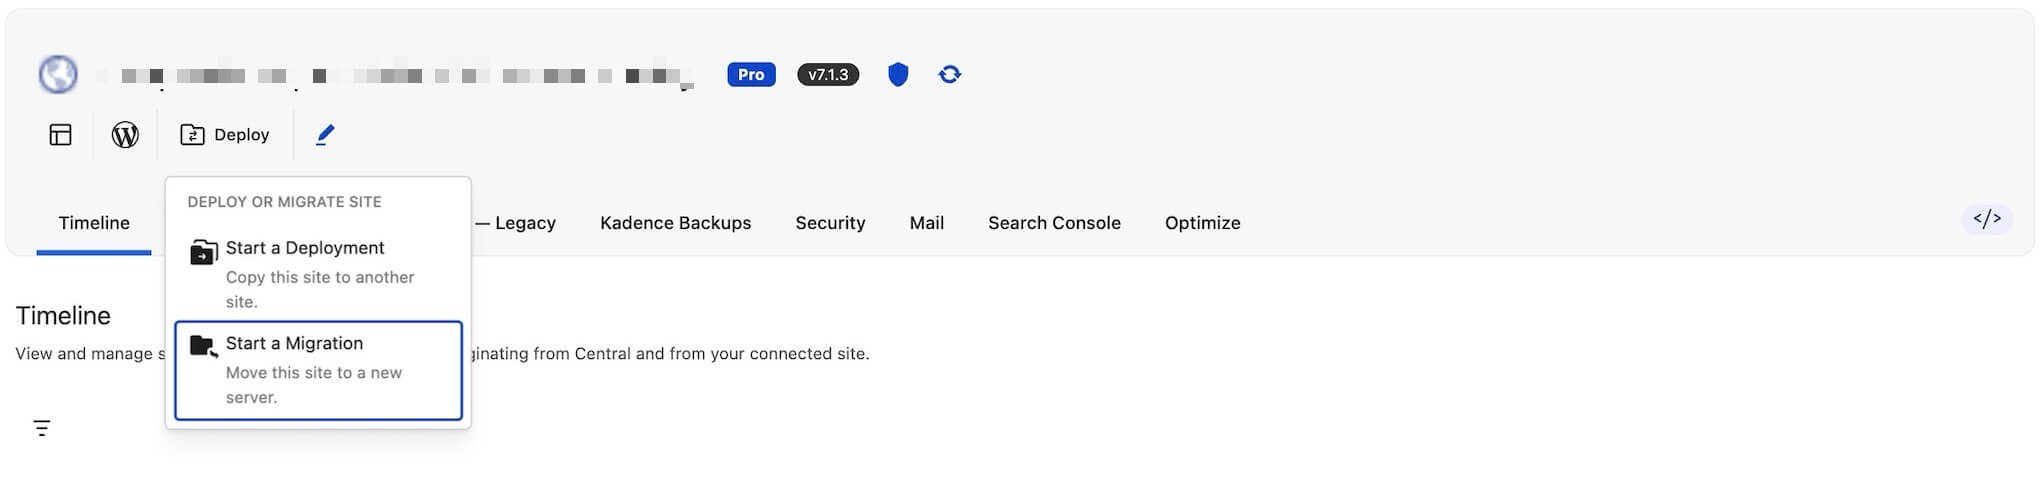
You will choose a destination site from those already connected to Kadence Central, or connect a new destination site (see the next section) if it is not yet in your account.
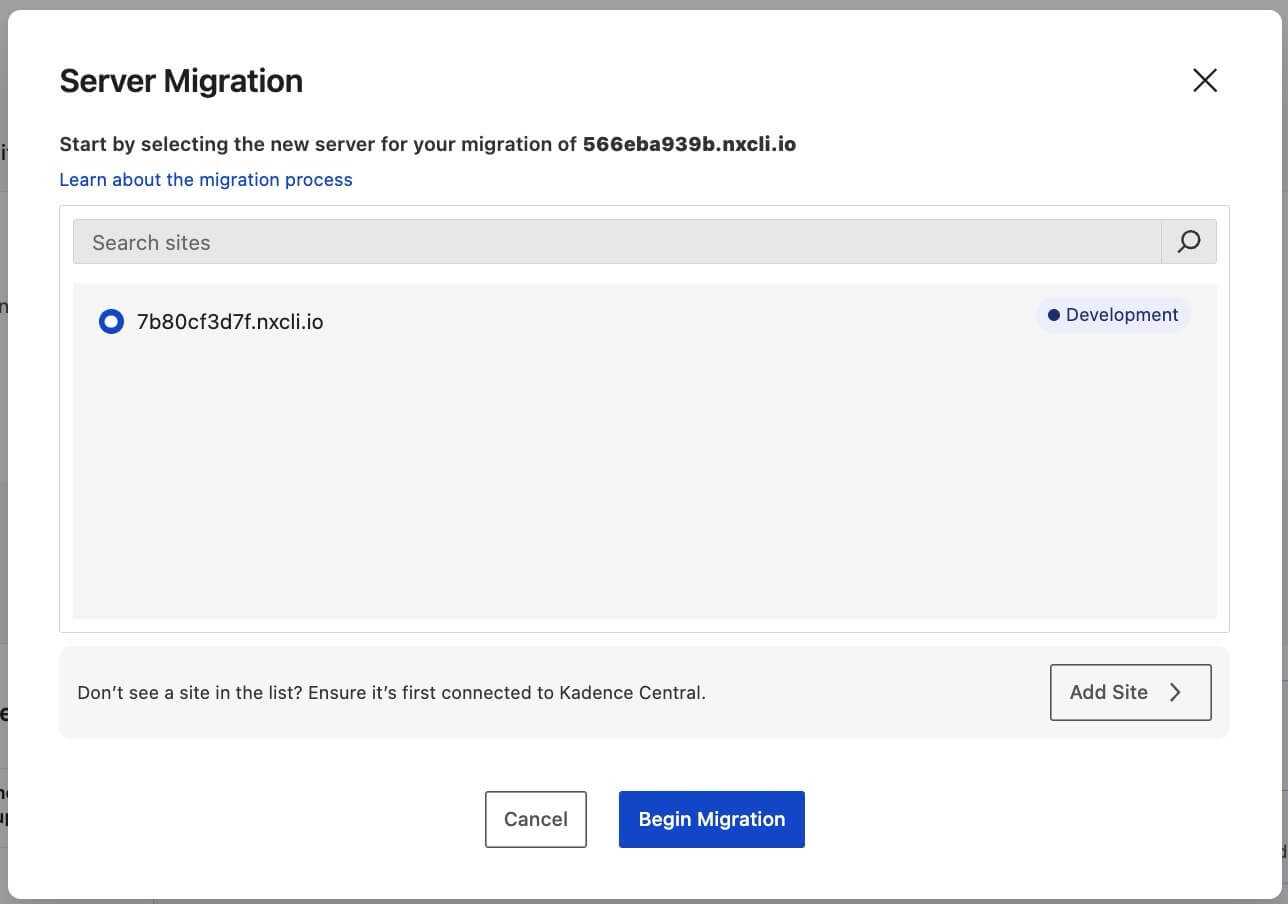
Step 3: Connect the destination site to Kadence Central
Before proceeding, gather for the destination site:
- WordPress admin login for the destination site
- SFTP or SSH credentials for the server hosting the destination site
Connect the destination site the same way as any new site in Kadence Central (Sites → Add Site), then provide SFTP or SSH credentials when prompted so Kadence Central can verify the server connection.
Once the connection is verified, click Confirm Migration to continue.
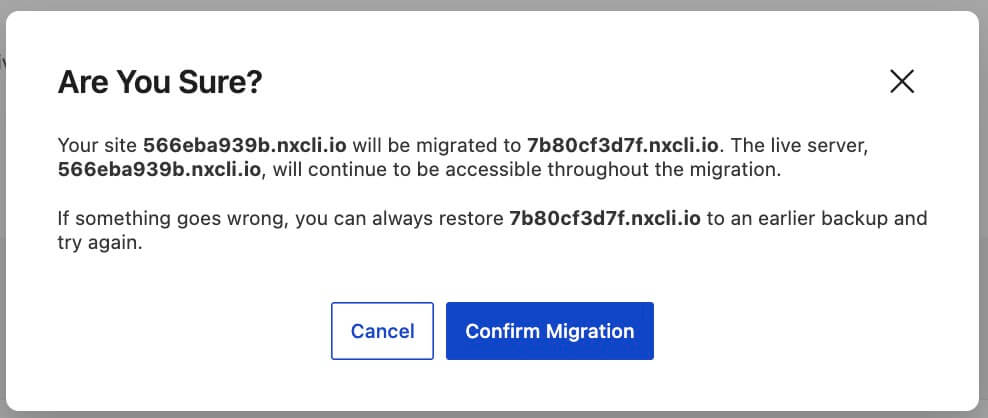
Step 4: Transfer the Files and Database to the Destination Site
Kadence Central copies all site files (themes, plugins, media) and the full WordPress database to the destination environment. Follow the progress of the migration card on the site Timeline.
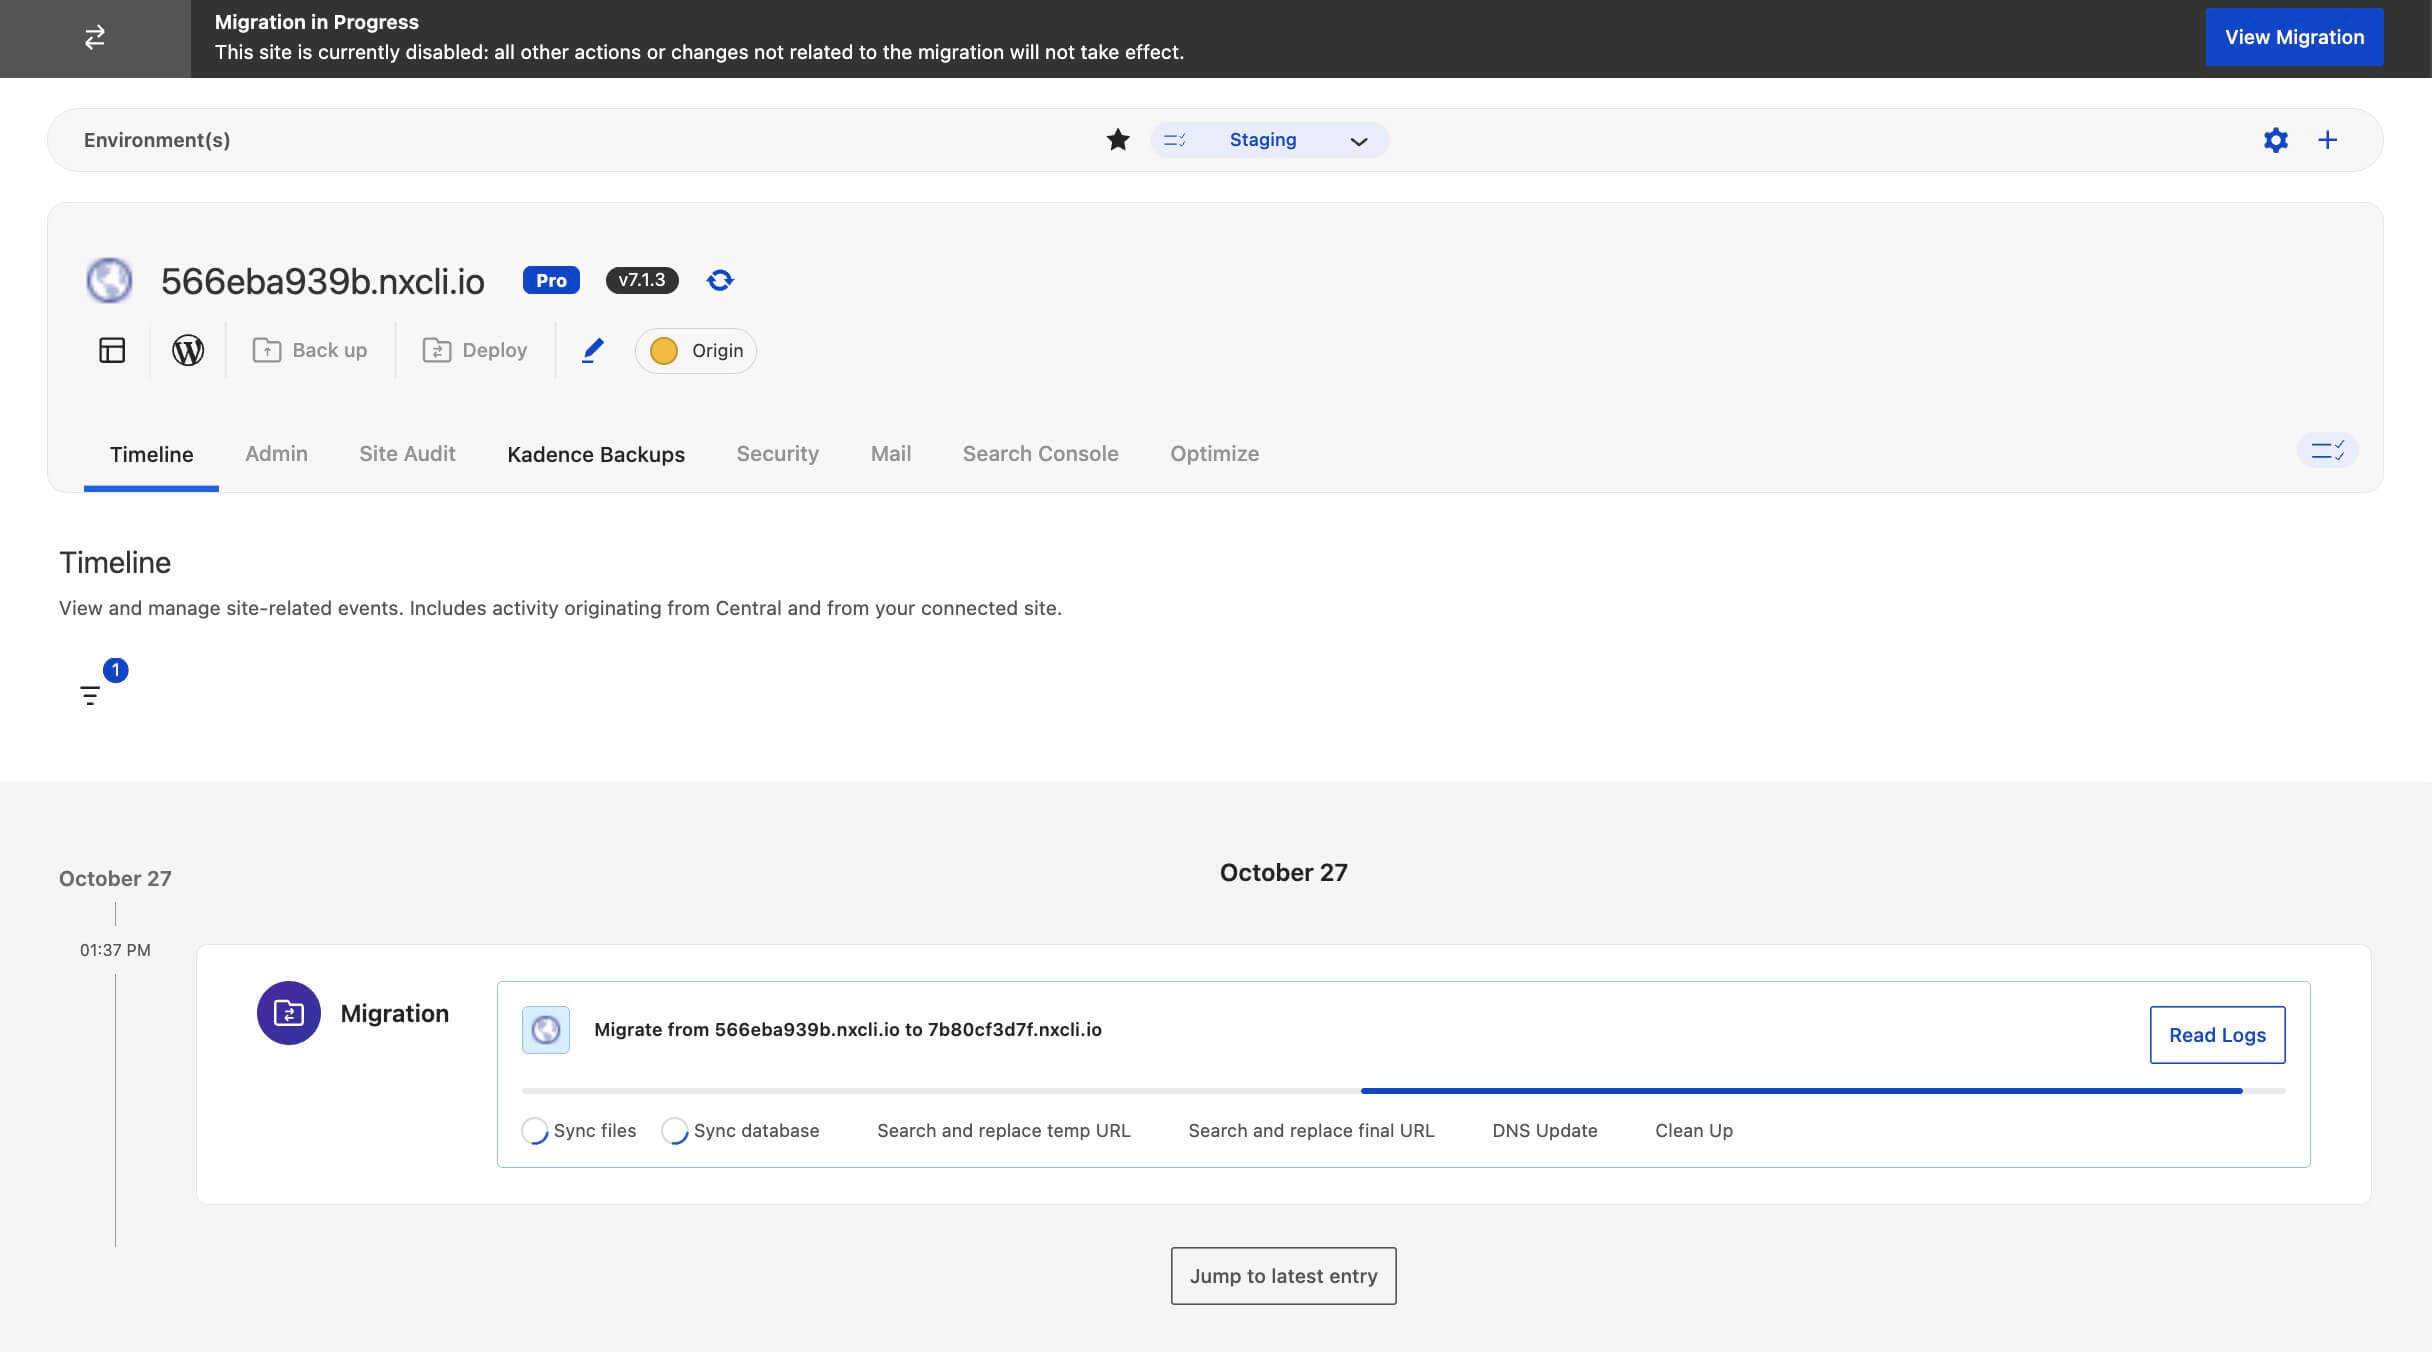
Warning: This step overwrites the destination site as it exists on the server. Take a backup first if you need a restore point.
The time required to complete the deployment varies, but it is typically around 10-15 minutes for a standard WordPress site, depending on its site size. Larger or more complex sites will take longer, e.g., those with vast media libraries, a significant number of plugins/files, or large databases.
You do not need to stay on the page. The migration card in the Timeline will always reflect the current status, and you can click Read Logs to get a better understanding of its progress.
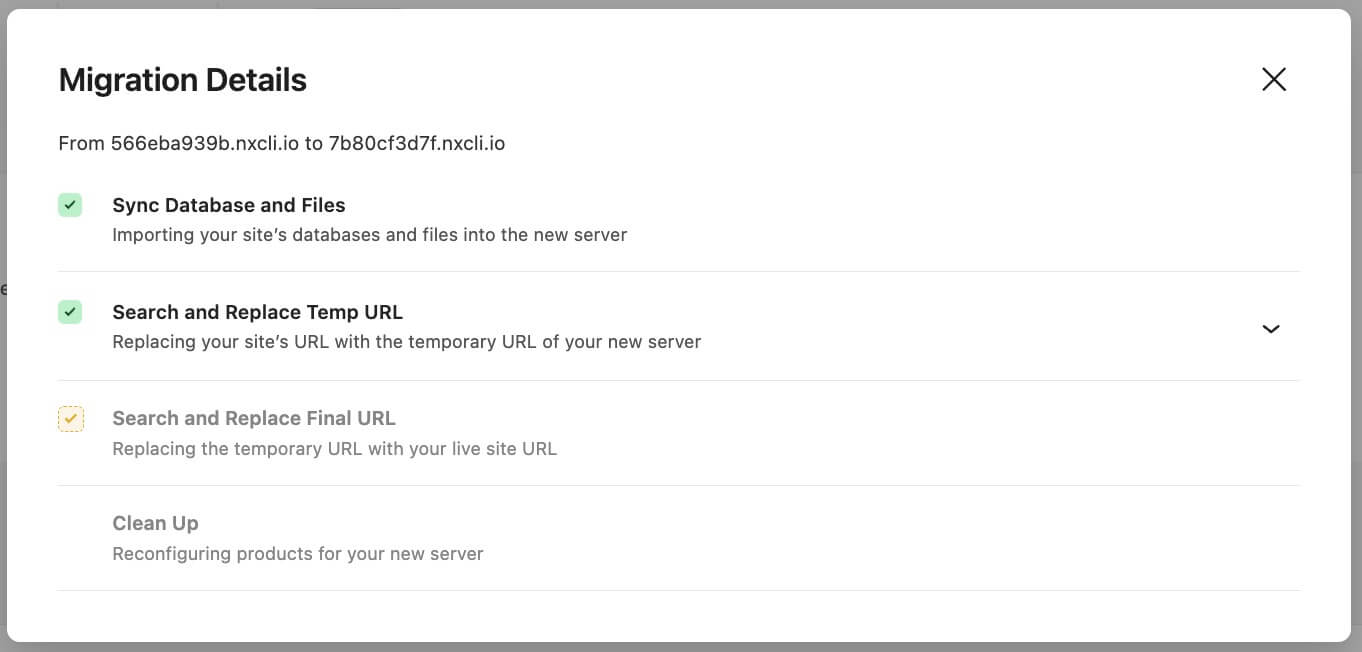
Step 5: Update the site URL in the database on the Destination Site
After content is copied, Kadence Central runs an automated search-and-replace for URLs, file paths, and environment-specific values so the database reflects the destination setup. The origin URL is replaced with the temporary URL provided by your host for the destination server.

Step 6: Review the status of the Migrated Site at your Temporary URL
When the migration completes, use the temporary URL from your hosting provider to review the site before updating DNS. This is often a generated subdomain such as tempsite01.yourhost.com.
Use the temporary URL to:
- Preview the full migrated site in a live environment
- Test navigation, media, forms, and critical functionality
- Access the WordPress Admin to verify settings and content.
Warning: The temporary domain is not for public traffic. Some plugins or custom code may behave differently until your custom domain points to the destination server and the migration is finalized.
It is important that you use this opportunity to validate your site before finalizing the migration and going live with the new site. Once you are ready to proceed with the next steps, click “I’ve Reviewed My Site” to confirm.
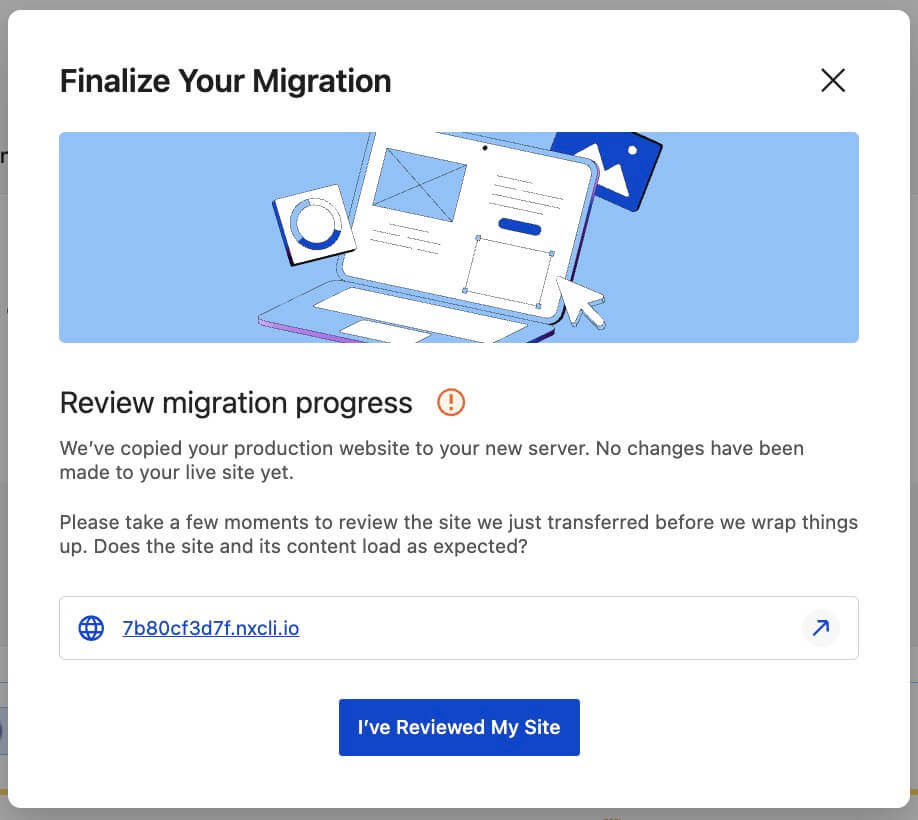
Step 7 (Optional): Migrate Again or Cancel
If you need to apply updates to the origin site after previewing the migrated site, click Resync My Site to rerun the migration and overwrite the destination with the latest version.
You can click Cancel this Migration if you do not want to proceed.
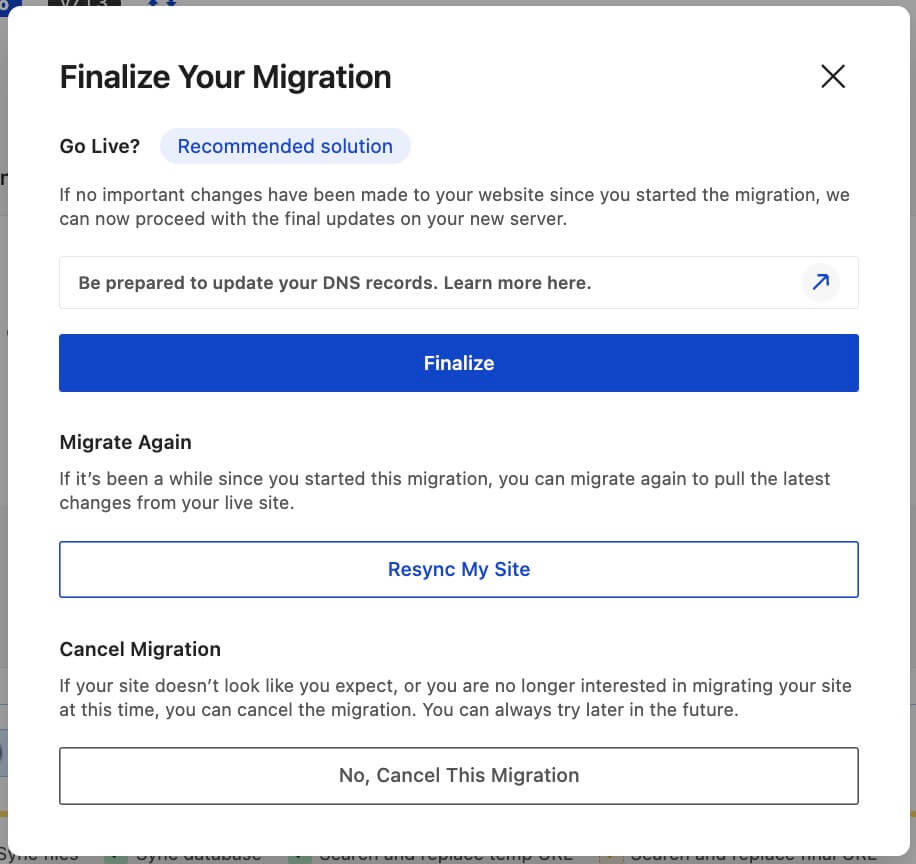
Step 8: Finalize the Migration
When you are ready, click Finalize Migration.
During finalization, Kadence Central runs a final search-and-replace on the destination site to remove lingering references to the old domain or file paths.

Step 9: Update your DNS Records
After the site works at the temporary URL, update your domain’s DNS to point to the destination server.
During the migration workflow, Kadence Central provides the DNS changes you need (for example, a CNAME record or nameserver updates). Log in to your domain or DNS provider, open DNS management, and apply the values shown in Kadence Central.

During the migration workflow, Kadence Central provides the DNS changes you need (for example, a CNAME record or nameserver updates). Log in to your domain or DNS provider, open DNS management, and apply the values shown in Kadence Central.
If your provider’s DNS panel is hard to find, check that provider’s DNS documentation for where to edit records.
For many popular providers, this article includes links to modify your DNS records.
Note: DNS changes may take up to 24 hours to propagate, though many update within a few minutes. You can check propagation with tools such as whatsmydns.net.
Step 10: Final Cleanup
After finalization, Kadence Central updates your dashboard so the destination site is the canonical connection:
- The origin site is disconnected from Solid Central.
- If the site used Kadence Backups — NextGen, backups from the origin site stop
- Timeline entries associated with the destination (pre-migration) site are removed.
- The origin site’s historical timeline and migration records are preserved.
- Kadence Central treats the destination site as the official site going forward.
Step 11: Verify the destination site
Browse the destination site as a visitor would. Test the front end and admin, check for broken links and missing assets, and confirm login works.
A successful verification means the site is now live and running from the destination server.
After the Migration is Finalized
Once the migration is finalized:
- You’ll manage the destination site in Kadence Central going forward.
- If the site is enrolled in Kadence Backups, scheduled backups run from the destination site
- Historical logs and timeline entries for the origin site are kept, but the origin connection is removed
Your history stays intact while control moves to the destination server.
Troubleshooting Common Migration Issues
If the migrated site doesn’t look right after the migration completes and the DNS updates propagate, here’s what to check:
- Confirm all files and database content were copied correctly.
- Check the destination server’s PHP error logs or the WordPress debug log.
- Consider rerunning the migration, which will repeat the file and database transfer steps.
- Verify the DNS propagation status for the domain using tools like whatsmydns.net.
A Recap of the Migration Steps
Here’s a quick overview of the key steps in the migration process:
- Step 1: Connect the origin site to Kadence Central if needed.
- Step 2: Start a migration from the origin site.
- Step 3: Connect the destination site if needed and confirm the migration.
- Step 4: Wait for file and database transfer to the destination site.
- Step 5–6: Confirm URL replacement and review at the temporary URL.
- Step 8–9: Finalize the migration and update DNS for the destination server.
- Step 10–11: Allow cleanup to finish and verify the destination site.
Conclusion
Migration in Kadence Central is built to move sites to a destination server, including into StellarSites, with automated transfers, URL and path replacement, DNS guidance, and integration with the Kadence Central dashboard and Timeline.
FAQ
Where do I find the migration option?
Migrations are specific to particular sites. Open the site in Kadence Central, then use the Deploy control near the site title. Under Deploy, select Migrate (or Start a Migration).