

Give
Creating Give Forms
Donation forms let visitors contribute directly to your fundraising campaigns or standalone causes on your WordPress site. This guide covers how to create a new Give form, choose a form template, configure donation levels and excerpts, and publish your form.
Before you begin
Make sure the Give plugin (plus any needed add-ons) is active, your currency is set under Give > Settings > General, and at least one payment gateway is enabled under Give > Settings > Payment Gateways.
Creating a Give Form for a Campaign
Each form belongs to a campaign, and you must access your campaign to create new forms.
- In your website admin, navigate to Give > Campaigns.
- Select the campaign you want to add a form to.
- Go to the Forms tab and use the Add campaign form button to add a new donation form.
- The Visual Form Builder will automatically open so you can customize and publish your new form.
Watch this video for a quick demonstration of how to create a donation form in Give.
Creating a Standalone Form (Give 4.19.0+)
A form can be created on its own without a campaign. This is ideal when you don’t need to manage a full fundraising campaign.
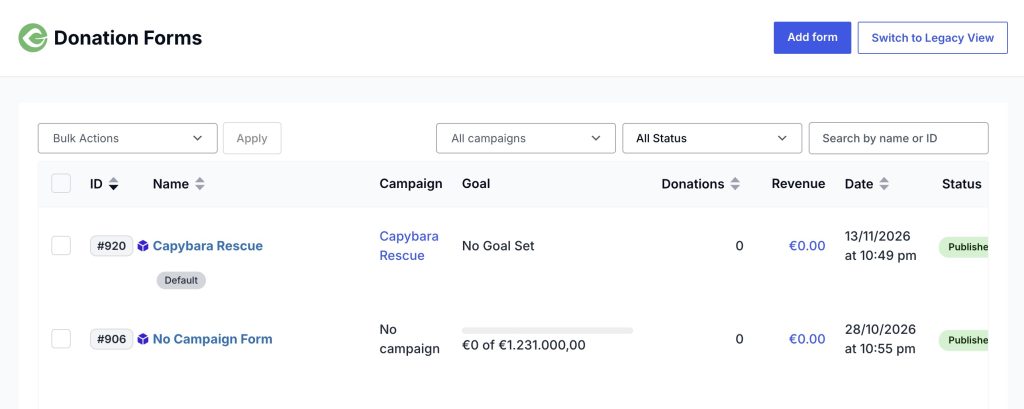
To create a standalone form, go to Give > Forms and use the Add Form button.
Choosing a Donation Form Editor
If you created donation forms before the Visual Form Builder was added to Give, you might still have the older form editor we call the Options-Based Editor. When you have the Options-Based Editor, you will be prompted to choose which editor to use before the form is created and opened.

Form Templates
Give Form Templates offer flexible design options to match the style and goals of any organization’s donation experience. There are different templates for both the Visual Form Builder and the Options-based Form Editor.
Selecting a Visual Form Builder Template in the Design Tab
To select a template, go to the Design tab and then, on the right-hand side, you will see the options for the design of the form. The first section is the Form Layout dropdown, where you can choose which template to apply to the form that you’re editing. The options are Classic, Multi-Step, and Two-Panel.
Classic Template
The Classic template displays all the fields in one long-form style page. This is designed to reduce the number of clicks that a donor makes before submitting a donation.
Donors fill out the form as they scroll down the page.

Multi-Step Template
The Multi-Step template breaks the donation process into smaller, easy-to-follow steps. This layout helps reduce the visual length of the form, making it less overwhelming for donors.
In the Visual Form Builder, each new Section you add creates a new step in the form. This makes it easy to organize fields in a way that guides donors through the process one step at a time.
By default, the template starts with a header as Step One, but this can be turned off if preferred. Disabling the header can streamline the experience even more and help lower friction for donors who are ready to give.

Two-Panel Template
The Two-Panel template is the middle ground between the Classic and the Multi-Step templates.
The left side presents the header of the form, while the right side is a form that is separated into a few steps.
When viewed on mobile devices, the two sides of the form stack upon each other, allowing the header to remain visible while donors navigate through the steps and view all the steps of the form. This greatly streamlines the experience of using the form on both desktop and mobile devices.

Selecting a Template for Options-based Forms
For Options-based forms, there are three templates: Classic, Multi-Step, and Legacy.
Selecting a Template
Form templates are set at the individual form level. To set the template, visit the Form Edit screen. On new forms, you must select a form template before you can publish the form.
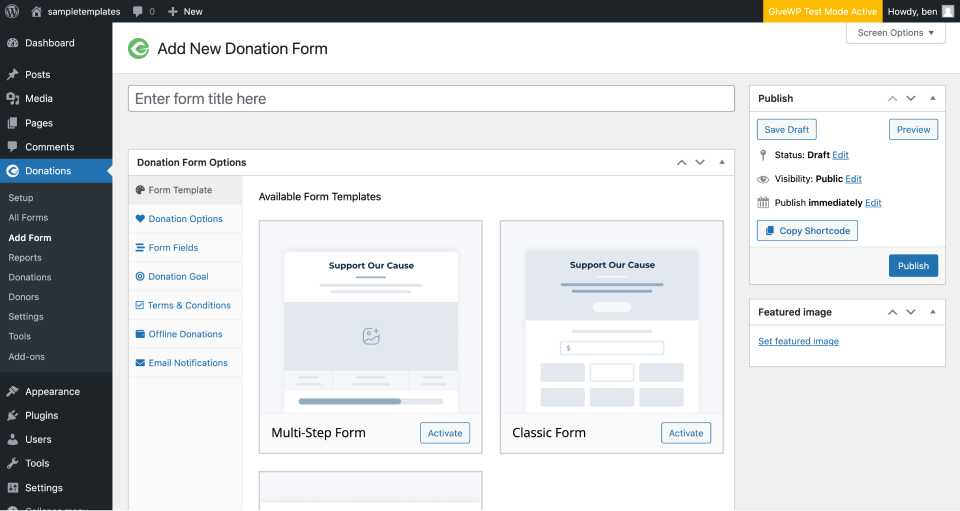
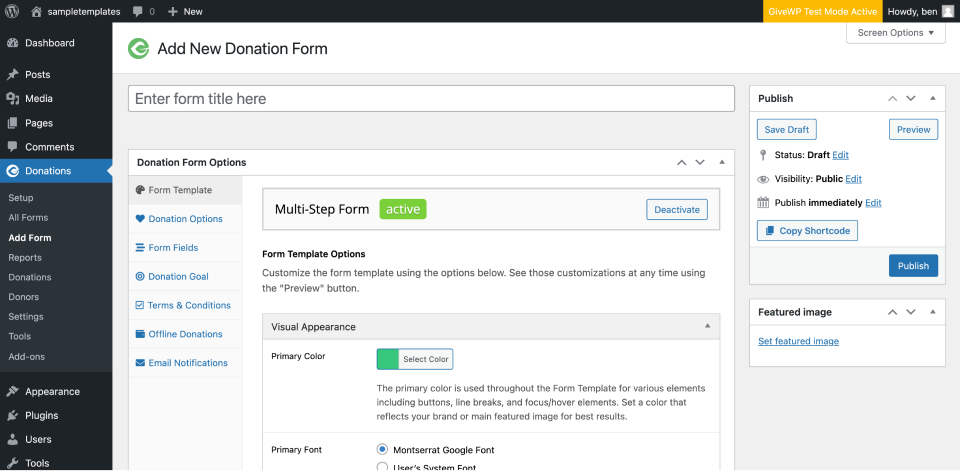
Once a form has been published, you can always go back and change the template in use, clicking Deactivate the current form template at the top of the Form Template tab, and then selecting and activating a different template.
Multi-Step Template
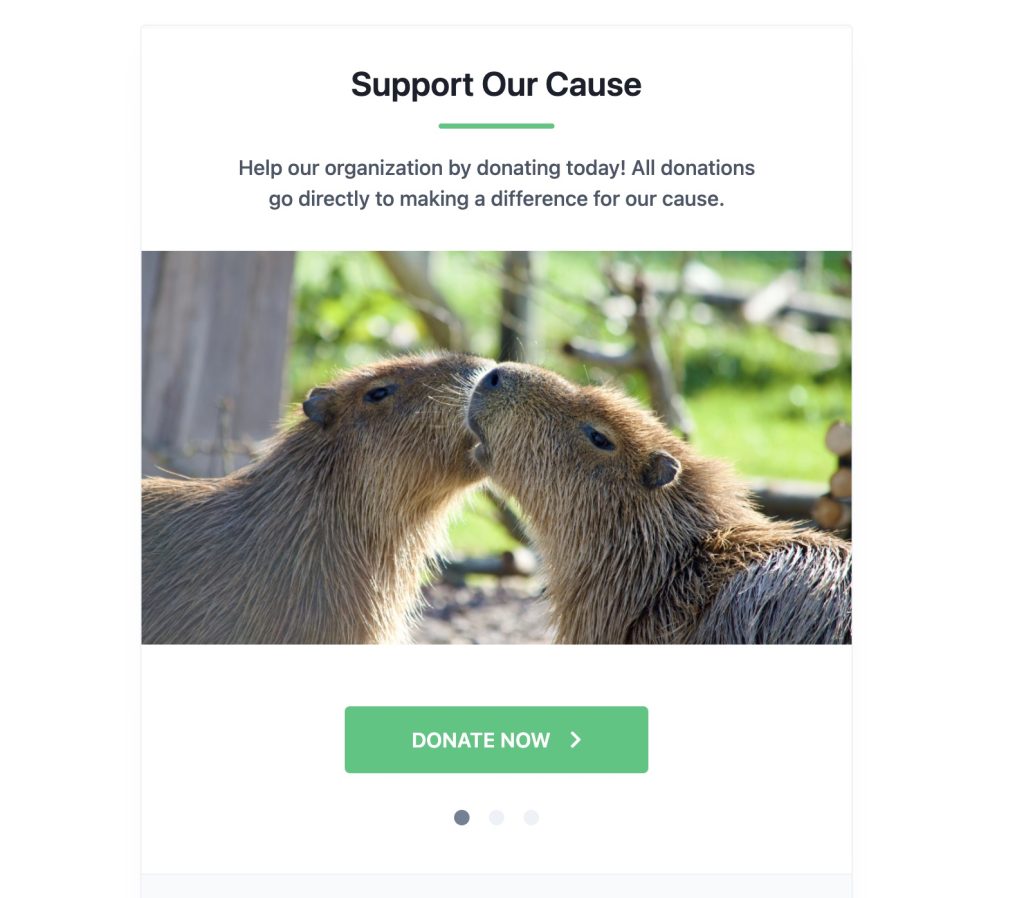
The Multi-Step form template walks the donor through a number of steps to the donation process. This template is ideal for embedding in other pages or posts on the site because of its fixed smaller width and relatively small space requirements.
The options on the edit screen are broken into steps to correspond with the steps on the front end.
Step One can be disabled entirely, based on your needs. That removes a step (and the resulting friction) from the steps while still delivering a multi-step experience.
The Multi-Step template keeps the donor on the same page throughout the entire process and displays the confirmation message in the normal flow.
Classic Template
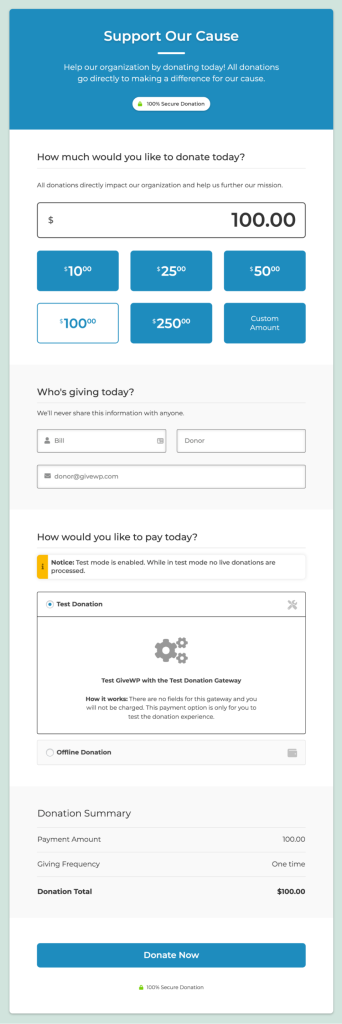
The Classic template displays all on one page, and while its width is fixed, the Classic template is slightly wider than the Multi-Step template.
The Classic form template is ideal for forms displayed by themselves on the page, and donors fill out the form as they scroll down the page.
Legacy Template
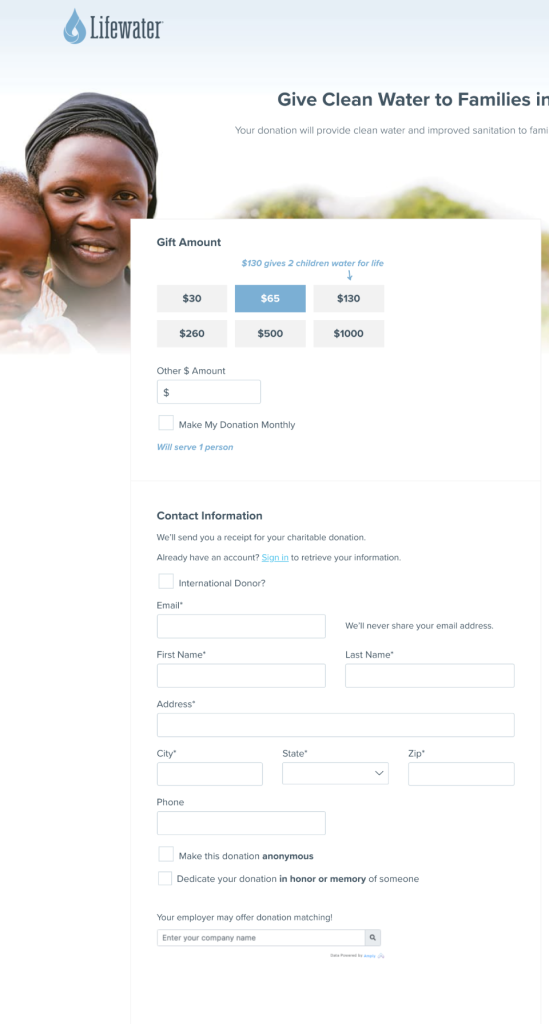
The Legacy template is ideal for developers and others who want to be able to more directly style things and create their own interfaces. While still fully supported, it’s the template that started it all and does not receive as much attention going forward as the team builds out new form interfaces.
Configuring a Form
Once you’ve selected a template, you’ll need to create Donation Levels, the Custom Amount, and ensure the required elements are in place.
Donation Levels (required)
Donation levels are automatically created when setting up your form. Edit these to ensure the correct levels are configured to your needs.
In the Visual Form Builder, go to the Build tab and select the Donation Amount and Levels block to add levels using the Plus icon, or remove levels by using the Minus icon next to an existing level.
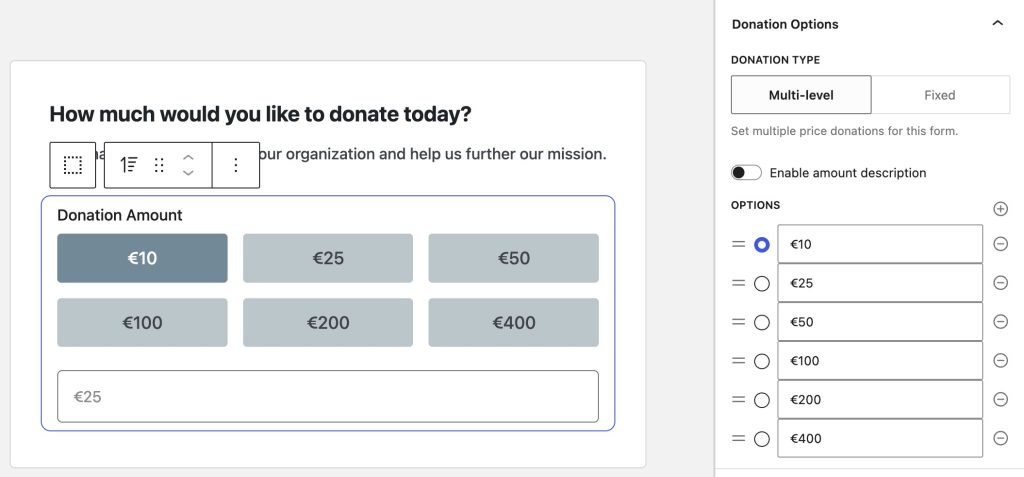
For Visual Builder Forms, you can also show or hide a description by toggling the Enable amount description.
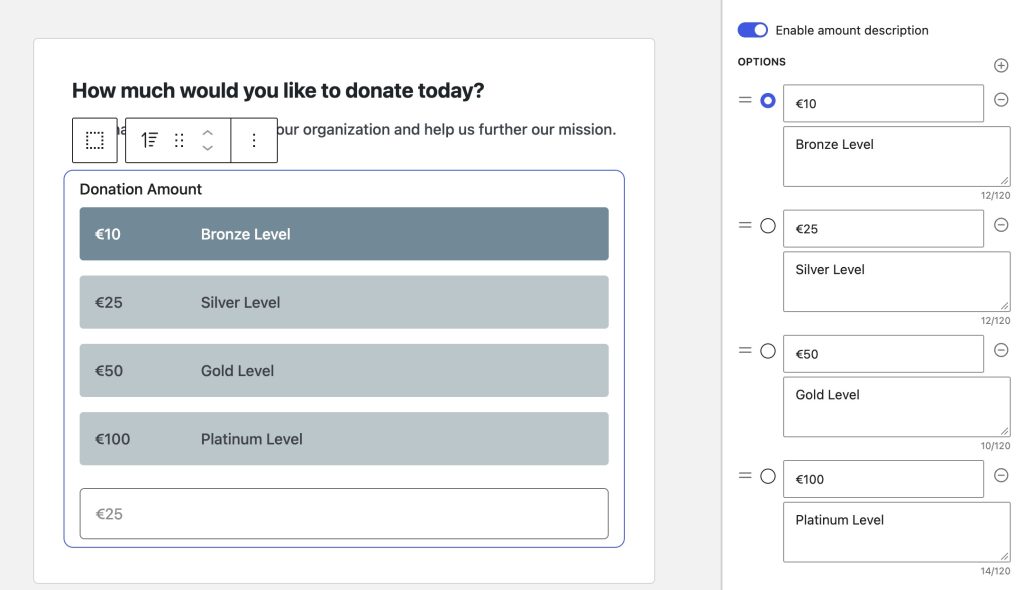
You can also add Donation Level descriptions in an Options-based Form. Navigate to the Donation Options tab to add, edit, or remove the description.
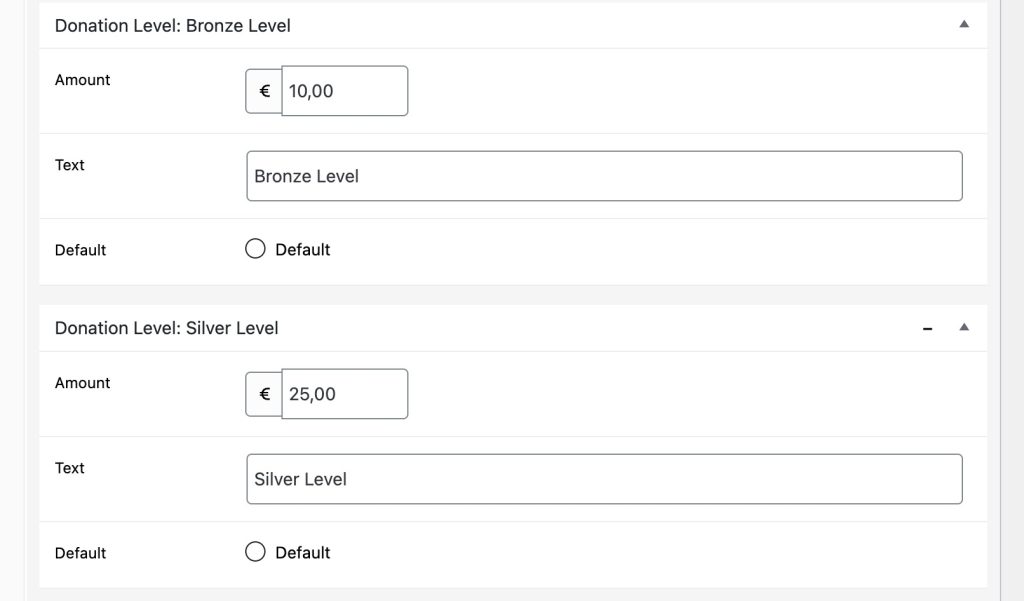
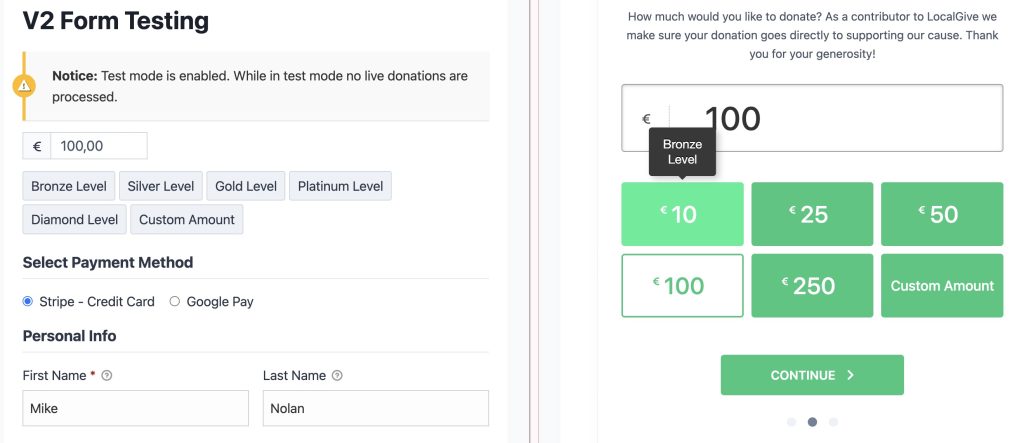
The Donation Level description will display differently as a tooltip in the Multi-Step and Classic templates, and as inline text for the Legacy template.
Form Excerpts
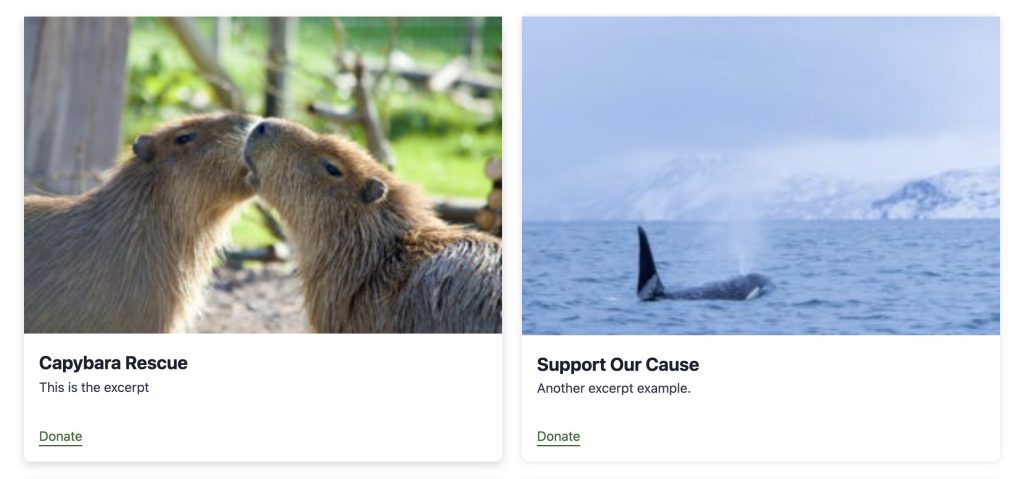
The Excerpt is an optional summary or description of a donation form; in short, a summary as to why the user should donate to your cause. Give leverages WordPress’ Core feature, called excerpts, which typically are used to describe a post.
The form excerpt isn’t displayed when viewing the form. It is displayed when using the Form Block or Form Shortcode.
Visual Form Builder Excerpt
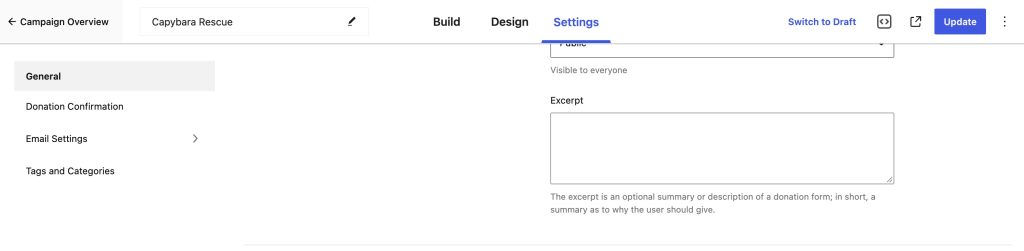
The excerpt for a Visual Form Builder form is found in the Settings tab. Once the excerpt is filled in, use the form’s Update button to save.
Options-based form Excerpt
The excerpt for an Options-based form is found on the form’s edit page. Scroll down to find it and fill in your excerpt, then use the Update button to save.

Disable the Form Excerpt Field
You may not have any use case for the form excerpt field and don’t want to see it in the admin interface. You can safely ignore it or disable it under Give > Settings > Display Options > Post Types > Forms Excerpts:
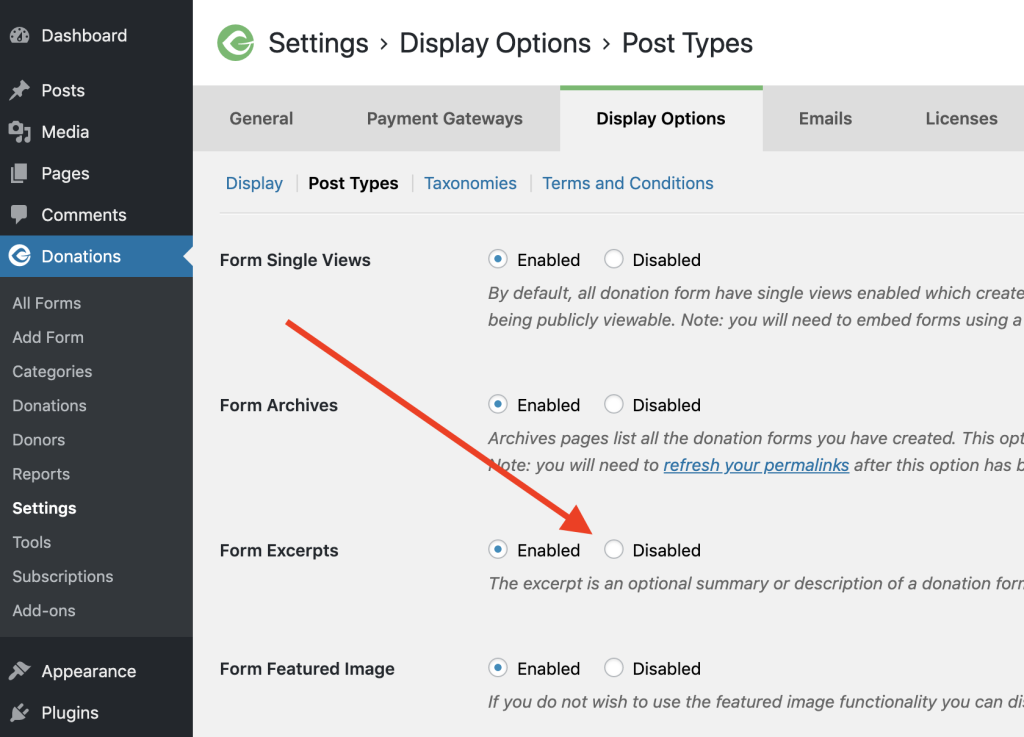
Note:
If an excerpt exists in a form, disabling the excerpt will not stop it from displaying in the Form Grid Block or Shortcode. Delete a form’s excerpt if you don’t want it to show anywhere.
Styling Give Forms
To style all Visual Form Builder templates and the Multi-Step and Classic templates for Options-based forms, the Custom CSS area is the best spot. The above form templates are iframe-based so that themes or other plugins can’t inadvertently cause style conflicts.
There is a method to use a CSS stylesheet if this is your preference.
Refer to the Handling Custom CSS in Give documentation for instructions on using both the Custom CSS area and a CSS stylesheet.
Publish Your Form
Once your form is ready, click Publish in the top-right corner to make it live. To place the form on a page, post, or external website, see Displaying and Embedding Give Forms on Your Website.
Next Steps
Now that your donation form is created, explore these guides to customize and test your setup:
- Customize advanced form sections and confirmations: Editing Give Forms
- Apply custom styling to your form: Handling Custom CSS in Give
- Run test transactions before going live: Test Mode