

Give
Displaying and Embedding Give Forms on Your Website
Give forms can be used in a variety of ways, but it ultimately depends on your goal. You can embed a form in your pages and posts using the shortcode or the block, use the form’s direct permalink, or embed forms on an external website. Let’s dive into the options for using forms on your website.
Before you begin
You must have at least one published Give donation form. See Creating Give Forms if you haven’t built one yet.
Using Give Forms on your website can be done with any of these methods:
|
Method |
Best Used For |
Customization Level |
|
WordPress Block Editor |
Standard WordPress pages, blog posts, and site templates |
Visual / Easiest |
|
External Website Embed |
Embedding forms on non-WordPress or external websites |
UI-Assisted / Quick |
|
Shortcode Builder |
Page builders (Elementor, Divi), Classic Editor, custom hooks |
Code-based / Flexible |
|
Direct Permalink |
Standalone landing pages, email links, social media |
Zero Setup |
Method 1: The WordPress Block Editor
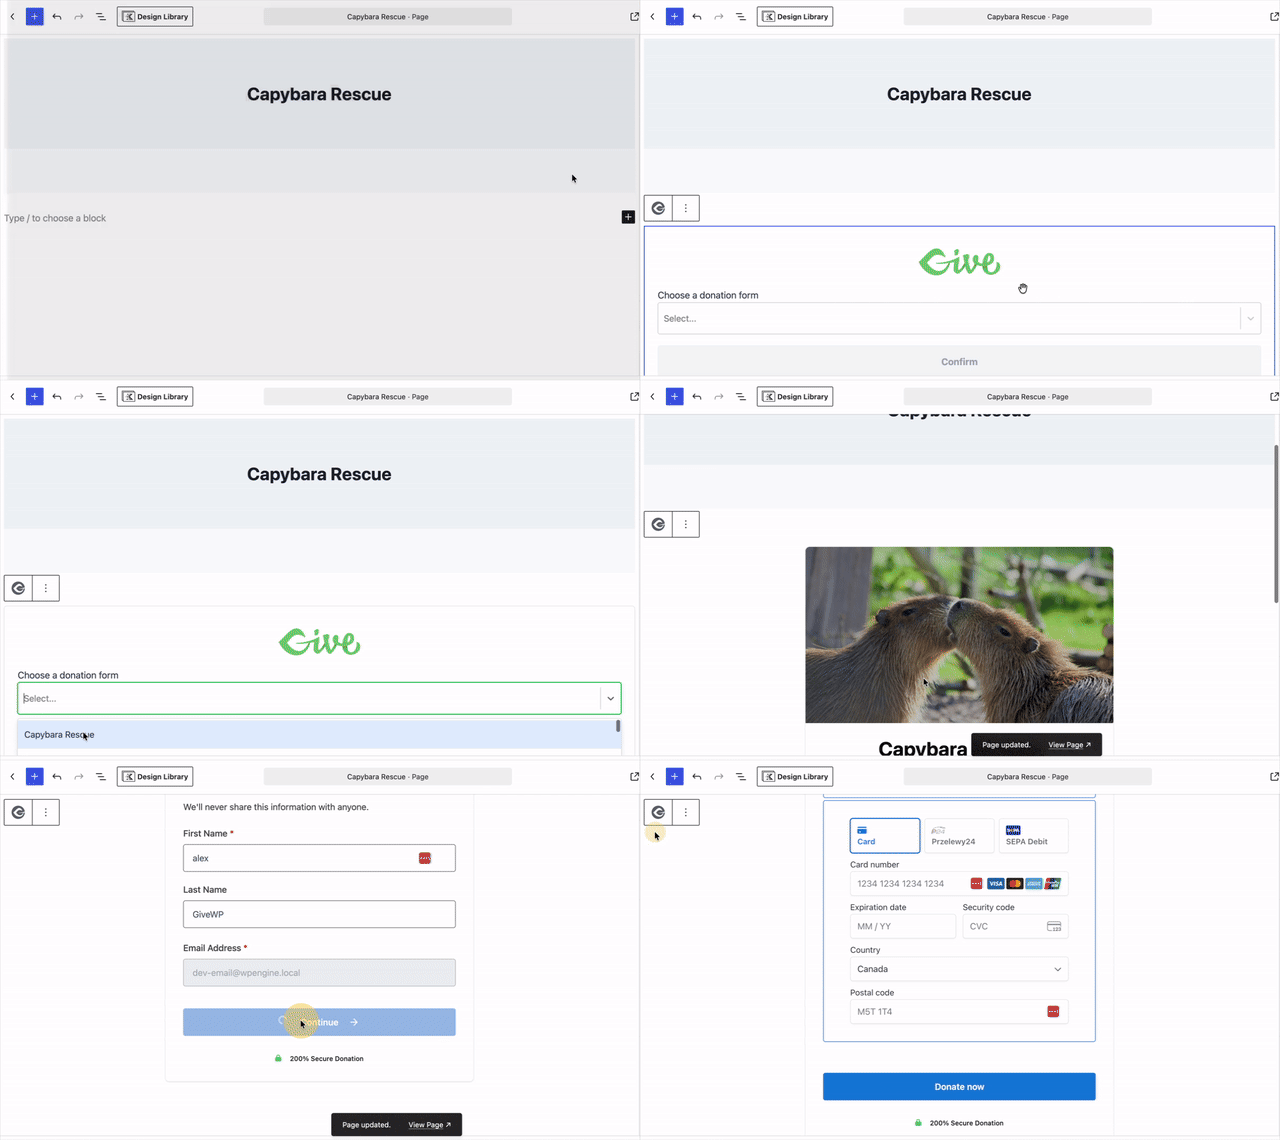
Give includes a dedicated form block that lets you embed a donation form into any post, page, or block theme template.
- Open the post or page where you want to display your form in the WordPress Block Editor.
- Click the + (Block Inserter) icon and search for Give Form.
- Select the Give Form block to add it to your page.
- Use the block’s dropdown menu to select the donation form you want to display, then adjust any display settings in the right-hand sidebar.
- Click Publish or Update to save your changes.
Method 2: The “Embed Form” Tool
You can embed a Give donation form onto a separate, external website without needing WordPress on that destination site.
- Open your donation form in the Visual Donation Form Builder.
- Click Embed </> icon in the top-right corner, next to Switch to Draft.
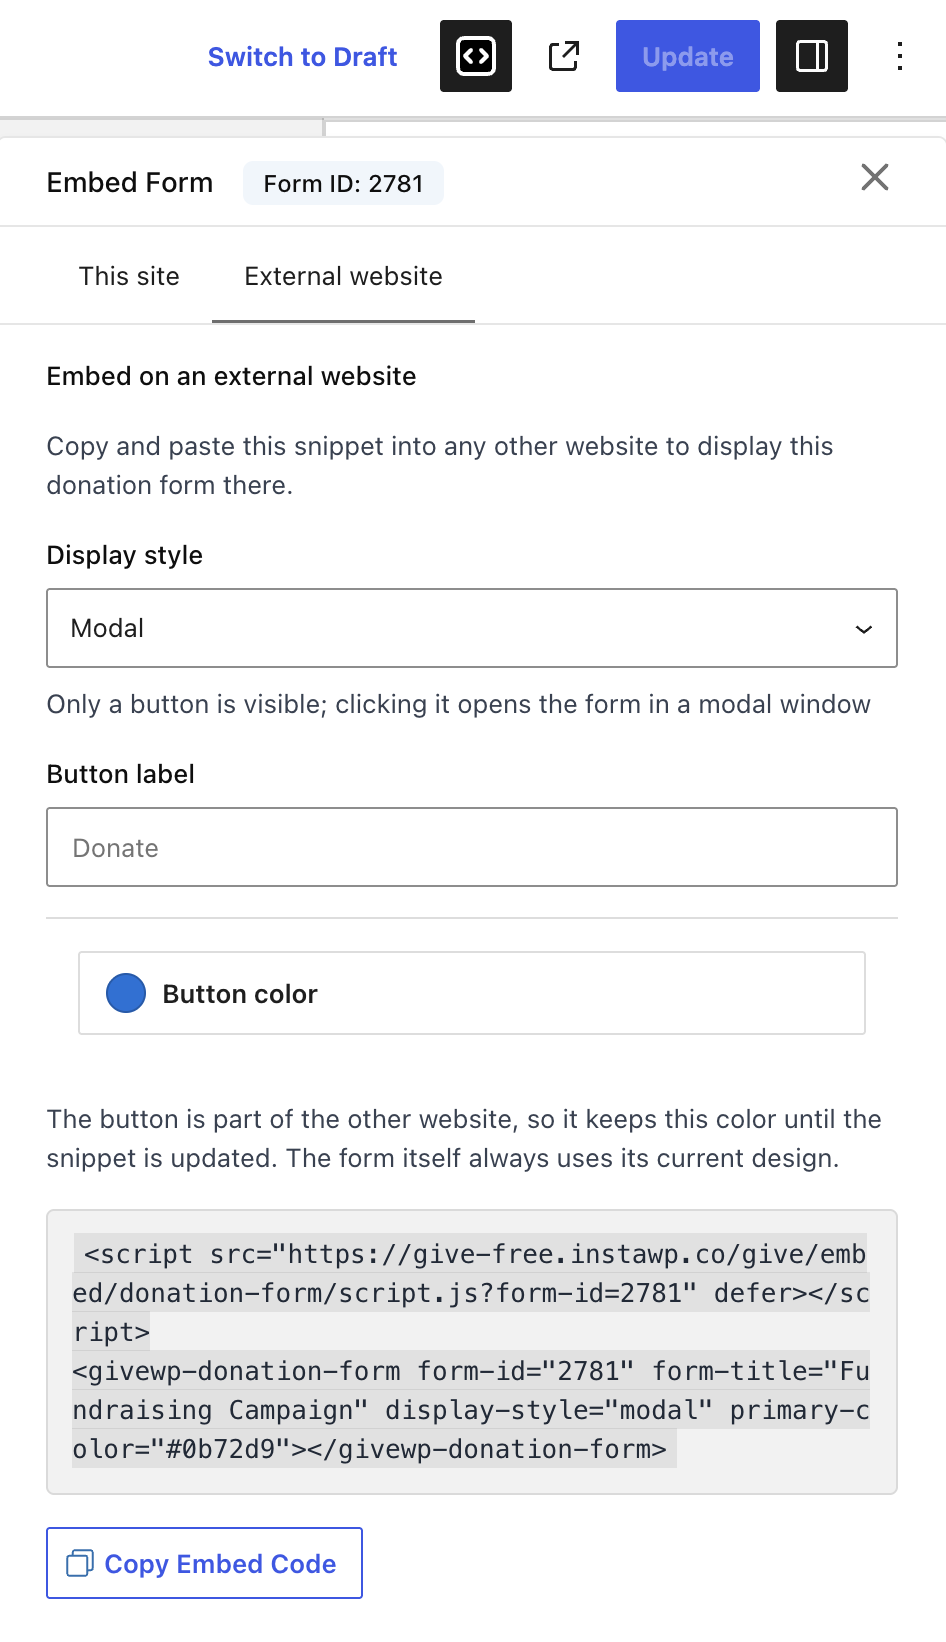
- Select the External Website panel.
- Choose your Display style (Full Form, Modal, or New Tab). If you select Modal or New Tab, customize the Button label text and button color.
- Click Copy Embed Code at the bottom of the panel, then paste the code into your external website’s HTML.
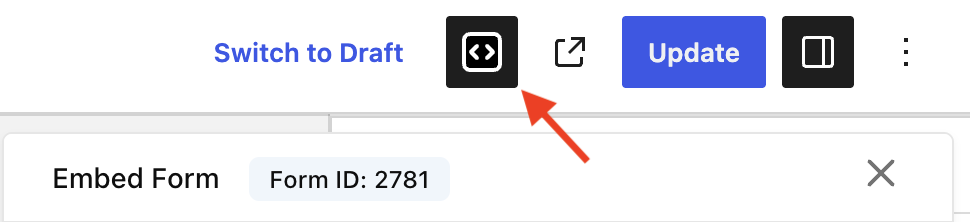
When Modal and New Tab are selected, you can customize the button label and color.
Method 3: Shortcodes (Classic Editor & Page Builders)
Shortcodes are best for page builders and the classic editor because they provide maximum compatibility and allow you to embed Give elements where the modern WordPress block editor is unavailable.
- Open your donation form in the Visual Donation Form Builder.
- Click Embed in the top-right corner, next to Switch to Draft.
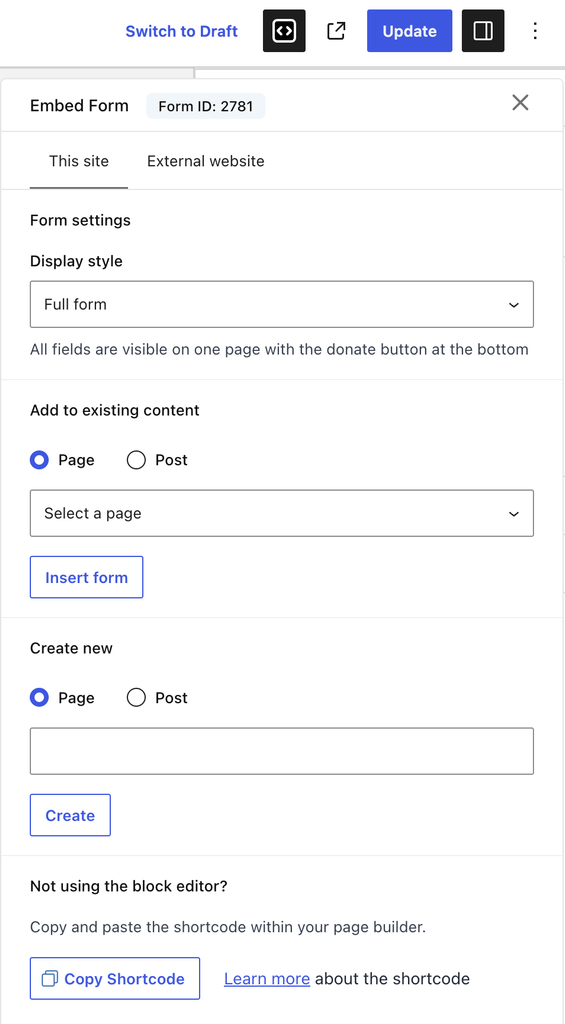
- Open the This Site panel to access the built-in shortcode generator.
- Select your preferred Display style (Full Form, Modal, or New Tab) and customize the Button label text if needed.
Tip: You can also insert the form directly into an existing or new Page or Post from this panel without copying the code manually. - Click Copy Shortcode at the bottom of the panel, then paste it into your editor or shortcode widget.
Method 4: Direct Standalone URL
Every published Give form automatically generates its own standalone landing page, making it easy to share directly via email or social media.
- Open your form in the Give form editor and click Publish (or Update).
- Locate the form’s full URL (permalink) displayed directly beneath the form title, or click View Form to open the standalone page.
- Copy the URL from your browser’s address bar and share it wherever you want donors to land directly on the form.
Tip: Want to change the default/donations/URL structure? See our Form Page URL Prefix guide to customize your form slug.
Next Steps
Now that your donation form is live on your website, here are a few things you can do next:
- Test your form before accepting real donations: Test Mode
- Customize your form’s styling: Handling Custom CSS in Give
- Change the standalone form URL slug: Form Page URL Prefix