

LearnDash
Sample (Free) Lessons
What Are Sample Lessons?
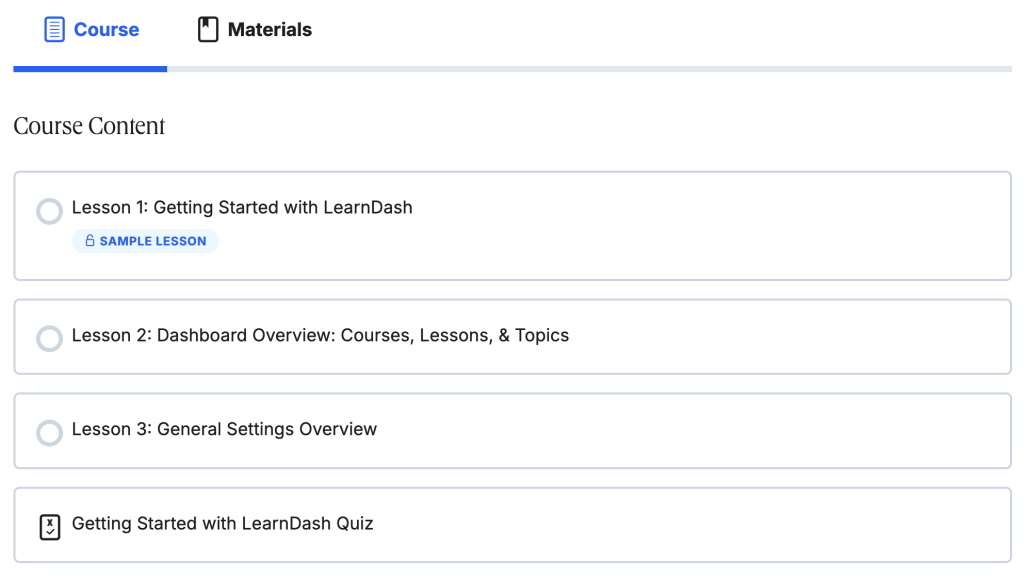
The LearnDash Sample Lesson feature allows you to unlock specific lessons inside a restricted course, letting visitors preview selected course material—and any nested topics or quizzes—without logging in or enrolling. In short, it lets you offer “try-before-you-buy” access directly within your course syllabus.
You can enable sample lessons on both free and paid courses. The only requirement is that your course Access Mode must be restricted (set to Free, Buy Now, Recurring, or Closed) rather than “Open”.
Why Use Sample Lessons?
Instead of building entirely separate “preview” pages, sample lessons leverage your existing curriculum to market your courses and build trust with prospective students:
- Increase Conversions & Enrollment: Let prospective learners experience your teaching style and course quality firsthand before committing to a purchase, removing the friction and hesitation of buying sight unseen.
- Keep Previews Inside Your Course Outline: Visitors view the sample lesson exactly where it lives in the syllabus. When they hit a restricted lesson, the enrollment button is right there for them to buy.
- Save Time on Setup: You don’t need to manually configure free previews for every sub-step. When you mark a lesson as a sample, any nested topics and quizzes inside that lesson are automatically included in the preview.
How to Enable a Sample Lesson
- From your WordPress dashboard, navigate to LearnDash LMS > Lessons.
- Select the desired lesson and click Edit.
- Click the Settings tab at the top of the page.
- Scroll down to the Lesson Access Settings section.
- Toggle on the Sample Lesson option.
- Click Update to save your changes.

NOTE: Visitors cannot click “Mark Complete” on a sample lesson. To track progress and mark the lesson complete, a visitor must log in and officially enroll in the course.
Optional: Require Login to View Sample Lessons
By default, LearnDash sample lessons are completely public. However, if you want to capture leads and require visitors to create a free account and log in before viewing the sample content, you can easily restrict access using Kadence Memberships.
Step 1: Install Kadence Memberships
- From the WordPress dashboard, go to Plugins > Add New.
- Search for Kadence Memberships.
- Click Install Now, then click Activate.
Step 2: Configure Your Logged-Out Message
Configure the message that displays when a logged-out visitor attempts to access the sample lesson.
- Navigate to Kadence > Memberships and go to the Settings tab.
- Locate the Restricted Content Message block.
- Add your desired message prompting visitors to log in or register.
- Save your changes.
Step 3: Restrict the Sample Lesson Post
- Navigate back to LearnDash LMS > Lessons and edit your Sample Lesson.
- In the WordPress editor sidebar, locate the Kadence Memberships Restriction settings box.
- Check the box to restrict the post, and set access to logged-in users or specific membership levels.
- Click Update.
Your sample lesson is protected. Logged-out visitors will see your custom restriction message instead of the lesson content, prompting them to create an account. For help setting up the user registration flow, see our Login and Registration guide.
Ready to Get Started?
To continue configuring your lessons and enrollment settings, explore our related guides below: